

 ホーム
ホーム ブログ
ブログ アクセス
アクセス3Dプリントアトリエ
阿蘇山は窓から見えますので、阿蘇の景色が素晴らしいだと思います!
3D地図のリビングルーム用テーブルをゼロから作ってみました。どうですか?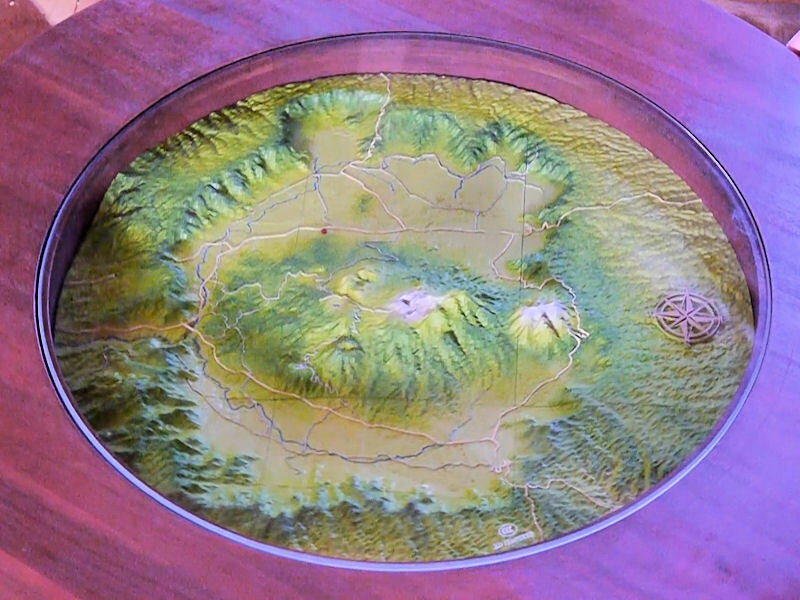
▲ I made this giant 590mm circular map of the Aso volcano and caldera region, and put in in a custom-made coffee table.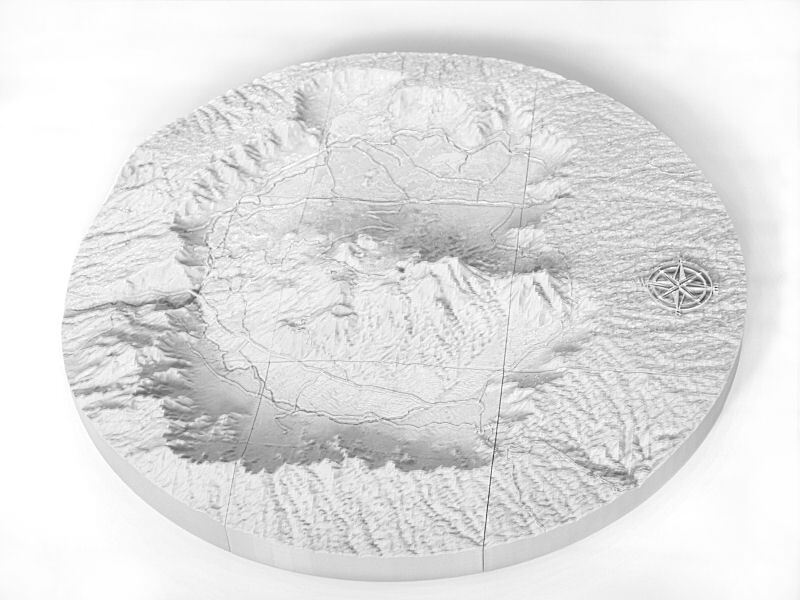
▲ Loads of detail on this map!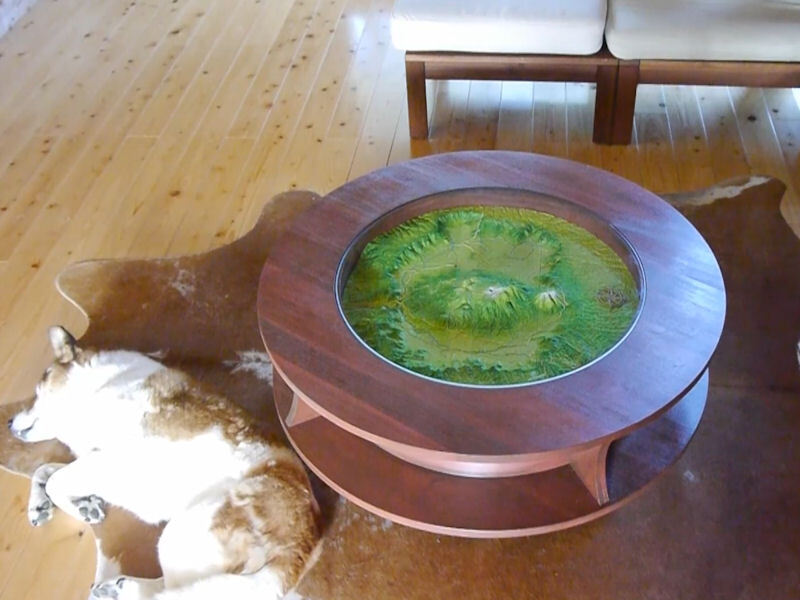
▲ This table is currently upstairs in the living room, and Katie would be happy to show you!
現在、作ったテーブルが2階のリビングに飾っていますので、ご覧になりたい方はぜひ見に来てください!
阿蘇山とカルデラの3D地図を3種類発売します!お土産にはいかがでしょうか?
サイズは200mm四角、200mm x 260mm四角、と大きい590mm丸い形で注文できます。大きな道と川が入っていますが大きいサイズのみには小さい道も書いています。高さが2倍でプリントしてます。
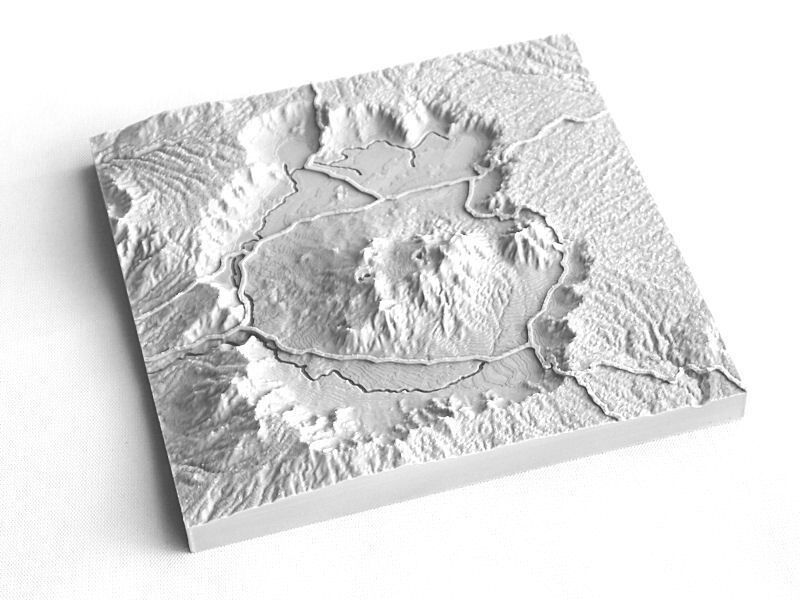
▲ I've added 3D maps to the shop today, with 3 different sizes of print available. All 3 sizes are centered on the impressive Aso volcano and caldera area of Kumamoto, and are available in small, medium and HUGE size:
展示スタジオの商品写真用の模型を発売いたしております!塗装済の屋台・三重塔・鳥居そして。。。お城もです!
在庫限りですので、お早めに検討してください!
https://www.asomill.com/shop-category.php?Cat=NEW&La=J
The studio display shelves are groaning under the weight of models, and so it's time to bid a heartbreaking farewell to some of my favourite pieces. These are 28mm scale terrain models, lovingly painted, and they are currently available to purchase in the online store for those who are keen to own the ultimate display & gaming pieces.
https://www.asomill.com/shop-category.php?Cat=NEW&La=E

▲ お城
▲ うどんの屋台
▲ 饅頭の屋台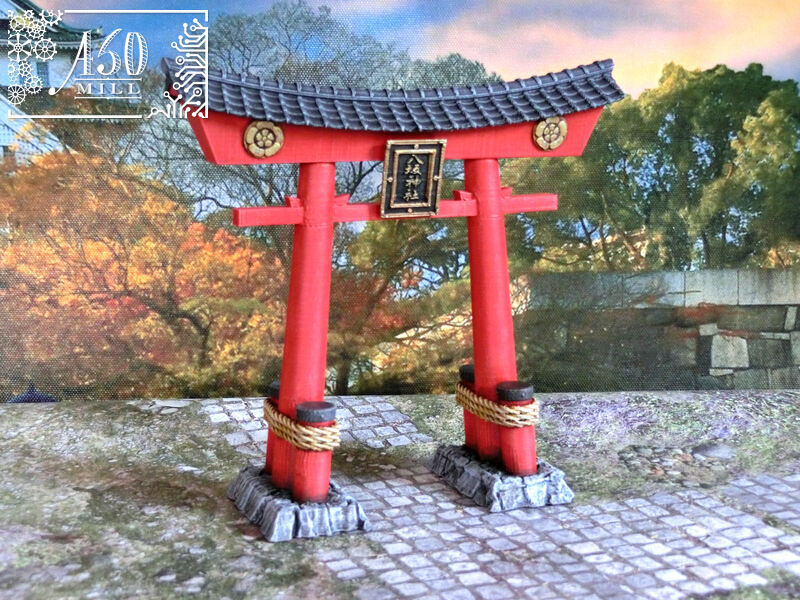
▲ 鳥居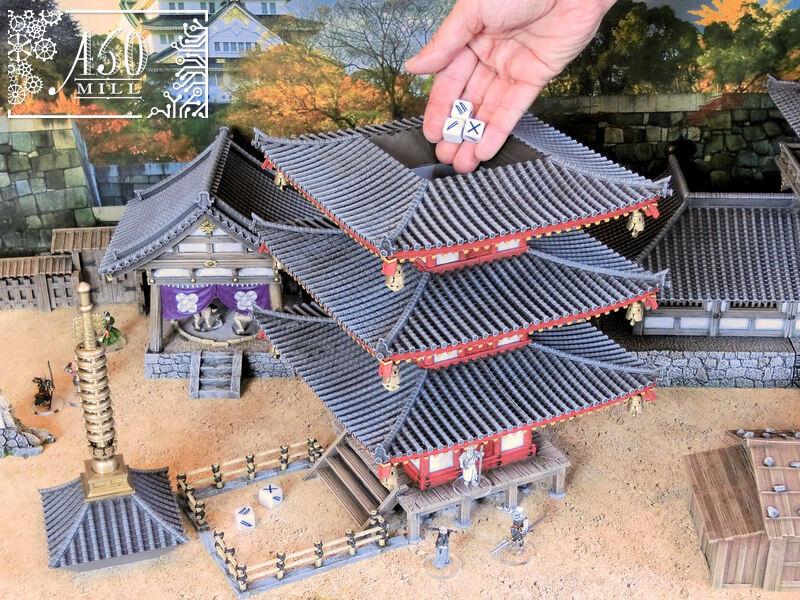
▲ 三重塔のダイスタワーも!
先週はハロウィーンでしたので、友達とご近所の方と一緒にパーティーしました。
It was Halloween last weekend, so that means it's time for a party with friends and neighbours! 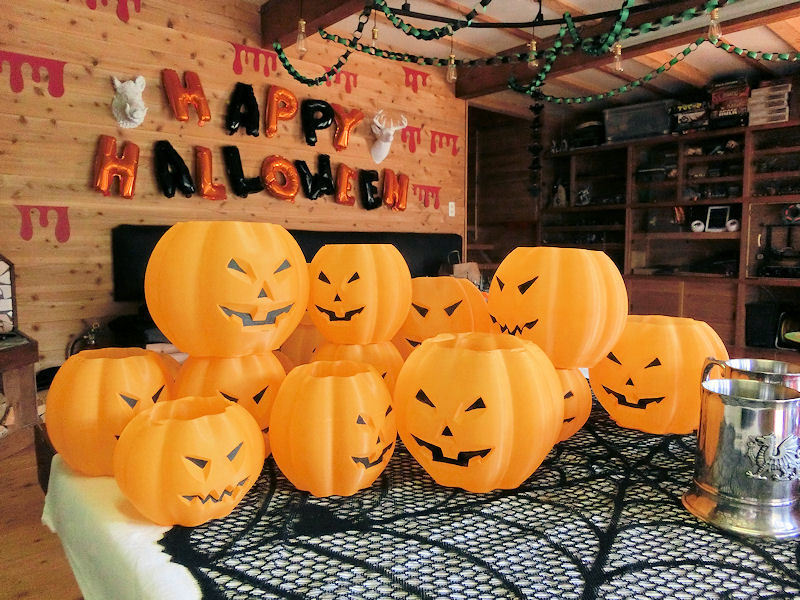
▲ いろいろな置物や飾り作りましたので、ぜひどうぞビデオをご覧ください。パーティーが5:00分ぐらいから始まります。
I made lots of new decorations and 3D-printed props, so take a look at the video. The party footage starts at about the 5-minute mark.
現在、ドームハウスのパーツが家の横に置いてありますので、お客様用の駐車場スペースがとりあえずなくなりました。その代わりに近くの「案内板」前に駐車してください!大変申し訳ございません。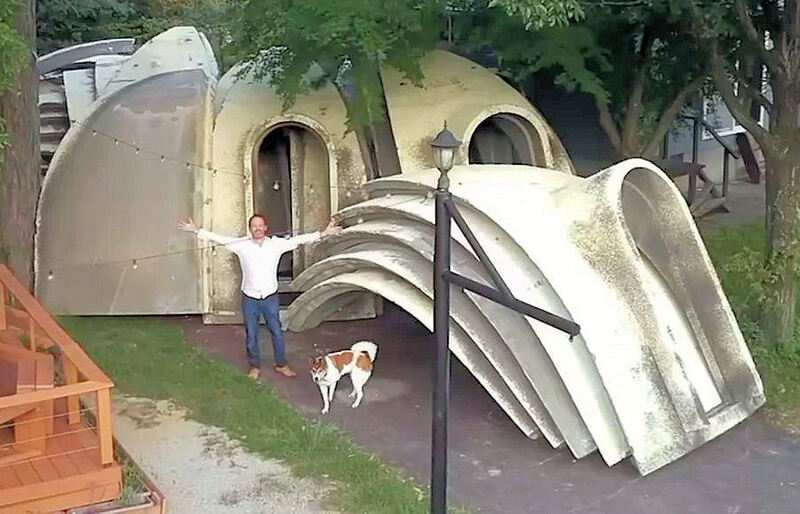
▲ There are many, many dome house pieces currently sitting outside the house (for the Bag End Aso project), so I'm afraid that the space is unavailable for customer parking at the moment. Sorry about that! Please use the parking spaces at the end of the road, in front of the Guide Map board, for the timebeing.
〒869-2226 熊本県阿蘇市乙姫2070-48
営業時間:13:00~17:00*
営業日:毎週金曜日・土曜日
(* ご来店前にお電話をお勧めします 090-1349-4029)


")
阿蘇山の3D地図テーブルを作ってみた! I made a 3D MAP table!
3D阿蘇カルデラはいかがですか? 3D Maps added to the shop
Painted models available 塗装済の模型発売中!
Making garage doors ガレージの扉DIY作成
New side-project... a hobbit house! ホビットの家
Shops added to the shop ショップにお店
Repainting a (mini) car ミニカーのリペイント
Buying land in Otohime 乙姫で土地探し
Scale model of the Inaba Residence 稲葉家下屋敷の模型
Customer request - Pokemon Ball! ポケモンボール
Garage construction ガレージ工事 PART 6
Secret Aso-volcano pool 阿蘇山の隠れプール
Garage construction ガレージ工事 PART 5
Garage construction ガレージ工事 PART 4
Garage construction ガレージ工事 PART 3
Garage construction ガレージ工事 PART 2
Garage construction ガレージ工事 PART 1
Making a capiz shell wall light カピス貝殻壁掛けライト
Making a rustic antique-style wall light アンティークなライト作成
Making a capiz shell chandelier カピス貝殻シャンデリア
Online store opening sale グランドオープンの割引
Opening a webstore 通信販売サイトを開店します!
A lucky escape with the typhoon! 台風がヤバいけどラッキー!
E-bike conversion DIYで電動自転車を作った!
$200 Underfloor heating 2万円でDIY床暖房
3D-printed OPEN/ CLOSED sign アトリエ看板作成


 神社
神社 寺
寺 茶屋
茶屋 城
城 店
店 家
家 農場
農場 建物その他
建物その他 壁・柵
壁・柵 橋
橋 池
池 LEDライト
0 コメント :
コメントを書く :