

 ホーム
ホーム ブログ
ブログ アクセス
アクセス3Dプリントアトリエ
| << Zombie Hotel in Aso 乙姫の廃墟ホテル 2021-02-17 | DIY Bathroom #2 DIYでバスルーム LIGHTS >> 2021-02-20 |
家のリフォームならいろいろありますが、これがメインですね!DIYでバスルームを作ります!
ユニットバスなら100万円ほどかかりますが、今回の予算はなんと20万円だけです!
At last we come to the biggest job of the house renovation... the bathroom! Japanese bathrooms are usually downstairs, because they are designed to be watertight, with a central drain in the floor letting you shower and splash without worrying too much. This one, unfortunately, needs to be ripped out and replaced from scratch!
I could choose to go the more normal route of getting a regular bathroom "kit", with plastic walls, floors and ceilings, but that would cost anywhere upwards of $10,000. But it probably wouldn't fit brilliantly anyway (because this house is oddly shaped, with a large window) so instead, I'm going to try building my own from scratch, to a budget of about $2000. I love a good challenge!
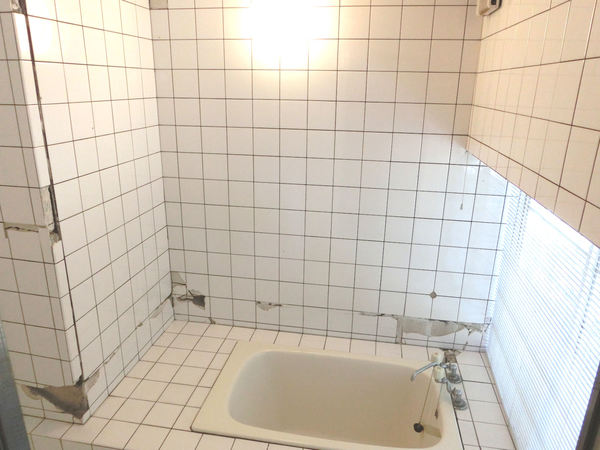
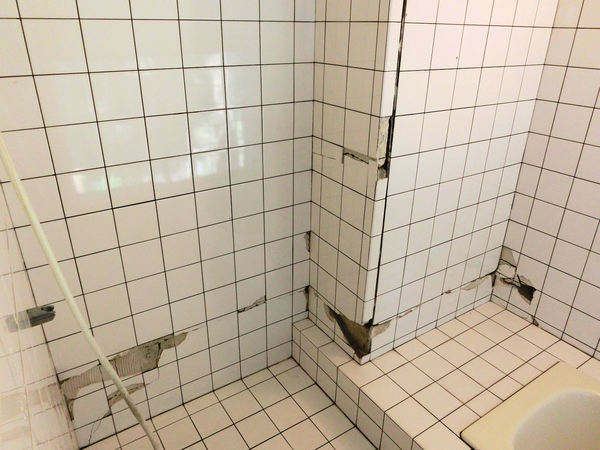
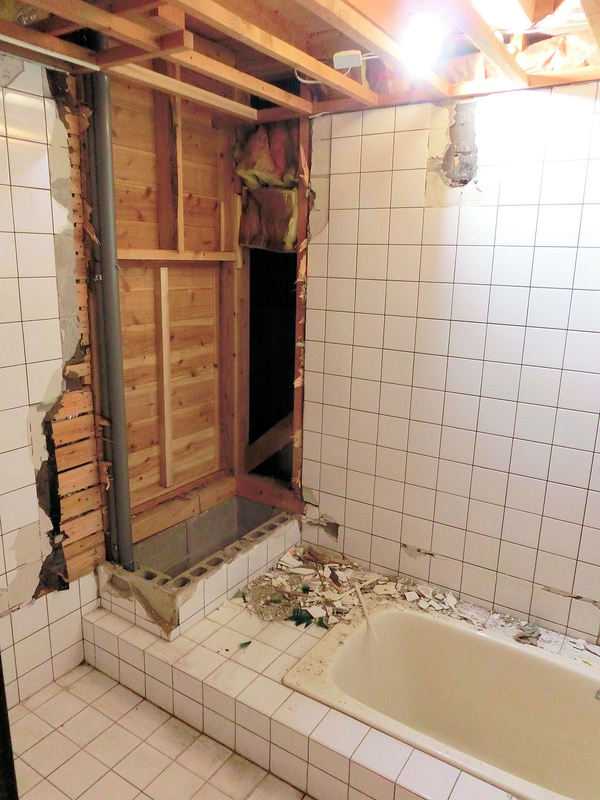
▲ 2016年の熊本地震でこのバスルームがダメになりました!壁は厚いコンクリートとタイルなのに、地震でタイル落としたり、ひびが出たりしました。
Here's why the whole room needs to be rebuilt - the big 2016 Kumamoto earthquake, the one that collapsed the famous Kumamoto castle, also did irreparable damage to this bathroom.
▲ このままだと使えない部屋になりました。
ということは全部ごみにして、ゼロから作り直そう!
The thick concrete walls and floor all cracked, and tiles started to shake off the walls and floor. This meant that the bathroom was no longer watertight, so it will all need to be redone from nothing!
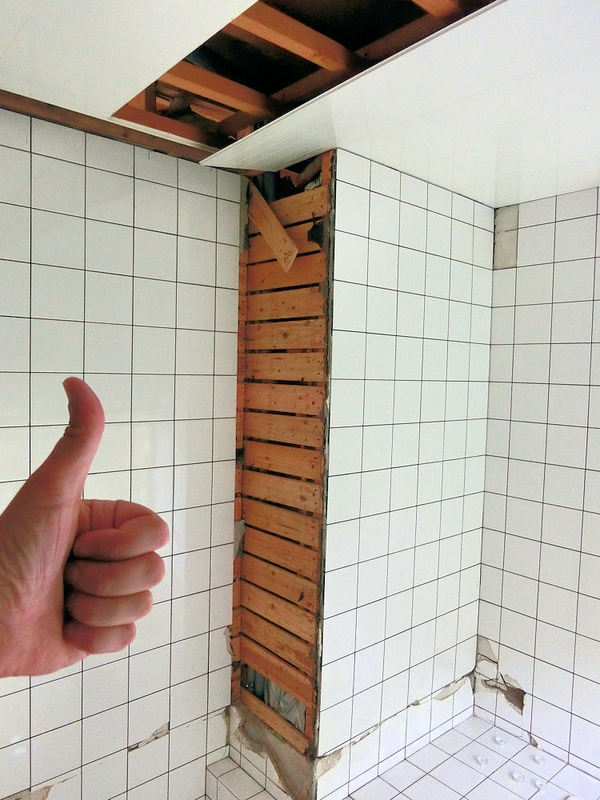
▲ まずはこの邪魔な壁から壊す。向こうの部屋には収納スペースがありますので、こっち側のバスルームが若干小さくなりました。これはダメですね。コンクリートとタイルを外すとこんな感じでした。
First job was to knock down this redundant wall. The room on the other side has some shelf space built into the wall, which has pushed this section of the wall about 40cm further into this bathoom. Which is, quite frankly, a stupid design!
So I started this big job by slowly cracking apart the concrete and tiles, to remove the wall. Felt goooood!
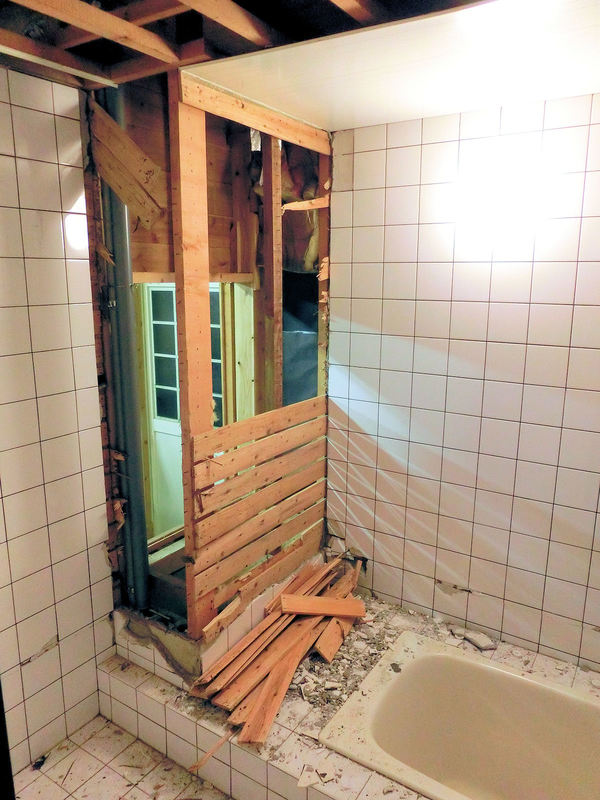
▲ 壁を全部壊したら向こうの部屋から穴がありました。その部屋の収納スペースは使う予定はないので、向こうから壁を作り直す。
Of course removing this wall meant that there was a bloody great big hole coming in from the next room!
▲ 向こうから壁を作るとこんな感じでした。バスルームの壁位置がちょっと変わりましたので、新しい天井も必要となりました。
I patched up the wall in the other room from that side, which left me with a roughly square-shaped bathroom once again. With the bigger bathroom, I also needed to pull out the old ceiling panels and replace them with new ones cut to the new room dimensions.
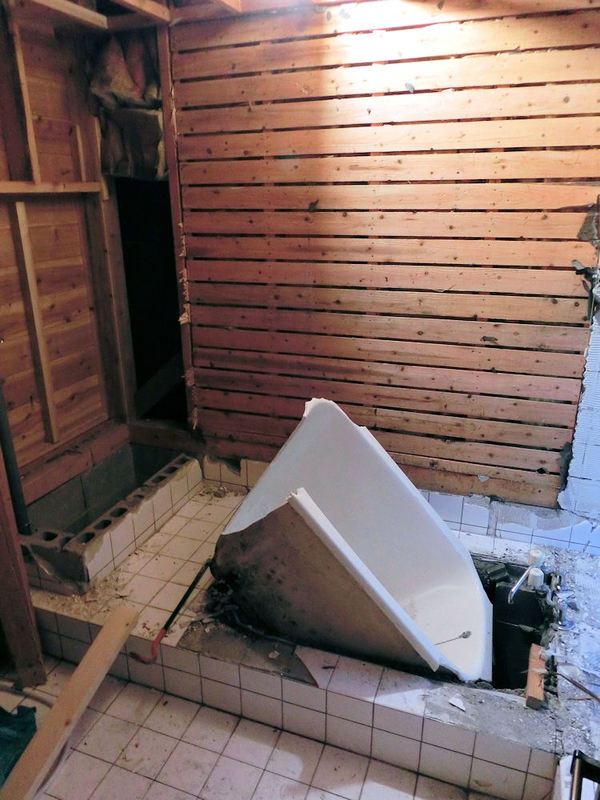
▲ 数日後、左側の壁と後ろの壁を全部外しました。大体500キロのタイルとコンクリートを外に投げました!
やっと古い風呂タブも外せました。阿蘇市の未来館リサイクルセンターで何百円で捨てました。
これで部屋をゼロに戻しました。これからの作業は全部作成だけです!
After a few more days of work, I had managed to remove about half a ton of thick concrete and tiles from the left-hand side and back wall of the bathroom. The small bathtub was slowly levered out of the concrete hole and taken to the nearby recycling dump.
With that, the old bathroom had been mostly knocked down, so everything after this point would be rebuilding! Yay!
| << Zombie Hotel in Aso 乙姫の廃墟ホテル 2021-02-17 | DIY Bathroom #2 DIYでバスルーム LIGHTS >> 2021-02-20 |
〒869-2226 熊本県阿蘇市乙姫2070-48
営業時間:13:00~17:00*
営業日:毎週金曜日・土曜日
(* ご来店前にお電話をお勧めします 090-1349-4029)


")
阿蘇山の3D地図テーブルを作ってみた! I made a 3D MAP table!
3D阿蘇カルデラはいかがですか? 3D Maps added to the shop
Painted models available 塗装済の模型発売中!
Making garage doors ガレージの扉DIY作成
New side-project... a hobbit house! ホビットの家
Shops added to the shop ショップにお店
Repainting a (mini) car ミニカーのリペイント
Buying land in Otohime 乙姫で土地探し
Scale model of the Inaba Residence 稲葉家下屋敷の模型
Customer request - Pokemon Ball! ポケモンボール
Garage construction ガレージ工事 PART 6
Secret Aso-volcano pool 阿蘇山の隠れプール
Garage construction ガレージ工事 PART 5
Garage construction ガレージ工事 PART 4
Garage construction ガレージ工事 PART 3
Garage construction ガレージ工事 PART 2
Garage construction ガレージ工事 PART 1
Making a capiz shell wall light カピス貝殻壁掛けライト
Making a rustic antique-style wall light アンティークなライト作成
Making a capiz shell chandelier カピス貝殻シャンデリア
Online store opening sale グランドオープンの割引
Opening a webstore 通信販売サイトを開店します!
A lucky escape with the typhoon! 台風がヤバいけどラッキー!
E-bike conversion DIYで電動自転車を作った!
$200 Underfloor heating 2万円でDIY床暖房
3D-printed OPEN/ CLOSED sign アトリエ看板作成


 神社
神社 寺
寺 茶屋
茶屋 城
城 店
店 家
家 農場
農場 建物その他
建物その他 壁・柵
壁・柵 橋
橋 池
池 LEDライト