


3D-Print Studio
| << DIY Bathroom #1 DIYでバスルーム 2021-02-19 | DIY Bathroom #3 DIYでバスルーム BATH >> 2021-02-24 |
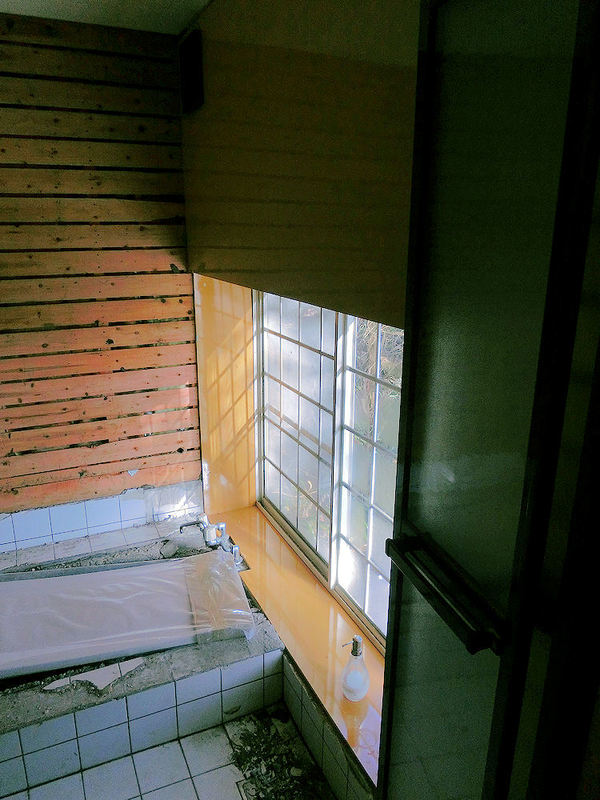
バスルームの新しい天井パネルとライトの作業が始まりました。天井にはフクビの「バスパネルEX」(2mx30cmで約1600円)を使いました。バスパネルには1センチほどの断熱材が入っていますが、その上にグラスウールの断熱材もいっぱい入れました。
Time to start rebuilding the bathroom! First thing to go in was a replacement ceiling, which was bought from a local building supply shop. These were the same dimensions as the previous ceiling, and come in 2m x 30cm panels for about $16 each. They have about 1cm of heat insulation material on the back (so I added lots more insulation above the ceiling!), but are super light and can be just tacked up to the existing wood frame.
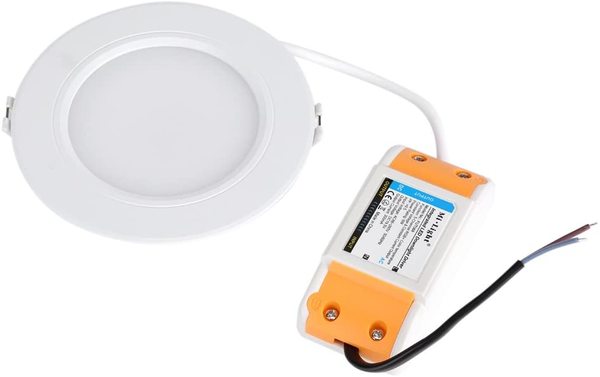
▲ バスタブの上にダウンライトを付けたいです。ただし、湿度が高いバスルームには防水ライトが必要でしょうね。アマゾンで見つかったライトはこの「Mi.Light」LEDダウンライト(2,179円)でした。浴室でも使えます。
普通のライトではないですよ。。。。
I wanted to put in 3 downlight LEDs above the bathtub, but of course these need to be waterproof units. I found these excellent Mi.Light LEDs for $21 on Amazon Japan, but they are not just any old lights......
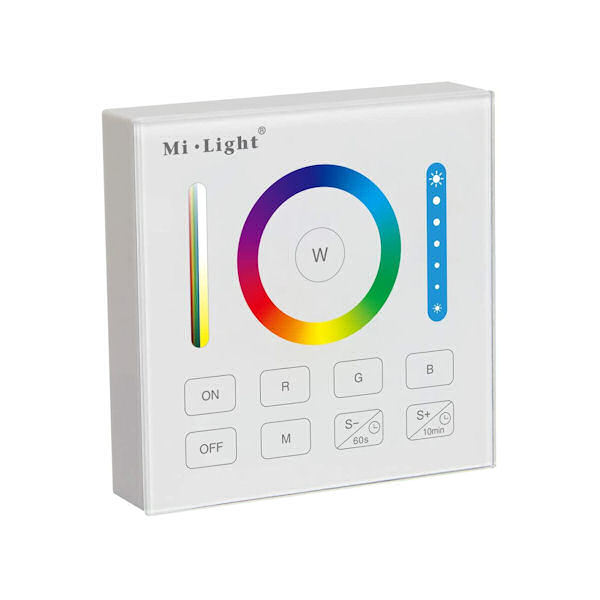
▲ 同じメーカーのワイヤーレスコントローラ(2,699円)を利用したら同時にライト何個もつなぐこともできます。そして、明るさと色も設定できます。この価格でこんな機能が素晴らしいと思います!
.... if you connect them wirelessly with this great value control unit ($27), you can then change the room lighting to any of 256 colours! You can also play with the brightness and saturation levels too. With 3 lights and a controller costing under $100 for such amazing functionality, these are such great value!! I can't recommend them enough.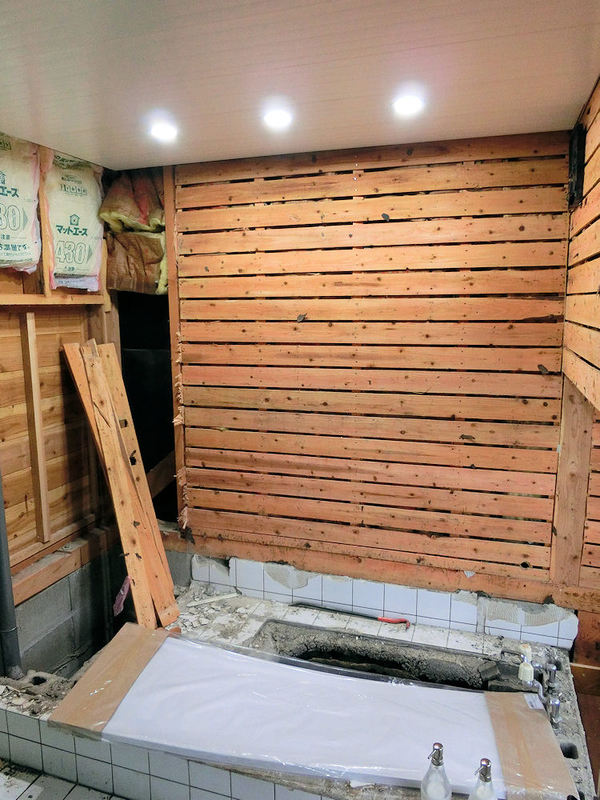
▲ お風呂の上に3個のLEDダウンライトをつました。ナイフで穴を開けて、電気配線をつなぐだけです。すごく簡単でした!
Fitting the lights is easy. I cut three holes with a knife, connected each wire to a power cable, and pushed the lights into the holes. After a few minutes of fiddling, the controller beeped to tell me they'd all wirelessly connected properly, and I got to play with the colour wheel. Too much fun!!
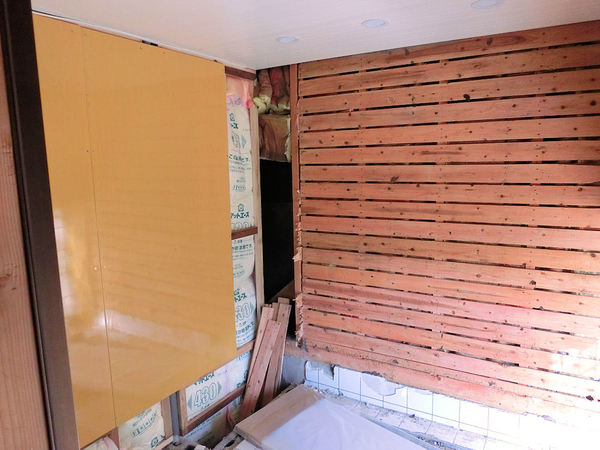
▲ 2階のキッチンへの下水パイプが8センチほど1階のバスルームに出ていますので、新しい壁を10センチほど移動しました。古い壁とと新しい壁の間にまたグラスウール断熱材いっぱい入れました。
その上にコンパネ板をはりました。
So on with the renovations! A waste-water pipe from upstairs protruded about 8cm into this room (it had previously been inside that false wall space in the corner), so I took this opportunity to move the left-hand wall 10cm further into this room. This neatly covered the pipe and let me stuff in lots more glass-fibre insulation. On top of that I screwed on some plywood panels that have a high gloss paint on one side - I hoped this would add some water-resistance until the bathroom was complete.
▲ 右側の窓の周りにもできるだけ断熱材を入れて、コンパネ板をはりました。
I did the same with the window surround, rebuilding it with insulation rolls and plywood panels.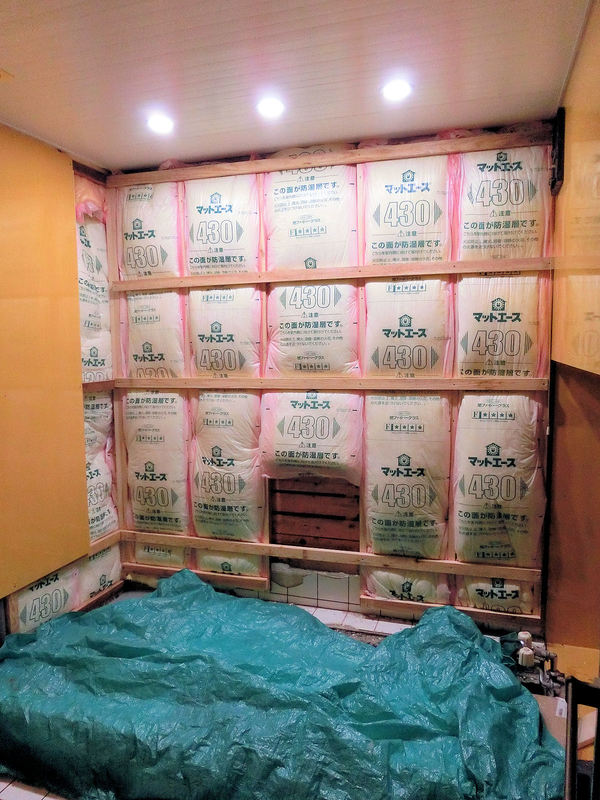
▲ 最後に、後ろの壁も8センチほど移動しました。古い壁と新しい壁の間に断熱材を入れました。
水道栓が壁に付けるつもりですので、パイプを通れるスペースを空けました。
The back wall was also brought about 8cm further into the bathroom, which gave me enough space to run water pipes inside it to a wall tap unit for the bath. And of course to stuff in lots more glass fibre insulation!

▲ これで壁の準備が大体できていますが、残っている作業がバスタブの穴ですね。これは大変だったよ!!
新しいバスタブが古いやつより長いですので、厚み15センチほどのコンクリートを外さないといけないね。ただし、ハンマー、丸鋸やバールで頑張っても壊せんかった。どうしよう?!。。。で、やっとできる方法考えた。3トンのカージャッキで下のほうからやっと壊せました!
With the walls mostly insulated and roughly covered for now, I turned to the last big problem for this project... the bathtub! The old bathtub was about 110cm in length, and since I wanted a longer tub I needed to remove this 15cm thick slab of concrete to make space. This was a pain in the butt! I tried hammers, chisels, crowbars and circular saws, but nothing was able to shift it. Then I had a brainwave, and look how happy I was to see it worked - I placed a 3ton car jack underneath the slab, and lifted it slowly up. At long last it cracked apart, and I could relax a little!
▲ タイミングがちょうどよかったですね!
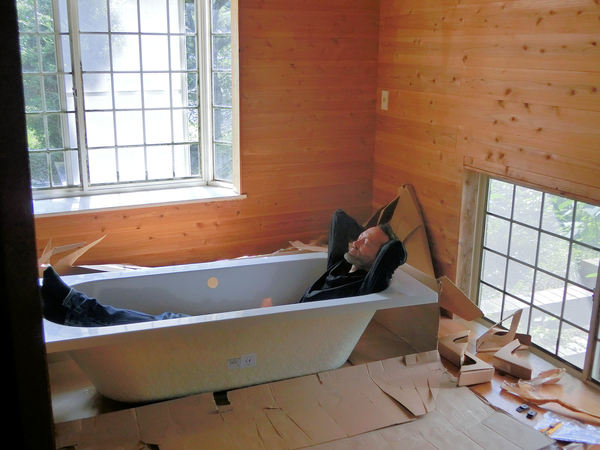
同じ週にイギリスのほうから新しいバスタブの配達が来ました。日本で買うと10万円ほどかかるけど、海外のEbay.comサイトでこのバスタブを注文できました。バスタブが約2万円で送料も2万円かかりました。配達が約1か月かかりましたので、すごいドキドキしていました。
写真は玄関で箱を開いたときの満足度100%ですね!
The same week that I was cracking that concrete apart, a delivery arrived from the UK. Long bathtubs (known as "European-style" here) are very expensive in Japan, because you don't normally find them in the standard "unit-bath" kits. So instead of paying over $1000 to buy from a Japanese retailer, I managed to find this acrylic bathtub on Ebay, which cost about $200. Shipping was another $200, and it took about one month to arrive.
The photo is just a pic of me, feeling particularly smug (sorry!) after unboxing it in the entrance hall!
| << DIY Bathroom #1 DIYでバスルーム 2021-02-19 | DIY Bathroom #3 DIYでバスルーム BATH >> 2021-02-24 |
〒869-2226 熊本県阿蘇市乙姫2070-48
Aso City, Otohime 2070-48
Open from 13:00~17:00*
Fridays & Saturdays
(* best to call beforehand 090-1349-4029!)


")
阿蘇山の3D地図テーブルを作ってみた! I made a 3D MAP table!
3D阿蘇カルデラはいかがですか? 3D Maps added to the shop
Painted models available 塗装済の模型発売中!
Making garage doors ガレージの扉DIY作成
New side-project... a hobbit house! ホビットの家
Shops added to the shop ショップにお店
Repainting a (mini) car ミニカーのリペイント
Buying land in Otohime 乙姫で土地探し
Scale model of the Inaba Residence 稲葉家下屋敷の模型
Customer request - Pokemon Ball! ポケモンボール
Garage construction ガレージ工事 PART 6
Secret Aso-volcano pool 阿蘇山の隠れプール
Garage construction ガレージ工事 PART 5
Garage construction ガレージ工事 PART 4
Garage construction ガレージ工事 PART 3
Garage construction ガレージ工事 PART 2
Garage construction ガレージ工事 PART 1
Making a capiz shell wall light カピス貝殻壁掛けライト
Making a rustic antique-style wall light アンティークなライト作成
Making a capiz shell chandelier カピス貝殻シャンデリア
Online store opening sale グランドオープンの割引
Opening a webstore 通信販売サイトを開店します!
A lucky escape with the typhoon! 台風がヤバいけどラッキー!
E-bike conversion DIYで電動自転車を作った!
$200 Underfloor heating 2万円でDIY床暖房
3D-printed OPEN/ CLOSED sign アトリエ看板作成


 Shrine
 Temple
 Teahouse
 Castle
 Shops
Shops Houses
 Farm
Farm Other Buildings
 Walls & Fences
 Bridges
 Ponds
Ponds LED Lights