

 ホーム
ホーム ブログ
ブログ アクセス
アクセス3Dプリントアトリエ
| << $300 Underfloor heating 3万円でDIY床暖房 2021-03-12 | Aging a trunk 50年代スーツケース >> 2021-03-23 |
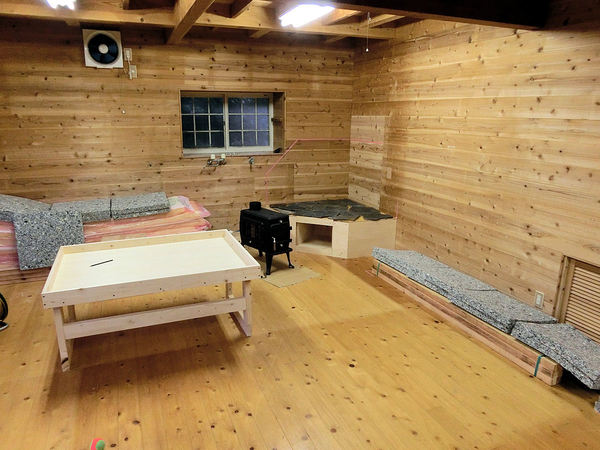
2階のほうは暮らせるスペースになったので、今度は1階の作業が始まります!
The upstairs of the house now looks pretty good, so it's time to move on to the downstairs space....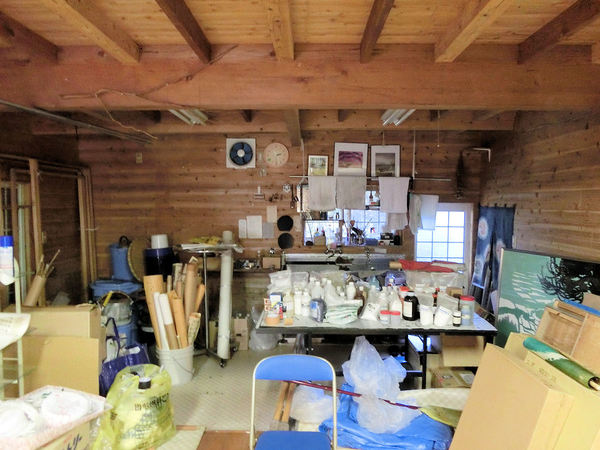
▲ 買う前に見学したときの様子。スタジオっぽいけど、暗かった。だけど、広い部屋が頭の中に想像できた。
When I originally went to see the house before buying it, this is what the downstairs looked like! With the storm shutters closed and a ton of painting supplies strewn around, it was quite hard to envision what it could look like empty.....
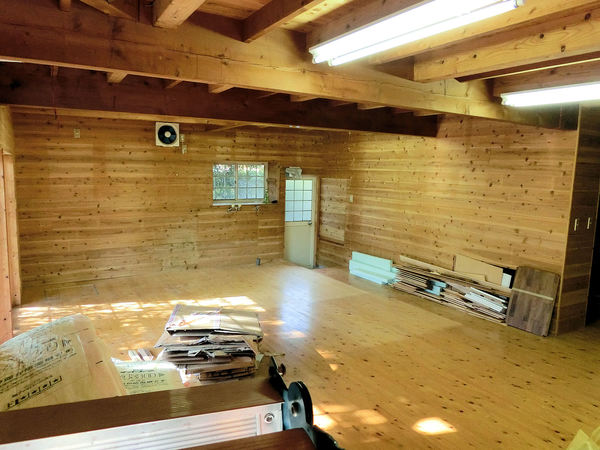
▲ 買った頃の写真です。物を全部外して、雨戸を開くとやっぱり広かったですね!
... but once everything was cleared out, and the storm shutters were open, it looked a whole lot more promising!

▲ 外にある杉松の影が多いので、昼間にも電気つけないとちょっと暗いです。将来的に林をちょっときれいにしますが、その前に部屋の目的を考えよう。。。
There are quite a few giant cedar pine trees surrounding the house, which make it a touch dark even in the daytime, but at some point I'll trim those to brighten things up. Until then, the lights and large windows keep it bright and quite airy.
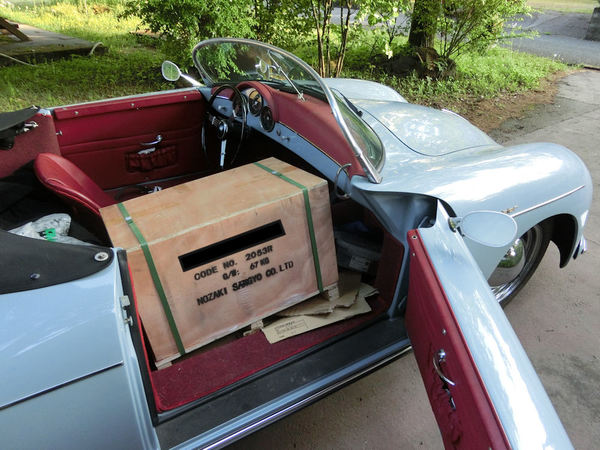
▲ まずは冬用の暖房要りますね!阿蘇では薪ストーブが多いですので、ヤフーオークションで35,000円で買いました。販売店が熊本市の近くでしたので、相変わらず青い車で取りに行きました!ただし、何と70kgでしたので、車を入れたときに店のフォークリフトを使いました。阿蘇に家に届いたときに息子のゆあんさんの力を借りました!????
The first project I wanted to tackle in this room was some heating, as it required some small structural changes. Aso is quite a rural area, and many of the houses here have wood-burning log stoves. I managed to snag this one on Yahoo Auctions for $350. It's pretty small for a wood stove, but it still weighs 70kg! So when I drove to get it (after removing the passenger seat in my little car!), we had to load it in with a forklift truck! The lift driver did look a bit nervous! ???? Of course when I got back to the Aso house, I had to enlist the help of Euan (my son) to get it out of the car and into the house!
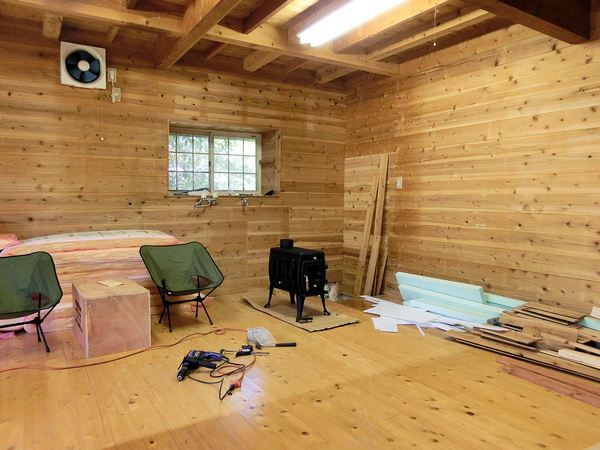
▲ 部屋のコーナーに薪ストーブと煙突を入れますので、不要の勝手口を壁にしました。横にデッキを作るつもりですので、そっちから外に行けます。まだまだ壁の木材を見ると色違いが見えると思いますが、あとから隠せるだと思う。
The stove is going in the corner of the room, so I can maximise the rest of the space, and this meant that I needed to board up the backdoor. Every Japanese house insists on having a narrow back door, for access to.... bins?! No, not really a reason. But since I can use the big glass doors onto the deck on the other side of the room to get outside, this back door was fairly redundant. So I boarded it up, and should be able to disguise the different wood colours later on.
▲ 次はパインの2x4で強い台を作りました。前の勝手口の低い床も隠せた。
Next I knocked together a very sturdy platform for the stove, from cheap 2x4s, which also enabled me to cover the lowered floor by the back door.
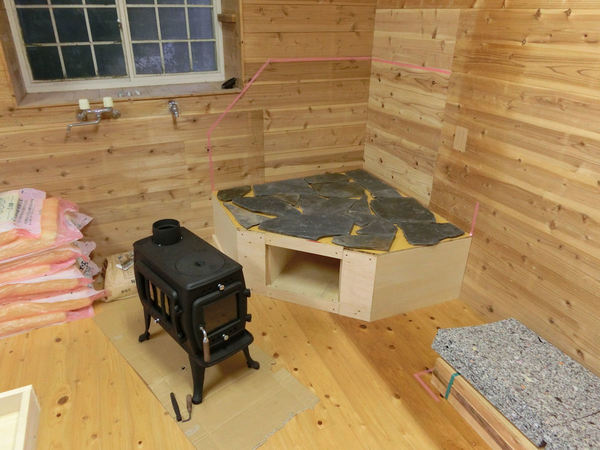
▲ その上にコンパネ板と石を置きました。ハンズマンから1平方メートルを買いました。
On top of the platform I placed thick plywood and then about 1 square metre of slate-like stone, bought from my local Handsman DIY shop.
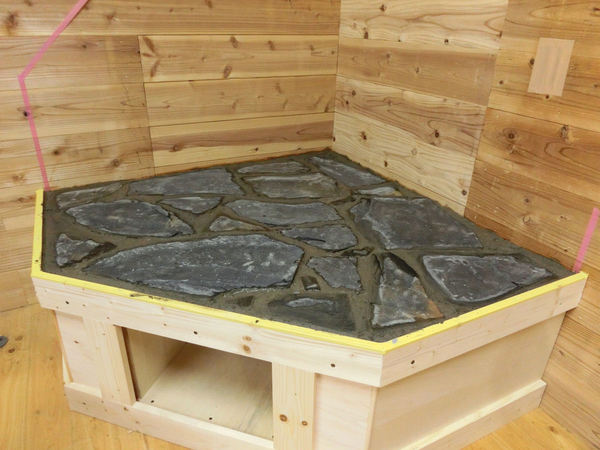
▲ 石を位置を決定してからコンクリートを入れました。
Once I had arranged the stones to my liking, I set them in concrete, and added a few more decorative strips of wood.
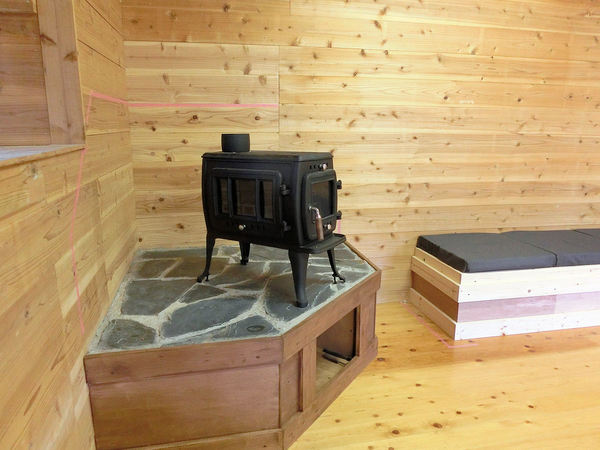
▲ 最後にウォルナット色でステインしてから、薪ストーブを載せました。壁に防熱の板をこれから張りますが、とりあえずこれで行きます。
Lastly, I woodstained the platform in a walnut colour, and lifted the stove up on top. Thanks, guys, for helping me out there! I'll be adding heatshielding material to the walls later on, but for now I can call this done.
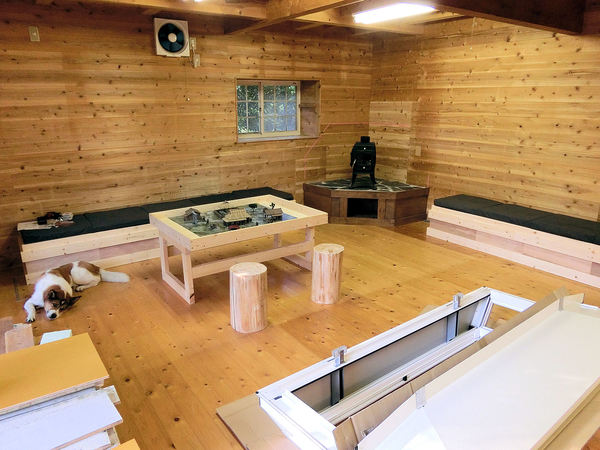
▲ 煙突の作業もいつかしないといけないんですが、その前にソファとテーブルを塗らないとね。
Of course I will also need to add a pipe chimney at some point too, but first I can move on to painting up these sofas and chairs!
| << $300 Underfloor heating 3万円でDIY床暖房 2021-03-12 | Aging a trunk 50年代スーツケース >> 2021-03-23 |
〒869-2226 熊本県阿蘇市乙姫2070-48
営業時間:10:00~17:00*
定 休 日 :毎週日曜日・月曜日
(* ドアが閉まっている場合もあります ー 近くにいます。ちょっとお待ち下さい!)


Scale model of the Inaba Residence 稲葉家下屋敷の模型
Customer request - Pokemon Ball! ポケモンボール
Garage construction ガレージ工事 PART 6
Secret Aso-volcano pool 阿蘇山の隠れプール
Garage construction ガレージ工事 PART 5
Garage construction ガレージ工事 PART 4
Garage construction ガレージ工事 PART 3


 神社
神社 寺
寺 茶屋
茶屋 城
城 家
家 建物その他
建物その他 農場
農場 壁・柵
壁・柵 市場
市場 橋
橋 池
池 LEDライト