

 ホーム
ホーム ブログ
ブログ アクセス
アクセス3Dプリントアトリエ
| << Birdhouses バードハウス 2021-03-26 | Sign-making 看板作り >> 2021-04-06 |
春が来た!ずっと楽しみにしていたデッキ作りが始めます!
…ですがその前、家のサイディングを直さないといけないんです!
Spring is finally here! I've been looking forward to the first project of the year - a wooden deck!
... but before I get to that, I have to take care of a few fixes to the outside of the house.

▲ デッキ作業の前の様子。草や要らない植物いっぱいありますが、ほとんど抜くつもりです。そして、この写真でははっきり見えないんですが、正面の前に古いデッキちょっと残っています。ただし、結構危ないんですね。あっちこっち壊れています。
This is how the house looked just before I started work on the exterior fixes and the deck. As you can see, there's a lot of overgrown weeds and bushes all over the place, and I plan to take out most of those eventually. It's a little hard to see the old deck at the front of the house from this photo, with all the weeds in the way, but it really needs to be removed! Most of the wood is rotting away, and I've put my foot through it in several places.
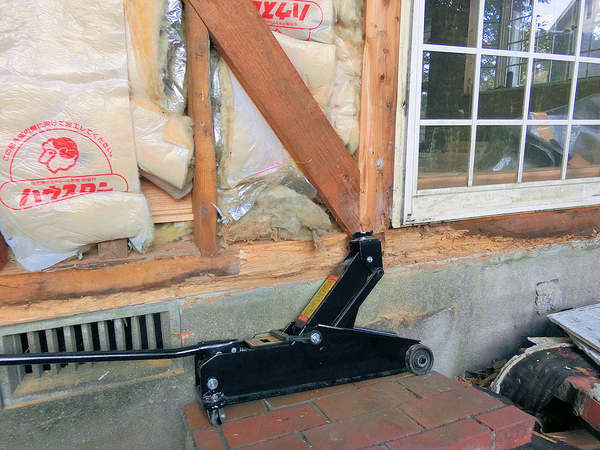
▲ まずは、地震のダメージで割れたサイディングを外しました。4年間も水が入っていた大引きを修理しましたが、3センチほどずれた柱を元の位置に戻すには力が足りませんでした。そこで、3トンのカージャッキでちょっと上げて、ハンマー叩きで横に3センチ戻せました。成功!
近くの工務店から新しいサイディングを注文しました。8枚ほど入れ替えできました。デザインは若干違いますが、家をペイントしたら気がつかないと思います。
The first repair to the exterior of the house was the removal of broken siding panels. The worst patch is at the side facing the street, where a couple of the upright posts inside the walls actually shifted slightly during the big 2016 earthquake, and pulled the siding off. As a result, water was able to get at the wood for 4 years during heavy rain, so I had to make that damage good.
Getting the posts back into the correct place was quite problematic, but I managed to solve it by carefully raising the upright post slightly using a 3-ton hydraulic car jack, and bashing it back in place with a sledgehammer. I replaced about 8 panels with siding ordered from a local store, and hopefully it should be pretty invisible once the house is painted.
▲ じゃ、次は古いデッキを壊しました。古い木材がとても弱かったので、たった1時間で終わりました。
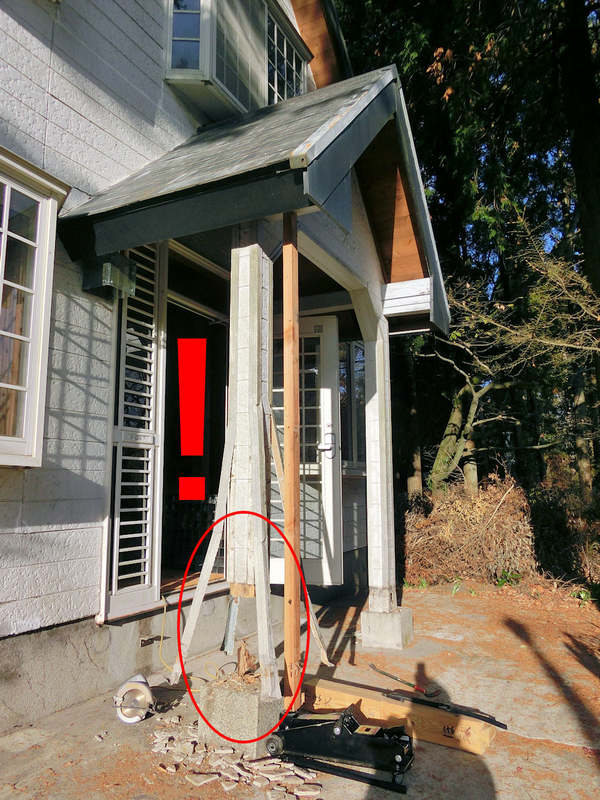
外したら、ポーチ屋根の柱にまた地震のダメージがありました。地震の時にサイディングが割れたなのに、水が入ってきました。両方の柱の下の50センチほどの入れ替えが必要でした。また3トンのカージャッキでちょっと上げて、修理できました!
The second repair job was on the thick wooden posts supporting the front porch roof. Again, the earthquake had cracked the siding panels and let rain get at the posts, and as a result the bottom 50cm of each post needed to be cut out and replaced. As before, the car jack saved the day, by letting me raise the roof a few centimetres to remove the bad wood and make it good.
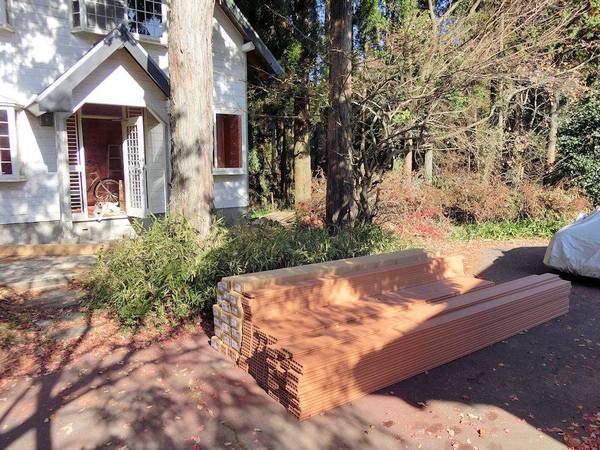
▲ ペンション村の方が「阿蘇の湿度で木材のデッキは大体5年間まで」と言われましたので、今回何年間も使える人工木材でデッキを作ります。20年以上使えたら嬉しい。
ネットでいろいろ調べましたが、やはりハンズマンDIY店から注文しました。作りたいデッキは大型のL形になりますので、3メートル幅で約11mx15mデッキが必要です。せっかくですので、柵を含めて予算は60万円となります。家が安かったから(350万円)、今回だけお大きい買い物します!
商品を集まるのがちょっと時間かかたそうですが、配送料は何と3800円です。大体1.5トンの人工木材がありましたので大型トラックと2人のスタッフで来ました!
Aso has a very humid climate, and according to a neighbour, wooden decks only tend to last about 5 years! Yikes! So I looked into using artificial wood for the decking, so it would last for the next 20 years instead. This is wood-dust, glued into resin and shaped into planks. It shouldn't rot, I hope.
After some internet research, I decided to order all my wood and aluminium support beams from my almost-local DIY store, Handsman. The deck I want to build is about 3m wide, around two sides of the house, in a large L-shape. It's approximately 11 metres at the front, and 15 metres at the side - which is pretty big! So, including the fence I want to include, my budget will be $6,000. The house was very cheap ($35,000) to buy, so I'm happy to spend this large amount this one time, since it will transform the whole house, I think.
The DIY store delivered all the artificial wood and metal beams on one large truck with two staff to shift it - in total it probably weighed about 1.5 tonnes! The delivery fee was $38, which was pretty reasonable, I thought.
▲ アルミの大引きが45センチほど開けて、前からあったコンクリート土台に固定しました。L型ブラケットやビスがすべてアルミ商品に入っていましたので、助かりました。
その上に4メートルの人工木材を載せて、大引きに固定します。
The deck is supported by aluminium beams spaced about 45cm apart, and these are attached to the concrete base using the L-brackets which were helpfully included with each beam.
On top of that, I carefully lined up each of the 4m wooden planks (each weighing about 10kg), and screwed them down.
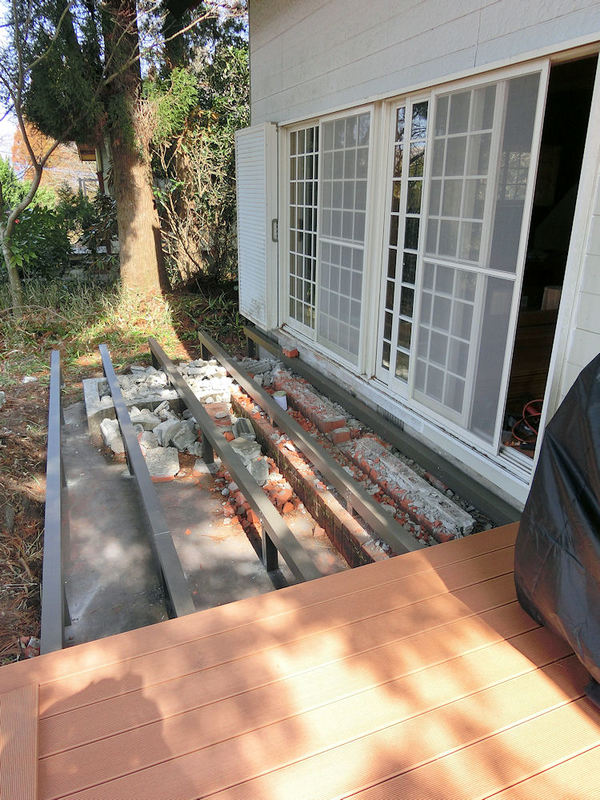
▲ 今までの作業がスムーズに進めましたが、家の横に古いレンガのステップやコンクリートがまだ残っていました。全部取ったらすごく時間かかりそうだったので、上の部分だけを壊してデッキで隠せるようにしました。ちょっと恥ずかしいけど、時間の節約ですね。
So far the deck-building had gone fairly smoothly, if a little slowly. But at the side of the house there was a large amount of solid brick steps concreted into the floor. I was not keen on removing every last piece of this, so I removed the bare minimum using a sledgehammer, just enough to fix the support beams over the top. I'm a little ashamed to admit I was too lazy to remove and carry away several tonnes of brick, and instead just built the deck over the top. Once the edging of the deck is in place, everything will be hidden from view.
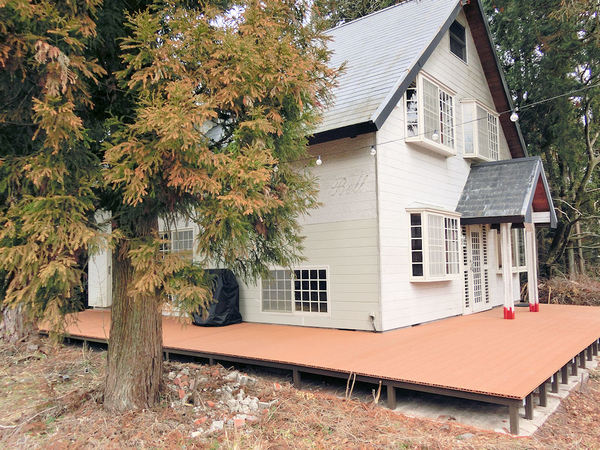
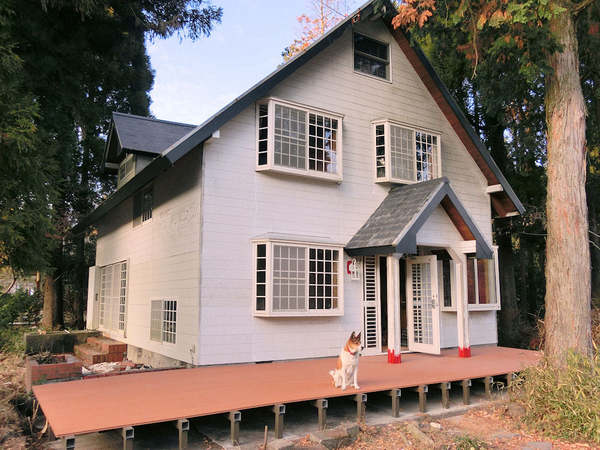
▲ デッキのL型一応できました!端っこがこれから付けますが、とりあえず使えるようになったので、嬉しいです!
At this point the floor of the L-shaped deck was done. Even though the edging has not been finished, at least I can now use the deck! Yay!
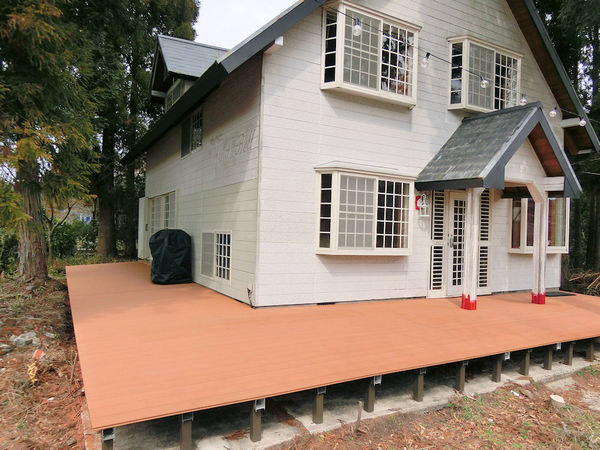
▲ 正面にステップも作らないといけないですね!まだまだです。。。
I also need to build some steps at the front. Still lots to do before it's finished....
| << Birdhouses バードハウス 2021-03-26 | Sign-making 看板作り >> 2021-04-06 |
〒869-2226 熊本県阿蘇市乙姫2070-48
営業時間:13:00~17:00*
営業日:毎週金曜日・土曜日
(* ご来店前にお電話をお勧めします 090-1349-4029)


")
阿蘇山の3D地図テーブルを作ってみた! I made a 3D MAP table!
3D阿蘇カルデラはいかがですか? 3D Maps added to the shop
Painted models available 塗装済の模型発売中!
Making garage doors ガレージの扉DIY作成
New side-project... a hobbit house! ホビットの家
Shops added to the shop ショップにお店
Repainting a (mini) car ミニカーのリペイント
Buying land in Otohime 乙姫で土地探し
Scale model of the Inaba Residence 稲葉家下屋敷の模型
Customer request - Pokemon Ball! ポケモンボール
Garage construction ガレージ工事 PART 6
Secret Aso-volcano pool 阿蘇山の隠れプール
Garage construction ガレージ工事 PART 5
Garage construction ガレージ工事 PART 4
Garage construction ガレージ工事 PART 3
Garage construction ガレージ工事 PART 2
Garage construction ガレージ工事 PART 1
Making a capiz shell wall light カピス貝殻壁掛けライト
Making a rustic antique-style wall light アンティークなライト作成
Making a capiz shell chandelier カピス貝殻シャンデリア
Online store opening sale グランドオープンの割引
Opening a webstore 通信販売サイトを開店します!
A lucky escape with the typhoon! 台風がヤバいけどラッキー!
E-bike conversion DIYで電動自転車を作った!
$200 Underfloor heating 2万円でDIY床暖房
3D-printed OPEN/ CLOSED sign アトリエ看板作成


 神社
神社 寺
寺 茶屋
茶屋 城
城 店
店 家
家 農場
農場 建物その他
建物その他 壁・柵
壁・柵 橋
橋 池
池 LEDライト