


 ホーム
ホーム ブログ
ブログ アクセス
アクセス
3Dプリントアトリエ
| << Ceiling finished! 1階天井が完成! 2021-11-21 | 3D-printed OPEN/ CLOSED sign アトリエ看板作成 >> 2021-12-26 |
一階のホールはほとんどできていますが、やはりライトを変更したいですね!現在のライトは蛍光灯ですので、光は白で、bzzzzzzzの音もしますから雰囲気が合っていません。今回LEDのエジソン形の電球にします。
The downstairs hall is edging closer to completion now, so it's time to deal with those old lights. It used to be a dyeing workshop and then a painting studio, so I guess the bright fluorescent strip lights were adequate task lighting, but they are getting on a bit and so tend to buzz, and they have quite high power usage (320W for eight of them). Worst of all, the light they give off is a white light, which makes the room feel cold. So it's time to change them out....
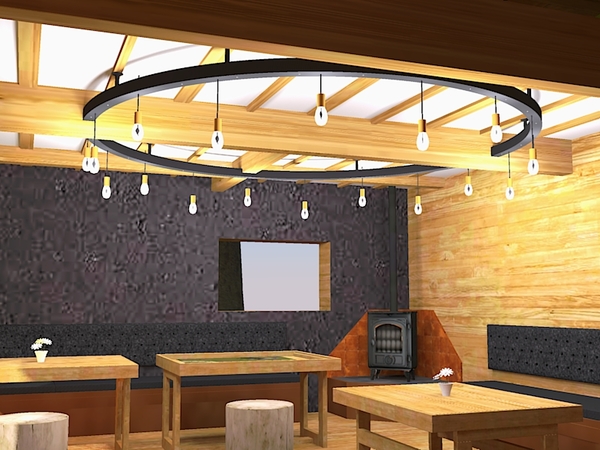
▲ まずは3Dソフトで形を作ってみました。大引きの位置によって、二つに分けます。3メートルの丸い形に作りたいですが、そんなに大きい丸がないので、30cmずつのレール式にします。
I started this project by designing a large 3 metre diameter chandelier, with 18 retro-style Edison bulbs hanging down around the circumference. I suppose it's more of a rail lighting system than a chandelier, but the lights will be fixed in place. I originally wanted to make this a perfect circle from something like wood, but couldn't find any easy of creating this on a budget.... so I decided to make it out of 30cm straight sections joined together to make something that is close to a true circle.
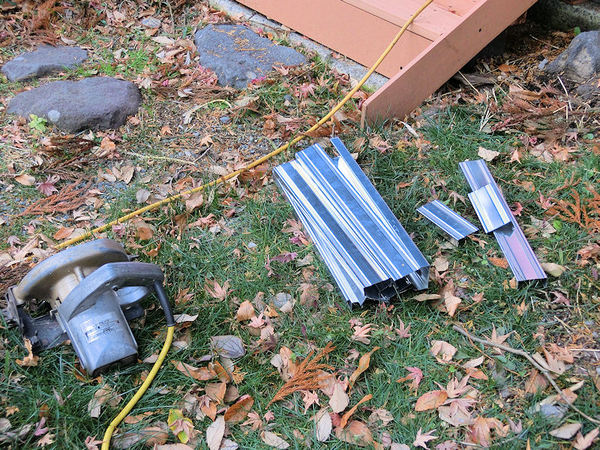
▲ 最初に全部3Dプリントでしたかったんですが、重かったです。その代わりにDIY店で見つけった鉄レールを30センチ部分に切りました。
I bought several 2m metal rails from the local DIY store. I think they are commonly used as lightweight but strong systems for suspended ceilings, but they suited my purposes well too. So I carefully cut 30 pieces of 30cm length using a cutting blade on my rotary saw. Easy peasy so far!
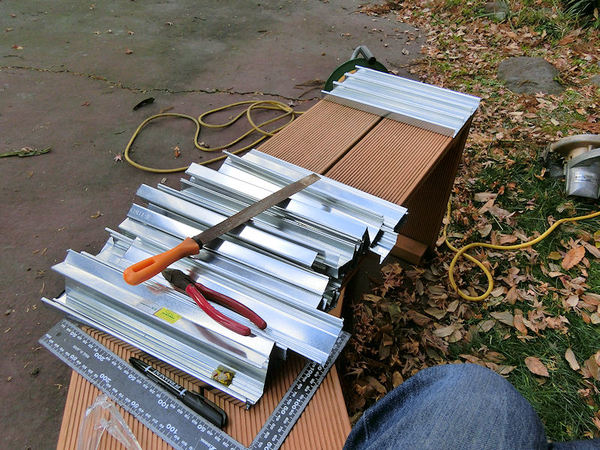
▲ 作業中で手を切らないように鑢で綺麗にしました。
I then smoothed off any sharp edges with a file, so as not to cut my fingers later on!
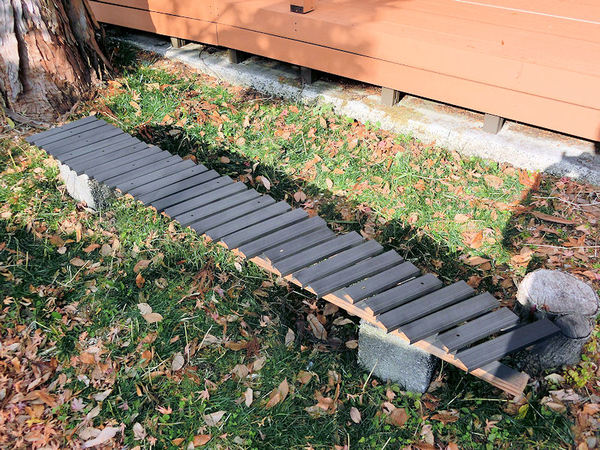
▲ 電気配線の穴を開いてから、艶なしの黒でスプレーをしました。
Half of the pieces needed holes drilled in them for wiring, and then I sprayed them all with a matt black spray paint.
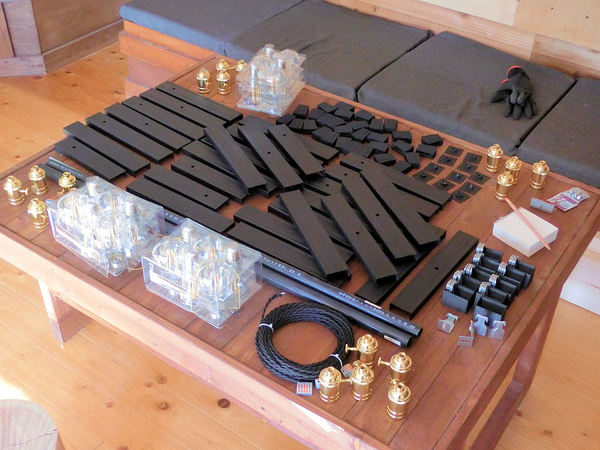
▲ 各レール部分を接続するところには3Dプリンターで30個のジョイントをデザインしました。上の写真はすべてのパーツとなっています。多いでしょう?!エジソン電球18個、中国から来たソケット18個、そしてレトロっぽい配線も集めました。
I'd been slowly collecting the various bits I needed for this project, so now I had 18 LED bulbs plus 18 shiny brass sockets, and some retro-style black cabling to match them. The joints between each section of rail were created to fit them exactly, and 3D printed slowly in the preceding days.
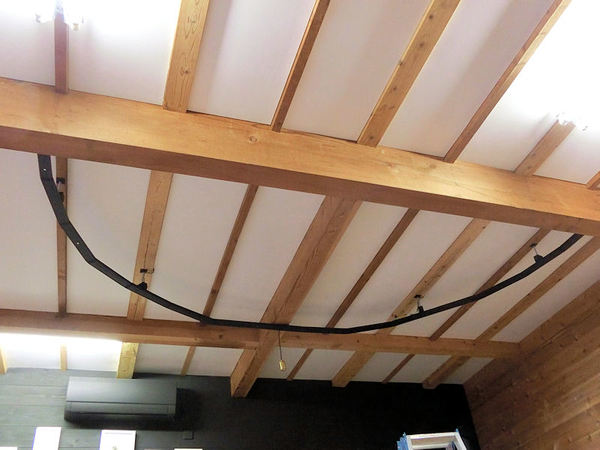
▲ 電気スイッチが二つありますので、1個の配線を抜いてライトの作成が半分ずつにしました。まずは天井から下がるところを図ってボルトとナットプレートを入れました。そして、ちょっとずつ各30センチ部分を下がりました。
次は電気配線の作業でした。これは結構簡単でしたので、スムーズに進みました。
Time to start fitting the light system, by fixing nut plates to the ceiling at various points. Then I fitted in cut pieces of long bolt, and hanging some custom-made hooks. Then I slowly slid in the short sections of railing, and started to join them together.
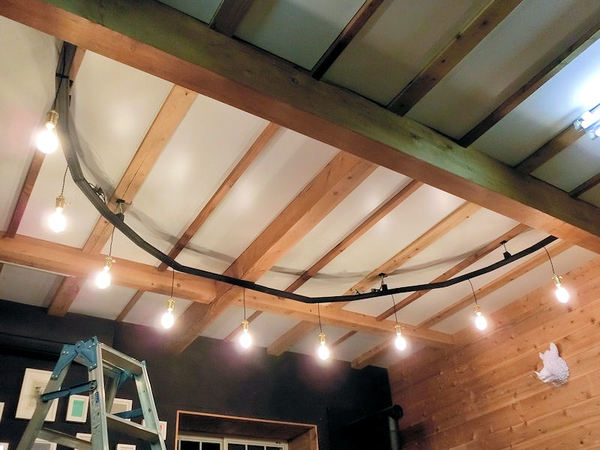
▲ 電球を入れて、スイッチの配線につながりました。電球のソケットにも1個ずつのスイッチもありますので、結構便利です。部屋の雰囲気や目的によって光が調整できます。
The next step was to run some cabling on the topside of the rails, and add 9 sockets using the retro-style twist cable. Each of these brass sockets has a separate on/off switch, so it's possible to adjust the light levels to fit whatever you're doing that day.
▲ 最後にレールを平行しました。あっちこっちに接続ジョイントが下がったところもありましたので、細かいプラスチックリボンで天井に付けました。これで平行に調整できましたので、ライトの半分終わりました。
The last thing to be done was to even up the railing. At a few joints the railing has started to droop slightly, because there were only 5 attachment points along the 4 meter circumference, so I added a few extra supports using long zip ties and some extra bits and bobs! This made the whole thing fairly level and even, and worked well enough for me.
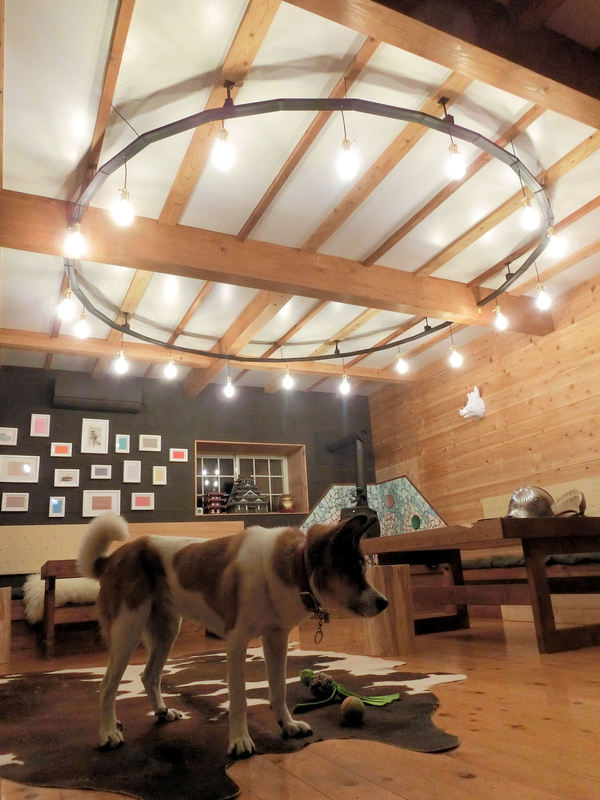
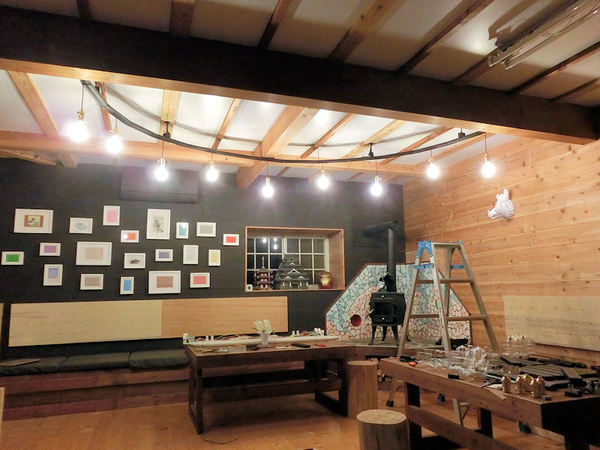
▲ 1週間後に残りの半分も同じ風に完成できました!いかがでしょうか?
A week later I went back and completed the second half of the light in the same manner, and at last I had a finished lighting system! The height of the bulbs has been carefully alternated between high and low, just to create some extra interest and give it a more 'crafty' feel.
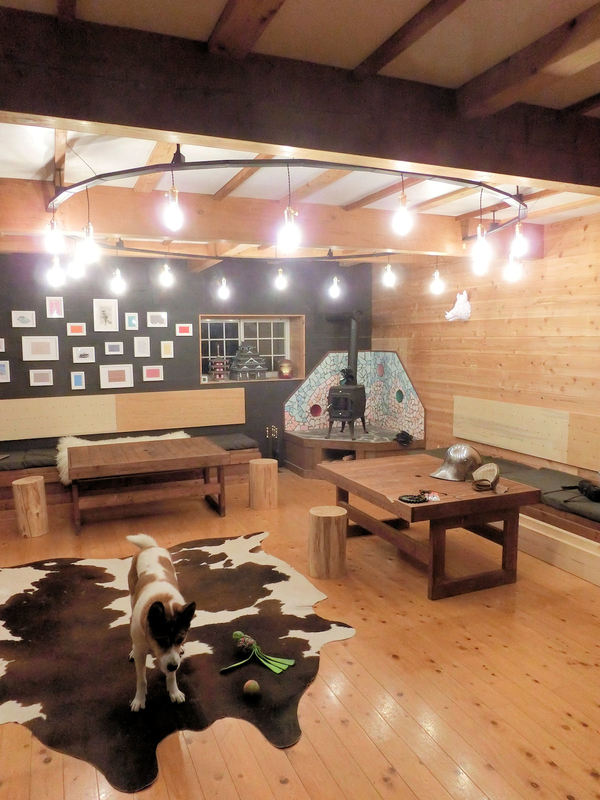
▲ やっぱり電球色のほうがいいですね!部屋の雰囲気も完全に変わりました!
I absolutely love it! The whole room is now bright and warm, and somehow still super cosy. I think lightbulb-coloured bulbs are such a great improvement on the glaring white light of strips lights.... plus the power consumption is now halved, even with 18 of those bulbs!
| << Ceiling finished! 1階天井が完成! 2021-11-21 | 3D-printed OPEN/ CLOSED sign アトリエ看板作成 >> 2021-12-26 |
〒869-2226 熊本県阿蘇市乙姫2070-48
営業時間:13:00~17:00*
営業日:毎週金曜日・土曜日
(* ご来店前にお電話をお願いします 090-1349-4029)




阿蘇山の3D地図テーブルを作ってみた! I made a 3D MAP table!
3D阿蘇カルデラはいかがですか? 3D Maps added to the shop
Painted models available 塗装済の模型発売中!
Making garage doors ガレージの扉DIY作成
New side-project... a hobbit house! ホビットの家
Shops added to the shop ショップにお店
Repainting a (mini) car ミニカーのリペイント
Buying land in Otohime 乙姫で土地探し
Scale model of the Inaba Residence 稲葉家下屋敷の模型
Customer request - Pokemon Ball! ポケモンボール
Garage construction ガレージ工事 PART 6
Secret Aso-volcano pool 阿蘇山の隠れプール
Garage construction ガレージ工事 PART 5
Garage construction ガレージ工事 PART 4
Garage construction ガレージ工事 PART 3
Garage construction ガレージ工事 PART 2
Garage construction ガレージ工事 PART 1
Making a capiz shell wall light カピス貝殻壁掛けライト
Making a rustic antique-style wall light アンティークなライト作成
Making a capiz shell chandelier カピス貝殻シャンデリア
Online store opening sale グランドオープンの割引
Opening a webstore 通信販売サイトを開店します!
A lucky escape with the typhoon! 台風がヤバいけどラッキー!
E-bike conversion DIYで電動自転車を作った!
$200 Underfloor heating 2万円でDIY床暖房
3D-printed OPEN/ CLOSED sign アトリエ看板作成



 神社
神社 寺
寺 茶屋
茶屋 城
城 店
店 家
家 農場
農場 建物その他
建物その他 壁・柵
壁・柵 橋
橋 池
池 LEDライト