


3D-Print Studio
| << Display cabinets 展示キャビネット 2023-01-01 | Planning a garage DIY車庫計画 >> 2023-04-25 |
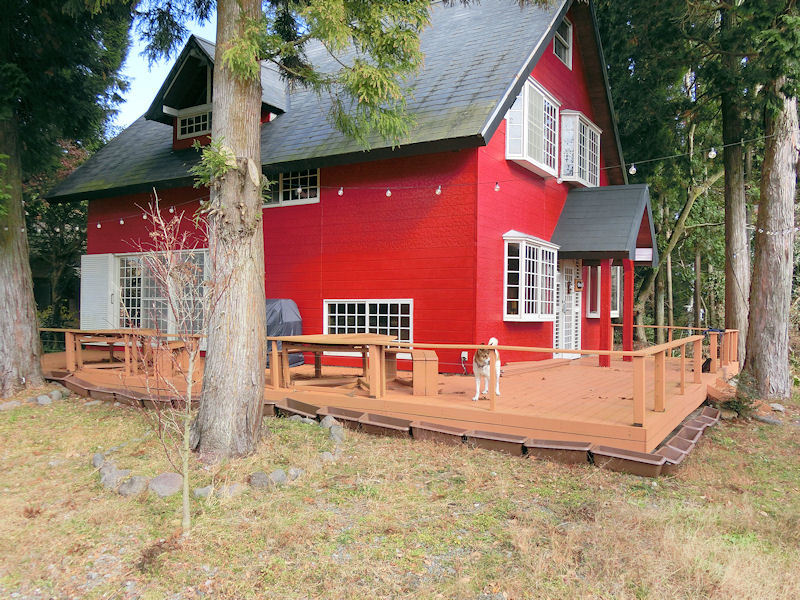
阿蘇で春がやっと着ました!デッキの周りに花壇・ハーブ園・小さい野菜畑を作りたいです。
Spring has finally come to Aso, so it's time to get out and do some gardening! This year I'm finishing off the deck area with a surrounding ring of decorative beds.
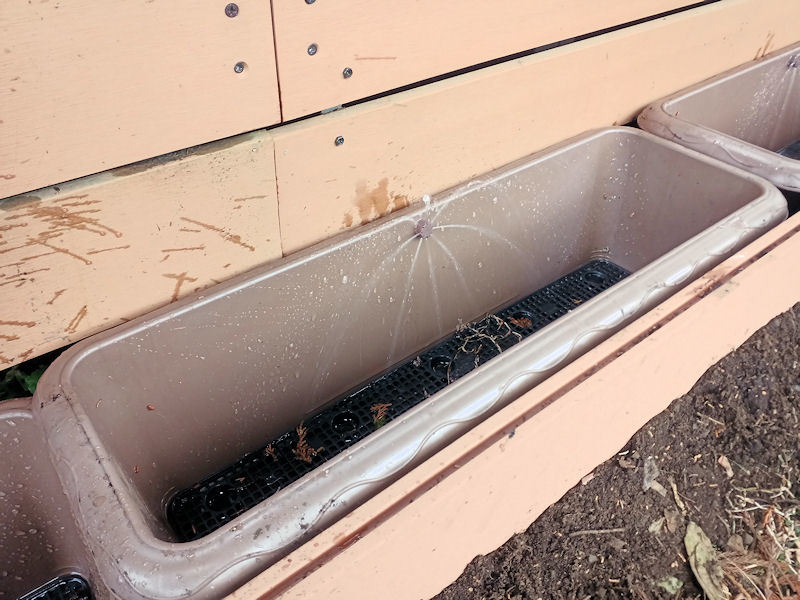
▲ 最初に、近くのDIY店で26個プランターを買って、デッキの横に並べました。
I started by going out and grabbing 26 cheap plastic planter tubs, which will allow me to remove weeds and rotate plants more easily.
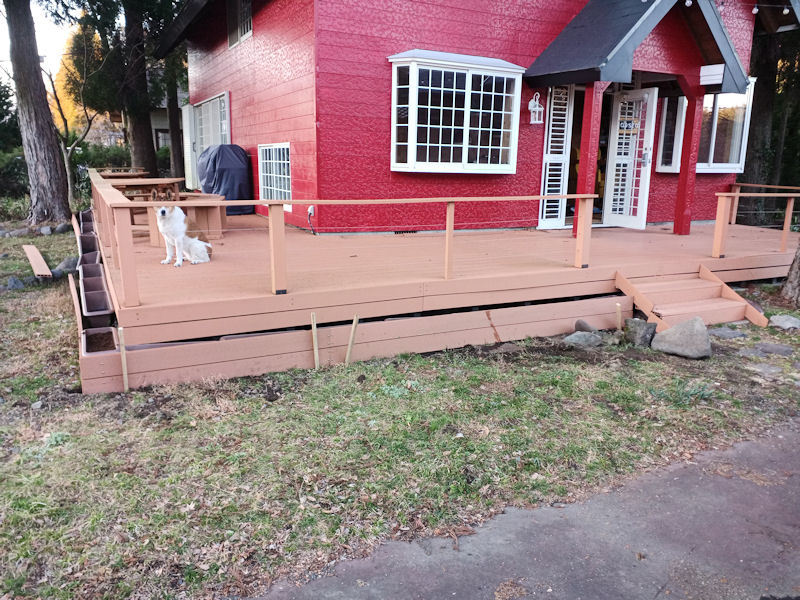
▲ デッキと同じ人工木材でプランターの前に壁を作りました。これで地面の凸凹が隠せるはずですね。
But planters on their own are not particularly attractive, so I decided to conceal them inside a low wall of the same artificial wood planks that the deck is made from. After digging out a few bumps and rocks, I managed to get a fairly even line of bed walls, so I hammered in a few posts and bolted them in place. It does a pretty good job of hiding the uneven slopes and bumps of the grass areas... and the wonky deck!
▲ 側面に一枚だけを使いましたが、正面に2枚をかすねました。地面とデッキの高さが結構遠いですから。
The gap between the deck and grass was pretty big at the front, so I used a double layer of planks there to make it taller.
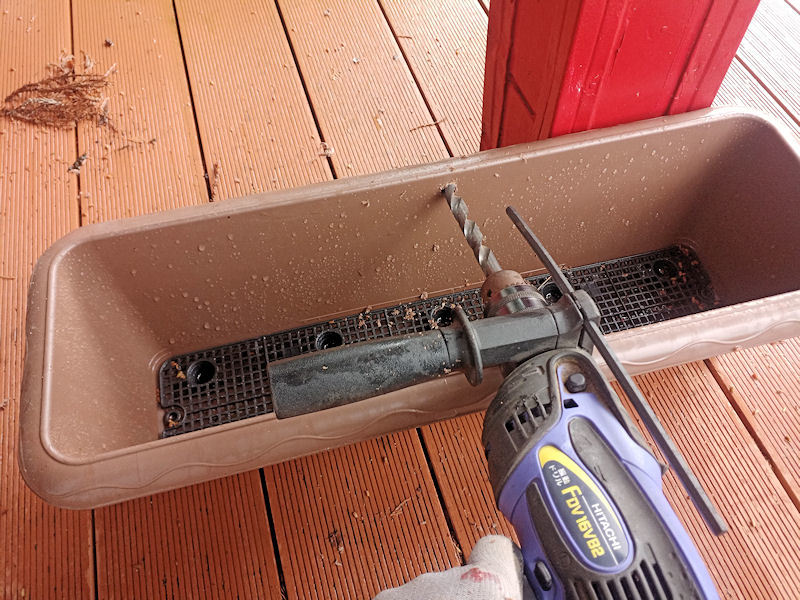
▲ プランターの後ろに灌漑システムを作りたかったので、アマゾンから安いやつを買いました。一個ずつの水供給を設定したいので裏面に穴をあけました。
One thing I wanted to try for this project was a simple irrigation and watering system, so that if I need it in the future I can plug in an automatic timer to water crops daily in summer. So I bought a cheap 30-metre irrigation kit from Amazon Japan, and drilled a hole in the back wall of each planter.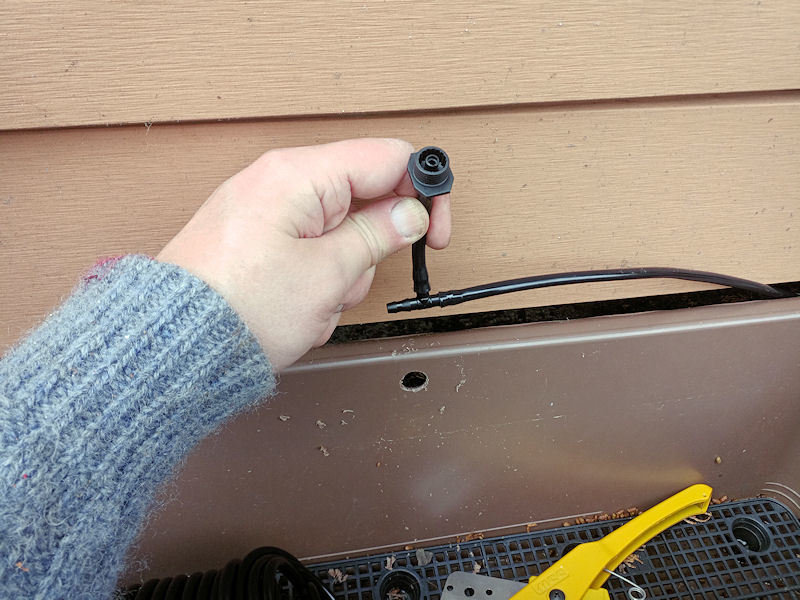
▲ 灌漑システムに入っていたノズルとパイプを後ろから差し込みました。
The pipes are concealed behind the planters, and a junction point for each one allows a small nozzle to be poked through the holes.

▲ キットの赤いノズルはちょっと目立つでしたので、プランターと同じ色でスプレーしました。
The nozzles that came with the kit had bright red nozzles, so I decided to dull things down by changing their colour. Happily, I had a spare spray can of matt brown, that was a perfect match for the colour of the planters.
▲ 結局こんな感じになりました。蛇口で水を流したら、一発で26個のプランターまで来ます。ラクラク!
So here's the result! By turning on the water supply at the garden tap, I get a little spray of water to each of the planters. Easy-peasy!
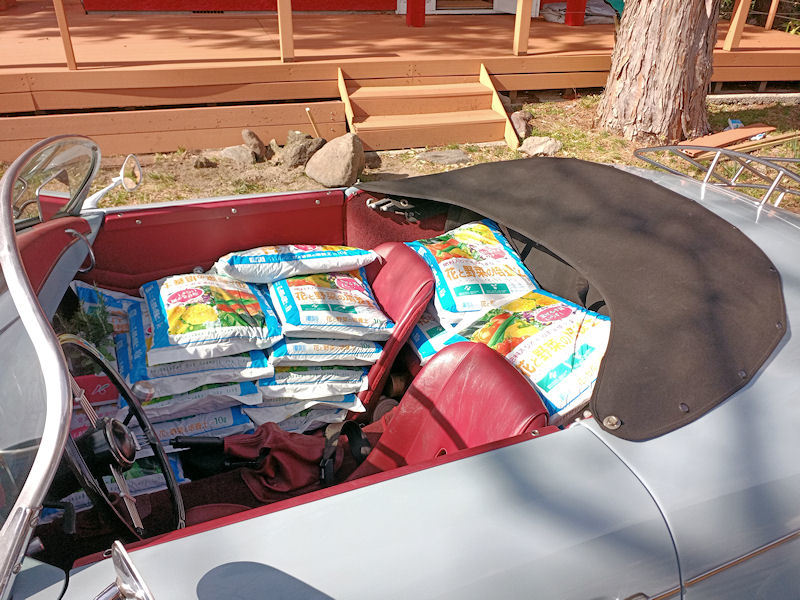
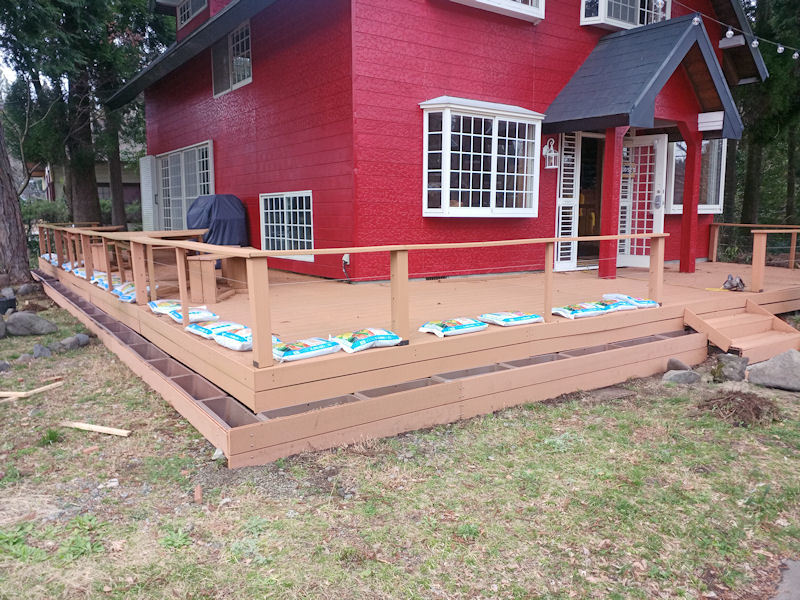
▲ 最後に近くのDIY店から花壇用土を260L買いました。また私のカワイイ「軽トラック」で家に持って帰れました。
The last thing to do was to pop off to the local DIY store and pick up 26 bags of soil, and as always my little 'pickup truck' performed wonderfully :)
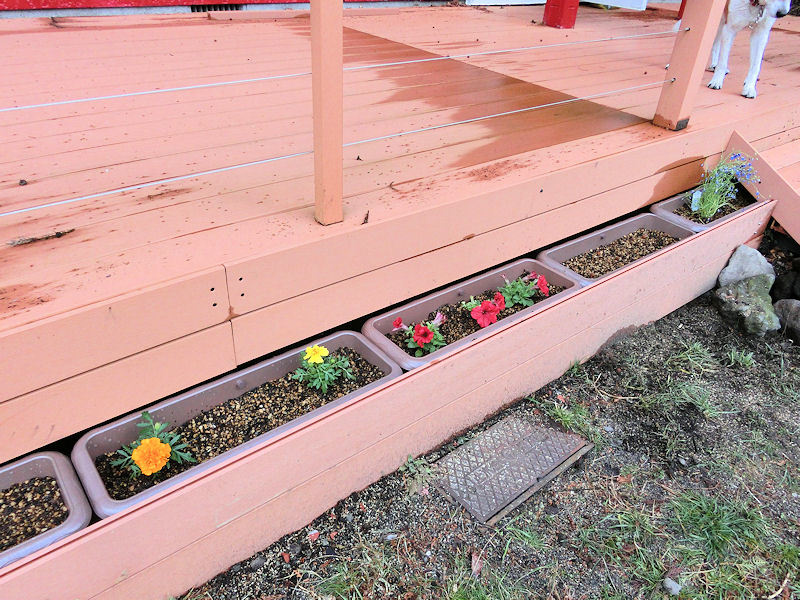
▲ 完成です!どうですか?正面に明るい花が飾っています。
All finished! At the front I'm hoping to grow a nice bright selection of colourful flowers.
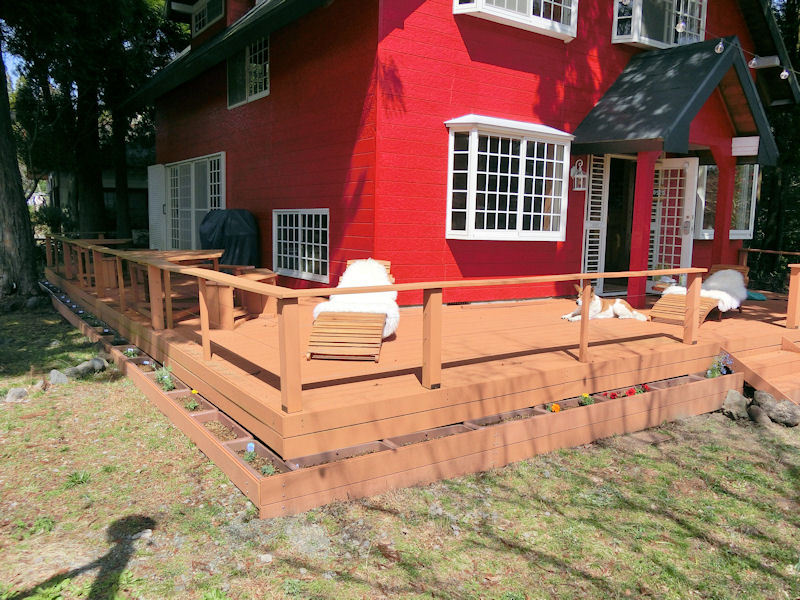
▲ 側面にハーブ園、そして野菜も植えています。成功したらちょっとびっくりになりますが、どうですかね?
Along the long side there are various herbs (rosemary and chives, etc, which are very handy for cooking), and then also some planters of vegetables. I even found rhubarb seeds, so I'm looking forward to some rhubarb crumble in the summer, perhaps?..... although I'll be very surprised if I get even a single edible bit of veg, to be honest!
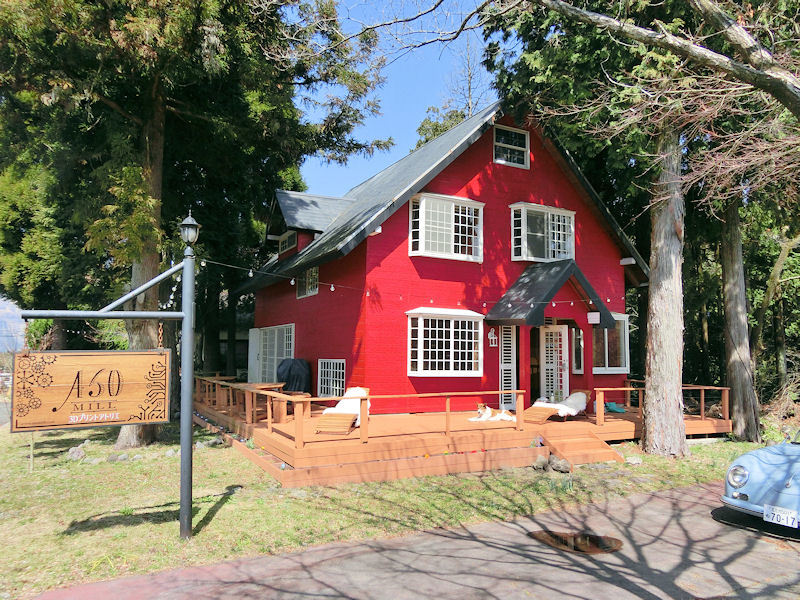
▲ これで家が完成です。後は車庫だけですかね。。。
Yay, the house is finished! Cute, isn't it? One last project for this year is a garage, but that's a job for later...
| << Display cabinets 展示キャビネット 2023-01-01 | Planning a garage DIY車庫計画 >> 2023-04-25 |
〒869-2226 熊本県阿蘇市乙姫2070-48
Aso City, Otohime 2070-48
Open from 13:00~17:00*
Fridays & Saturdays
(* best to call beforehand 090-1349-4029!)


")
阿蘇山の3D地図テーブルを作ってみた! I made a 3D MAP table!
3D阿蘇カルデラはいかがですか? 3D Maps added to the shop
Painted models available 塗装済の模型発売中!
Making garage doors ガレージの扉DIY作成
New side-project... a hobbit house! ホビットの家
Shops added to the shop ショップにお店
Repainting a (mini) car ミニカーのリペイント
Buying land in Otohime 乙姫で土地探し
Scale model of the Inaba Residence 稲葉家下屋敷の模型
Customer request - Pokemon Ball! ポケモンボール
Garage construction ガレージ工事 PART 6
Secret Aso-volcano pool 阿蘇山の隠れプール
Garage construction ガレージ工事 PART 5
Garage construction ガレージ工事 PART 4
Garage construction ガレージ工事 PART 3
Garage construction ガレージ工事 PART 2
Garage construction ガレージ工事 PART 1
Making a capiz shell wall light カピス貝殻壁掛けライト
Making a rustic antique-style wall light アンティークなライト作成
Making a capiz shell chandelier カピス貝殻シャンデリア
Online store opening sale グランドオープンの割引
Opening a webstore 通信販売サイトを開店します!
A lucky escape with the typhoon! 台風がヤバいけどラッキー!
E-bike conversion DIYで電動自転車を作った!
$200 Underfloor heating 2万円でDIY床暖房
3D-printed OPEN/ CLOSED sign アトリエ看板作成


 Shrine
 Temple
 Teahouse
 Castle
 Shops
Shops Houses
 Farm
Farm Other Buildings
 Walls & Fences
 Bridges
 Ponds
Ponds LED Lights