


3D-Print Studio
| << Planning a garage DIY車庫計画 2023-04-25 | Making a rustic antique-style wall light アンティークなライト作成 >> 2023-05-17 |
2階のリビングはまだちょっと暗いので、もう一つの照明を作成したかった。ただし、その部屋の天井はアピールポイントですので長いシャンデリアを作りたいです!
「カピス」(capiz)という貝殻で作成しようと決めました。そのに高くないし、風が通ったら素晴らしい音がしますので、ちょうどいいと思います。
The second floor's living space is still quite dark sometimes, so I've decided to add an extra light to brighten things up. However, since the lovely tall cathedral ceiling is a wonderful feature of the room, I thought I'd try to make use of all that vertical space, with a tall DIY chandelier.
I decided to try making a chandelier from capiz shells, because they are not that expensive to buy in bulk, and I could make it any size I wanted just by adding more. As an added bonus, capiz shells make a lovely tinkling sound when they bump into each other in a breeze!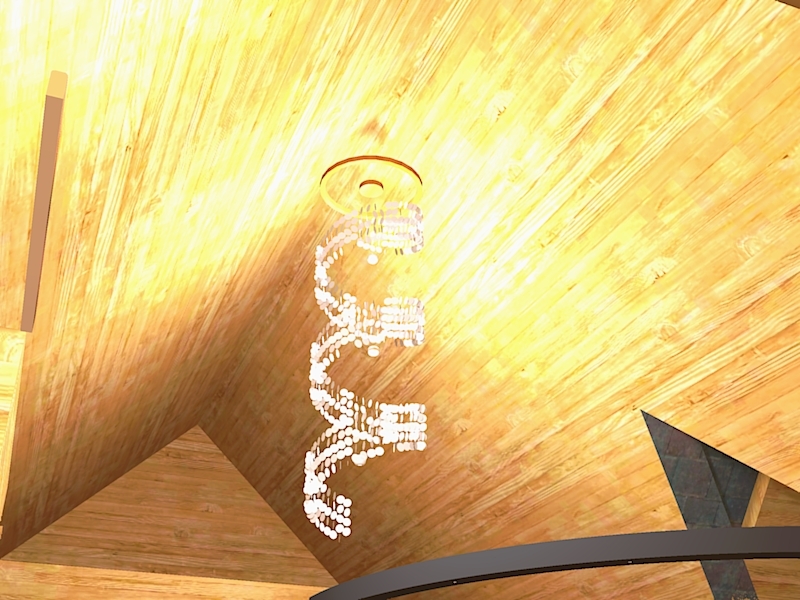
▲ まずは3Dデザインソフト「Sketchup」で必要な大きさを作ってみました。こんな感じにできるかなぁ?
しかし木材のリング形は非常に作りにくいので、その形はやめました。その代わりにテーブル用の丸い木材にしました。
A bit of preplanning was required, to get the size and shape I wanted, and also to work out how many shells I would need to buy. So I tried out some layouts in my favourite free 3D modelling software, Sketchup, and came up with this design. I eventually abandoned the wooden ring design for the top part, in favour of a much simpler solid circle of wood.
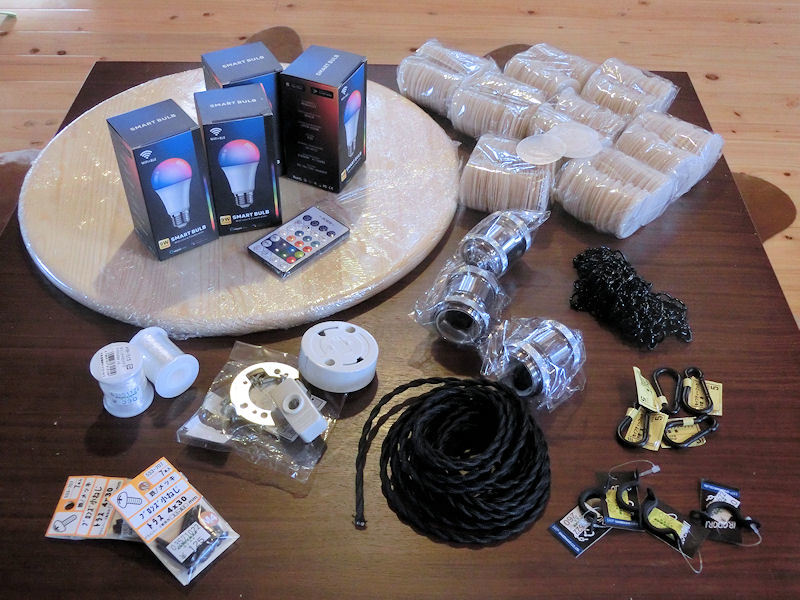
▲ これらのパーツを集めました:
合計約20,000円になりました。このプロジェクトが結構時間かかるけど、そのに高くはないですね。
Then it was some hunting online, to find the parts I needed. This is what I bought:
In total that came to about $200. This project takes lots of time to put together, but doesn't actually cost all that much.
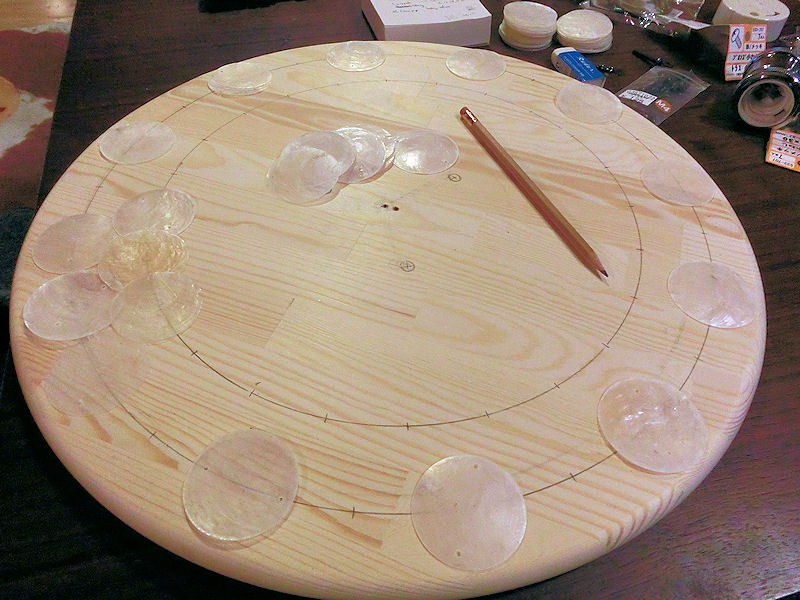
▲ 最初にテーブル板にカピスの位置を描きました。外側に24個、内側に24個でサイズ的に合いました。
各貝殻の所に2ミリの穴をあけました。それらに穴に透明なアクリル糸を通します。
I started by placing two rings of capiz shells around the wooden tabletop, and marking off the positions of each shell. Each ring had 24 shells, so I drilled 48 small holes for the plastic thread to go through.
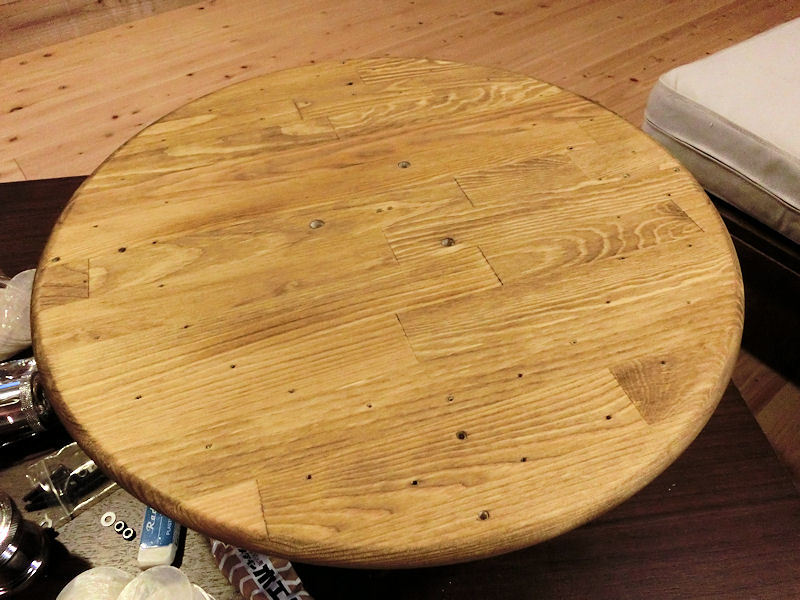
▲ 真ん中に3つの電気配線のために10ミリ穴もあけました。そして、4か所でチェーン用の穴もあけました。最後にウッドステインで塗りました。
In the centre I drilled 3 larger holes for the electrical cables, and then also holes for the metal chain clips at 4 quarters, and then quickly painted the tabletop with woodstain.
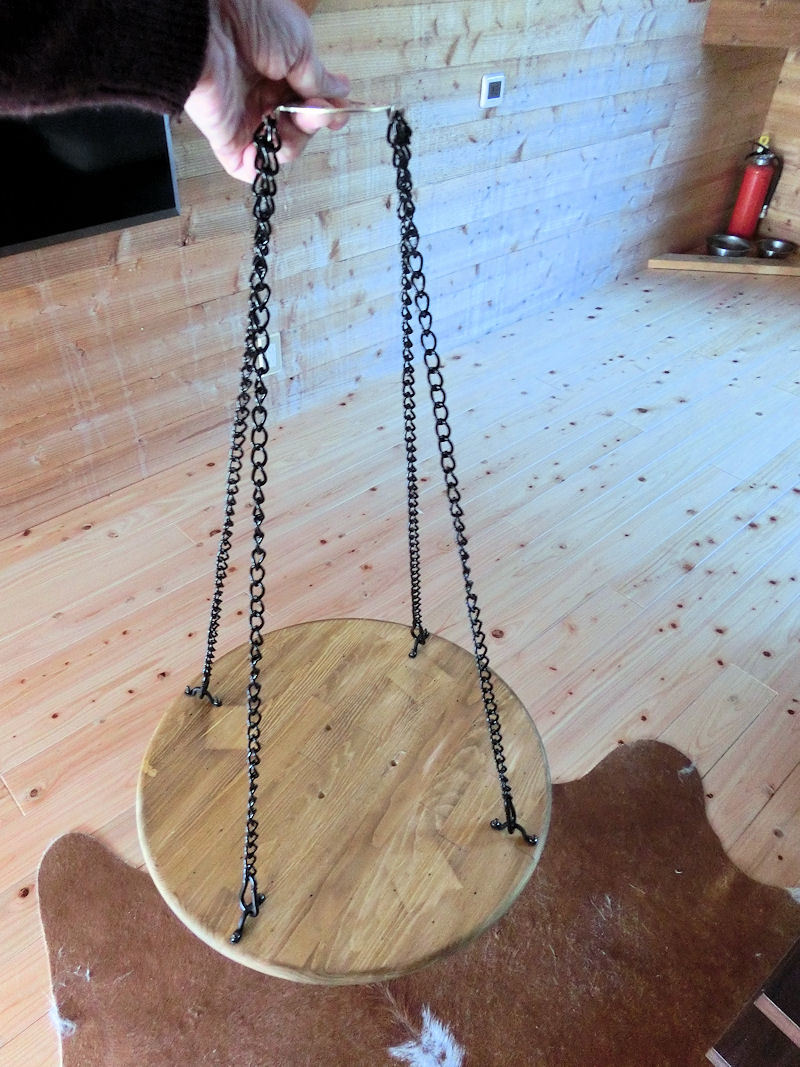
▲ チェーンは4か所から下がります。60cmの長さで切りましたので、シャンデリア本体はそれ下に約2メートルになります。
After attaching metal clips to each of the four 'corners', I hung the chandelier from 60cm of chain. With the height of the shells, it should work out to well over 2 metres in total.
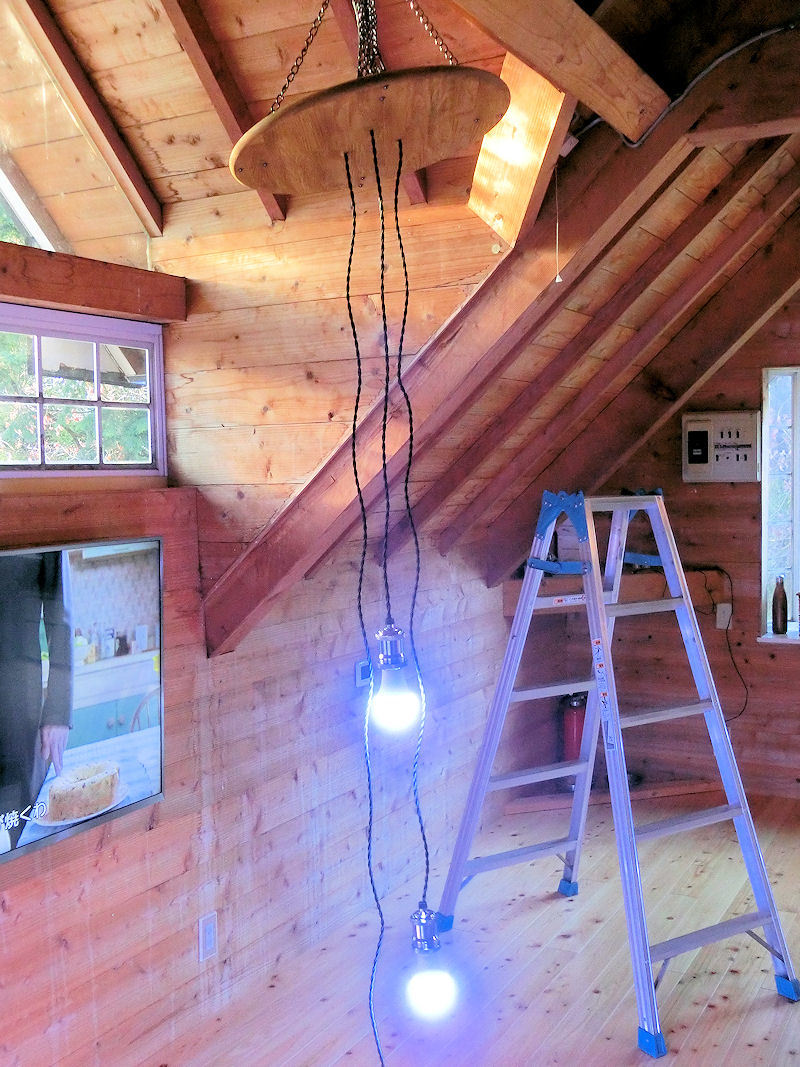
▲ 電気配線はこのレトロな雰囲気のケーブルとメッキのソケットにスマートLED電球をつなぎました。テストのときにこんな感じでした。
では、後はカピス貝殻だけですね。。。
I connected up the bulbs and cables, and plugged it in to check everything was working fine. So far, so good.
Now it's just a matter of adding 800 capiz shells one by one...
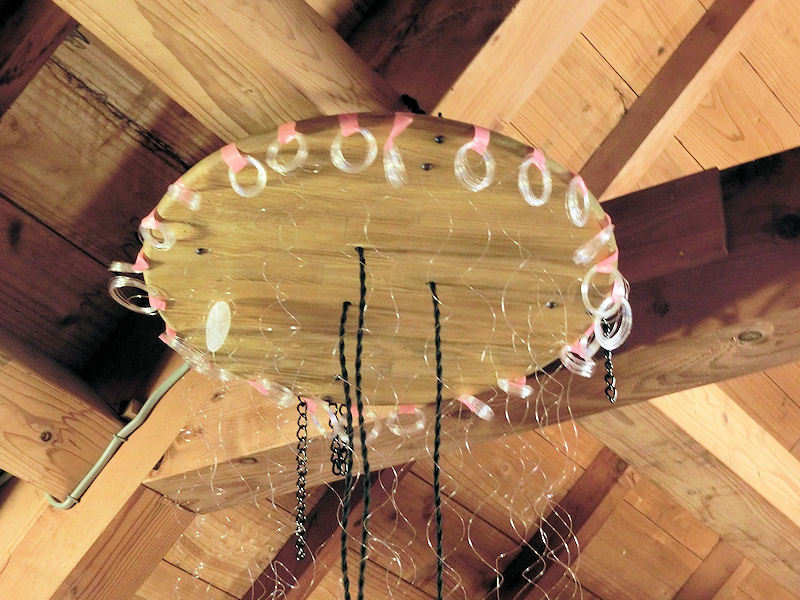
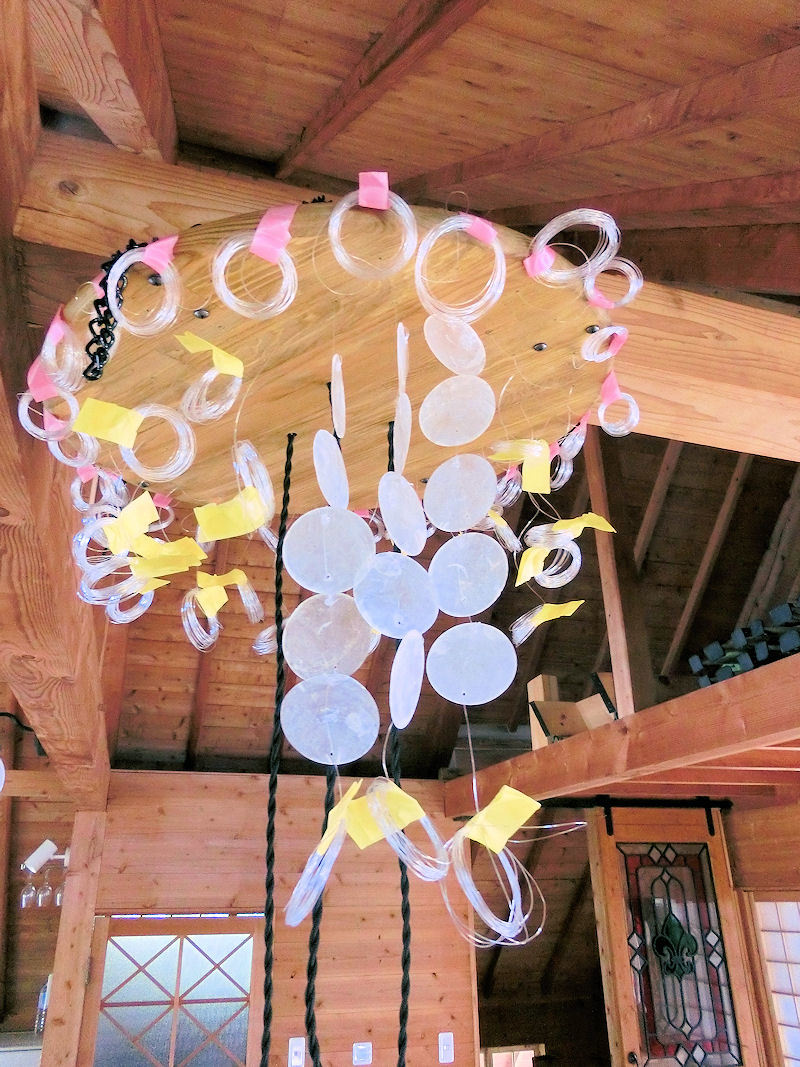
▲ 外側と内側の穴をペアにして、約5メートル長さの糸を通しました。見えない上面に糸をホチキスで止めました。そして、外側の糸をぐるぐる回してピンク色のテープで木材の部分に結びました。
I cut the clear thread into 5-metre lengths, and ran one through each pair of outer and inner ring holes. Then I stapled the middle of each string to the top of the wood, where it can't be seen, just to stop it from slipping.
Next I slowly looped up each length of string from the outer ring of holes, and tied each loop together with some pink masking tape.

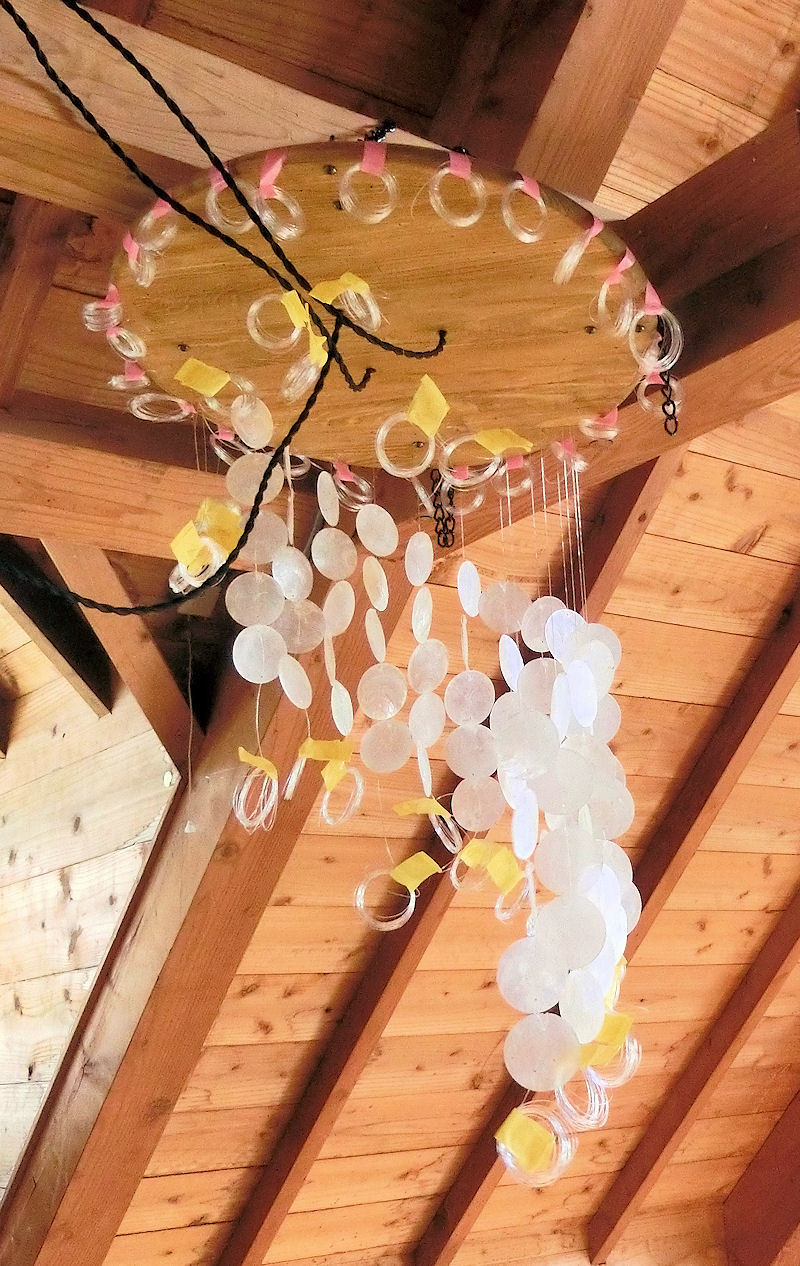
▲ 同じ風に内側の糸も黄色テープで結びました。これは大事ですね。これをしないと糸がゴチャゴチャにします。
I did the same with the string from each of the inner ring of holes, but taped them up with yellow masking tape. It's a bit of a pain looping up the strings like this, but it's necessary to prevent them becoming all entangled and knotted.
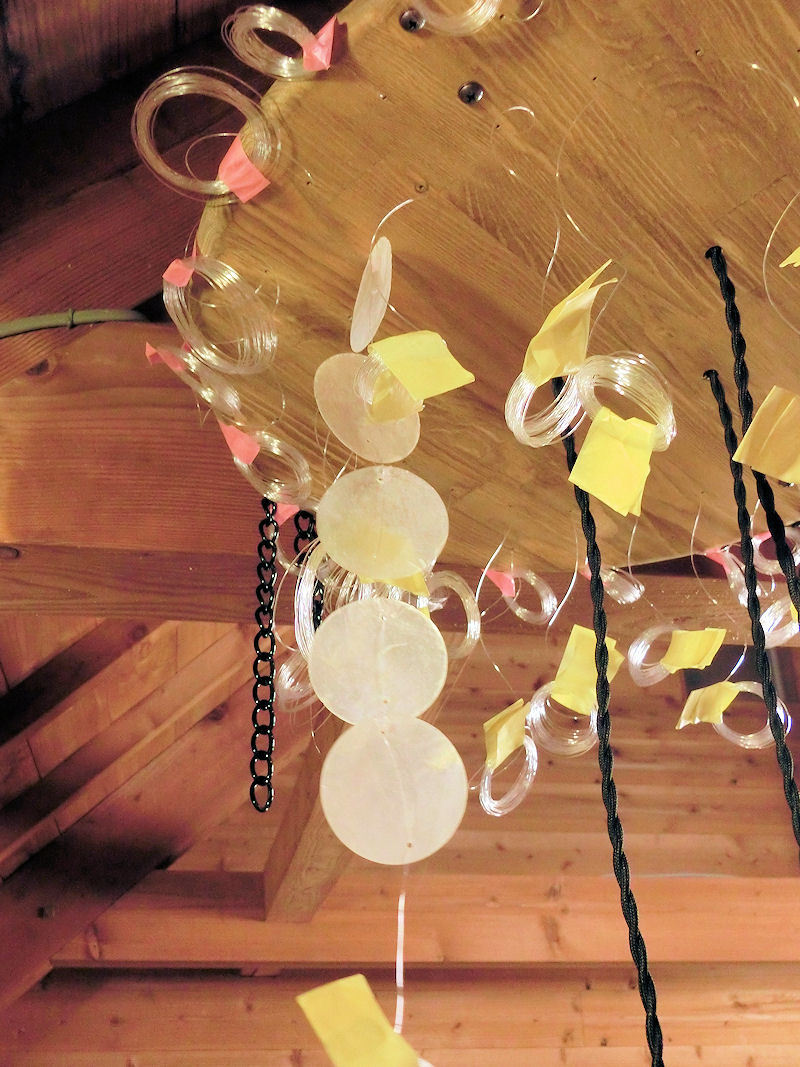
▲ カピス貝殻に穴が買った頃から穴がありましたので、助かりました。糸を上の穴に通して、2回結んで、下の穴から出ました。各糸には5個セットを結びました。
Time to tie on the first set of 5 capiz shells! I looped the string through the top hole of the shell (happily they came pre-drilled with holes!), and tied a knot in it there, then ran the string through the bottom hole of the shell. Then I just repeated the same process for the other 4 shells. My first set of 5 was completed - only 795 more to go!
▲ 次の糸から15ミリぐらい下の所に、次の5個セットを結びました。結構ゆっくりな坂になりますが、3Dソフトで試してみたときにこのぐらいのペースで好きならせん状の形にできるかも。
I'd already worked out how much I needed to drop the next string of 5 shells (in the 3D design software), to give me the spiral angle I wanted. So the top shell of the next string was just dropped half a shell from the previous string (about 15mm), which seemed like it would take forever to get all the way down?!
▲ 最初の部分は結構時間かかりました。糸は長かったので、テープを外したらゴチャゴチャになった場合もよくありました。各カピスを結ぶには約4分かかりました!
5個セットを終わったら、また糸をテープで結びました。これで邪魔にならないんです。
These first few strings did take ages to get done, mostly because the long strings kept getting knotted and tangled up with themselves. Once each set of five shells was complete, I carefully looped up the remaining string and tied it back up with masking tape. I think the early shells were taking about 4~5 minutes each, but later on I was able to go at about 3 minutes for each.
▲ 内側に一周を終わりましたらこんな感じになりました。それから、外側の糸からもカピス貝殻一周を結びました。
Once I'd finished a complete circle of 24 shell sets on the inner ring, I did exactly the same thing with the outer ring, which thickened up the appearance nicely. This where the different colours of masking tapes comes in handy, so you don't get confused which one you're working on!
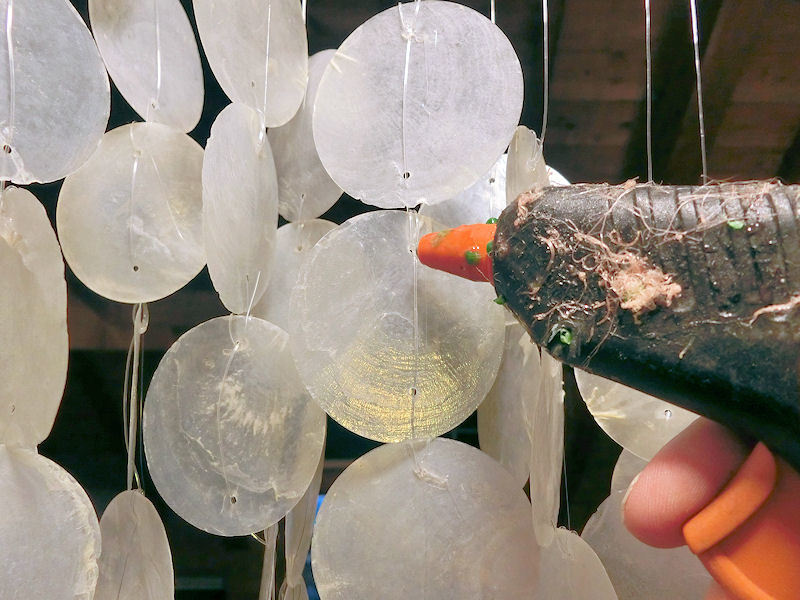
▲ アクリル糸をスリップしないように、写真の様に各結びの穴にホットグルーガンで止めました。
それから毎晩、ビデオを見ながらカピス貝殻を結びました。結構時間かかりました、どんどん大きくなりました。何週間後、約2メートルの高さになりましたので、梯子に上って天井から電気配線を付けました。
完成品はこんな風になりました。。。
The clear plastic string is pretty slippy, so I added a blob of hot glue to the top hole and knot of each shell. That should hold it in place permanently.
So doing 24 strings of 5 shells each, for both inner AND outer rings, x 3 spirals for each ring, takes.... quite a long time! But I was able to watch/listen to videos while I was working away, so it was a pleasant way to pass an hour or two each evening, much like knitting. After a few weeks the strings had reached 2 metres each, so I climbed up on a ladder to add some electrics and a socket to the distant ceiling, and carefully lifted and hung the chandelier.
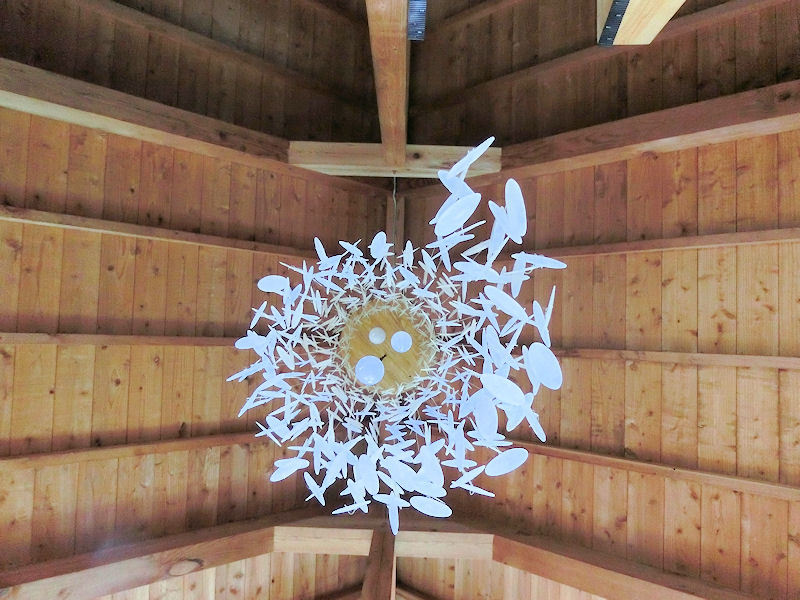
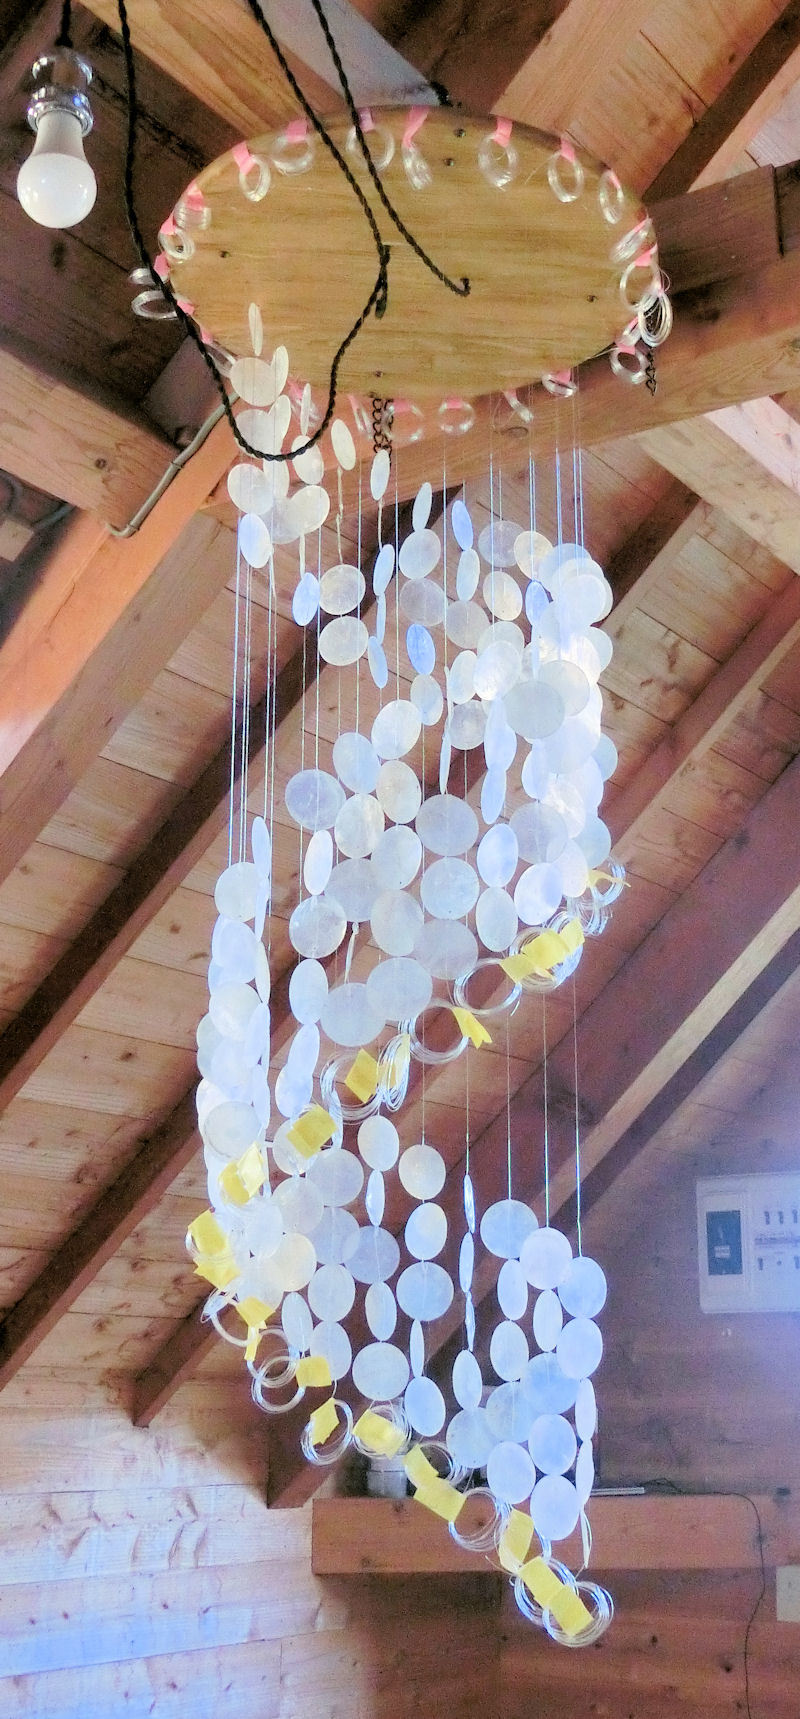
▲ 下から見るとこんな感じです。風が通るときにいい音が出ます!
Here's the finished chandelier as viewed from directly underneath. When a breeze blows, it makes such a lovely sound!
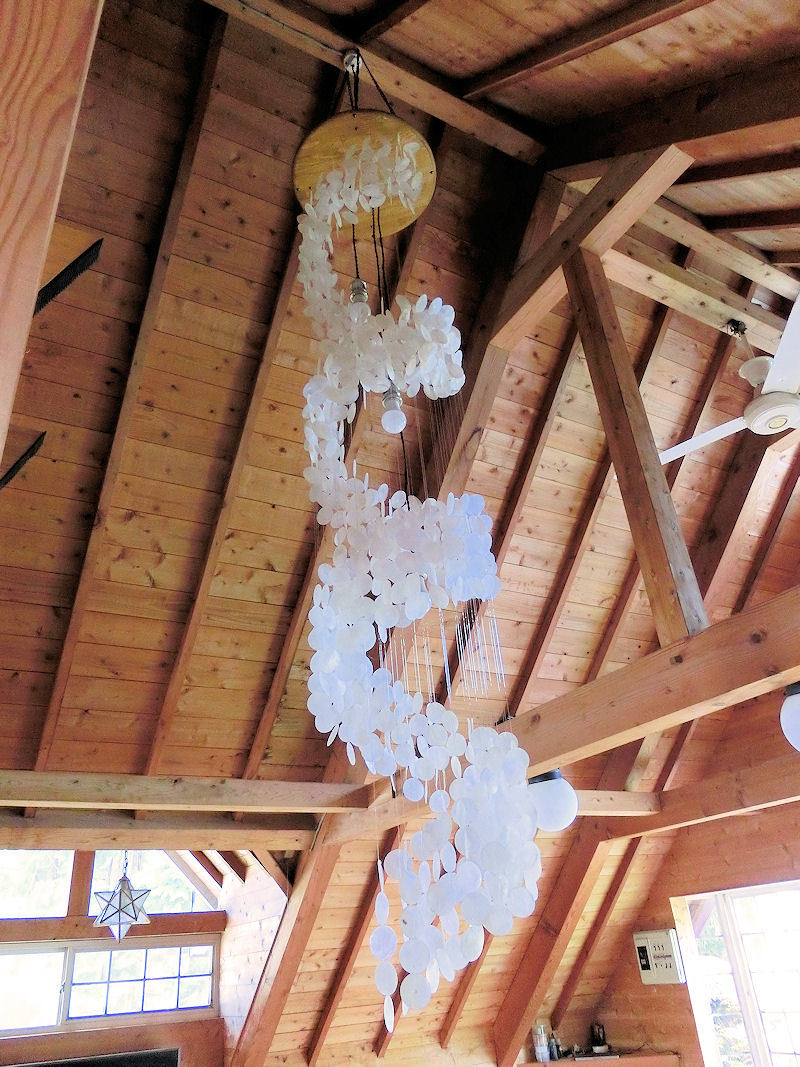
▲ 全部で多分3メートル近くですね。
The whole chandelier and chain is about 3 metres tall!
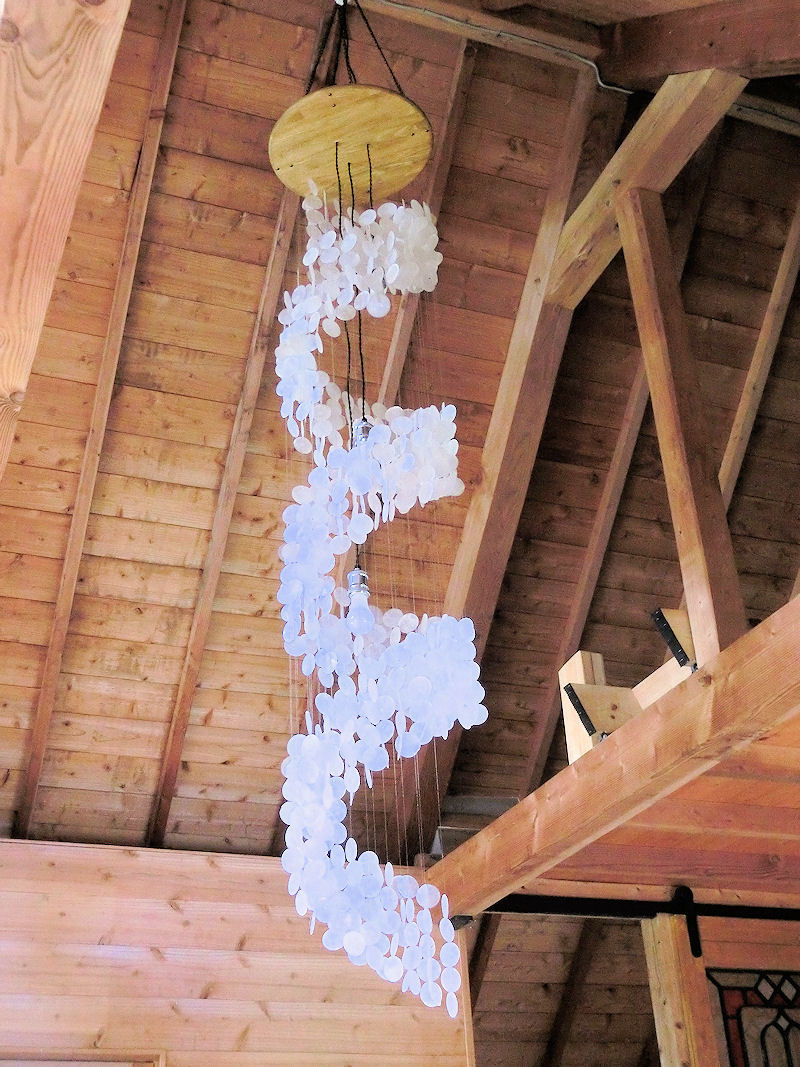
▲ いつかケーブルを違う色に変更するかもしれないですが、とりあえず満足です!
I might change the cables to silver maybe, at some point, but for now I'm pretty happy with how it looks.
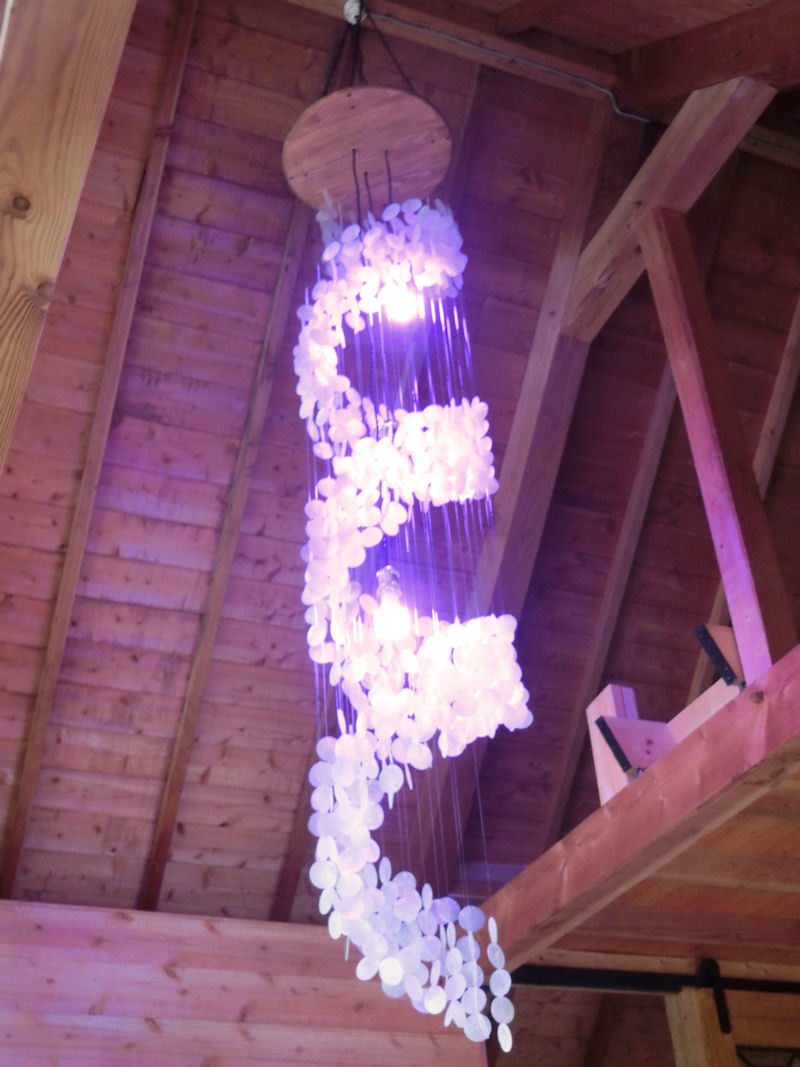
▲ スマートLED電球は普段電球色にしますが、この紫いろも結構楽しいですね!
いかがでしょうか?2万円と約80時間かかりましたが、だれでもできるDIYプロジェクトですね!
Those LED smartbulbs come with a remote control, of course, so I can change the normal warm lightbulb colour to something funky like this purple - which is very soothing!
In total I think it took somewhere around 80 hours to complete this chandelier (which I would have spent watching movies anyway), but for about $200 I think this project was well worth it! What do you think?
| << Planning a garage DIY車庫計画 2023-04-25 | Making a rustic antique-style wall light アンティークなライト作成 >> 2023-05-17 |
〒869-2226 熊本県阿蘇市乙姫2070-48
Aso City, Otohime 2070-48
Open from 13:00~17:00*
Fridays & Saturdays
(* if the door's closed, we might have popped out to walk the dog... back soon!)


")
阿蘇山の3D地図テーブルを作ってみた! I made a 3D MAP table!
3D阿蘇カルデラはいかがですか? 3D Maps added to the shop
Painted models available 塗装済の模型発売中!
Making garage doors ガレージの扉DIY作成
New side-project... a hobbit house! ホビットの家
Shops added to the shop ショップにお店
Repainting a (mini) car ミニカーのリペイント
Buying land in Otohime 乙姫で土地探し
Scale model of the Inaba Residence 稲葉家下屋敷の模型
Customer request - Pokemon Ball! ポケモンボール
Garage construction ガレージ工事 PART 6
Secret Aso-volcano pool 阿蘇山の隠れプール
Garage construction ガレージ工事 PART 5
Garage construction ガレージ工事 PART 4
Garage construction ガレージ工事 PART 3
Garage construction ガレージ工事 PART 2
Garage construction ガレージ工事 PART 1
Making a capiz shell wall light カピス貝殻壁掛けライト
Making a rustic antique-style wall light アンティークなライト作成
Making a capiz shell chandelier カピス貝殻シャンデリア
Online store opening sale グランドオープンの割引
Opening a webstore 通信販売サイトを開店します!
A lucky escape with the typhoon! 台風がヤバいけどラッキー!
E-bike conversion DIYで電動自転車を作った!
$200 Underfloor heating 2万円でDIY床暖房
3D-printed OPEN/ CLOSED sign アトリエ看板作成


 Shrine
 Temple
 Teahouse
 Castle
 Shops
Shops Houses
 Farm
Farm Other Buildings
 Walls & Fences
 Bridges
 Ponds
Ponds LED Lights