

 ホーム
ホーム ブログ
ブログ アクセス
アクセス3Dプリントアトリエ
| << Making a capiz shell chandelier カピス貝殻シャンデリア 2023-05-05 | Printing car parts 車パーツのプリント >> 2023-06-29 |
2階のリビングのライトが全部交換したいです。80年代のつまらないデザインだし、省エネのためにも新しくしたいですが、やはり4つのライトを購入すると高いですね。その代わりに自分で作成しようと考えています。これでちょうど会うデザインも作れるかもね!
まずは壁掛けのライトを古い80ワットから電球2個で合計8ワットに変わります。フランス風のアンティークなボックス形のデザインをネットで見ましたが、2万5千円ぐらいでした!
A little project I've been wanting to tackle for a while now is replacing the old lights in the 2F living room. They're all 80s-style boring globe lights, and I want to make them a little more stylish and unique - to match the recently-finished shell chandelier. As an added bonus to being able to update the style of the room, the new lights will all be low-energy LED bulbs fittings, too.
I found a French-inspired rustic antique-style wall light design I liked, which has 2 chandelier bulbs in a painted wooden box, but the price online was a staggering $250. So I decided to try making my own, with a little help from my 3D printers....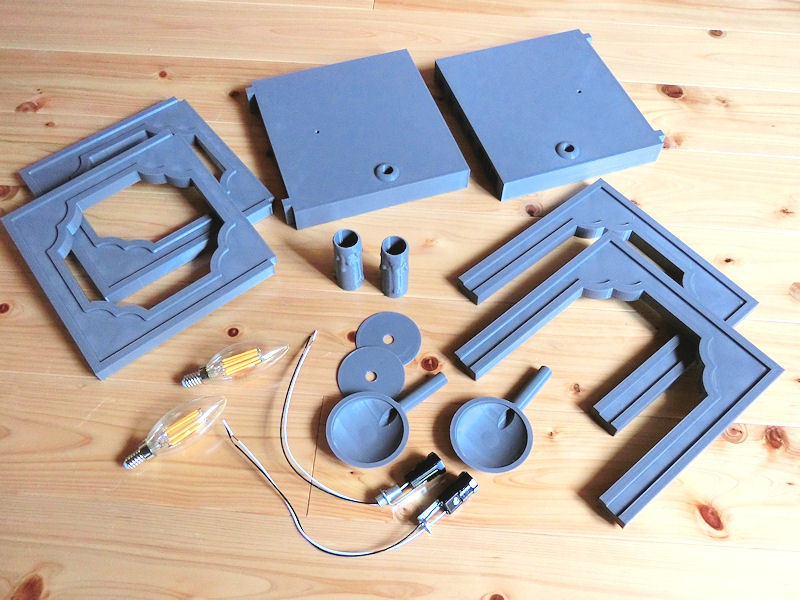
▲ 同じ風で3Dプリンターで作れるデザインを作ってみました。大体二日間かかりましたが、必要なパーツは約1000円のプラスチック材と300円の電球ソケット2個で集めました。そして、4ワットのE12電球はすでに持っていました。
After an evening of 3D modelling on the computer, I came up with a very similar design to the wall light, and after a couple of days of printing I had all these parts ready to assemble. It required about $10 of 3D-printer plastic, and a couple of E12 bulb sockets for $3 each. I had a couple of spare E12 LED chandelier bulbs in the cupboard, which would work perfectly!
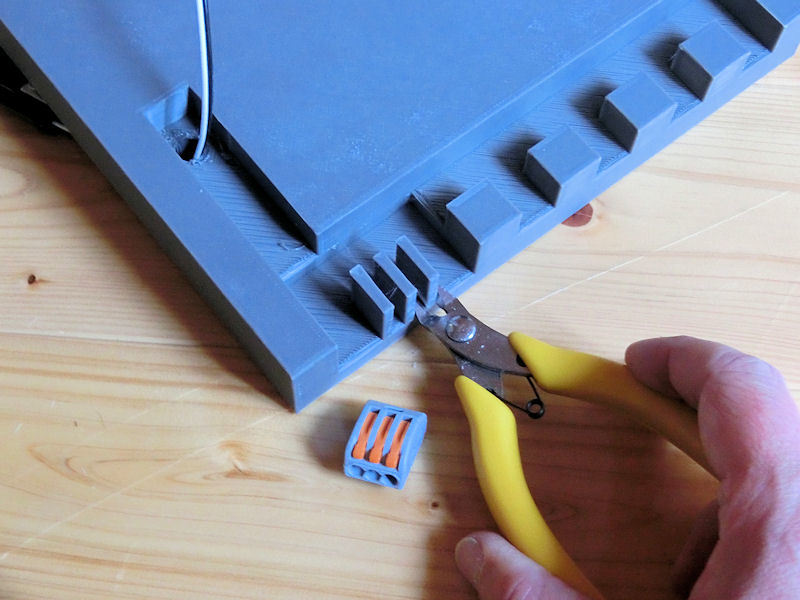
▲ ライトの裏側には電気配線のために開いているスペースを用意しました。
I designed a little bit of hidden space at the back of the pieces, to hide the wiring.
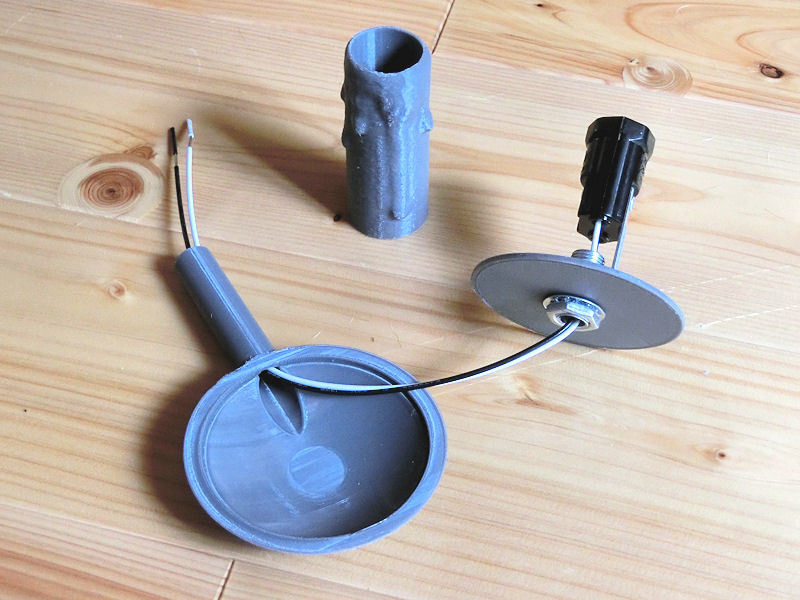
▲ アンティーク風の蝋燭形のソケットをデザインしました。偽物蝋燭の中にE12用のソケットをジャストフィットできました。
I carefully measured the space required to house the E12 sockets, and then (using the 3D software) cut a 21mm hole in this fake candle to hide everything.

▲ ソケットをホルダーに入れるとすべてのワイヤが隠せます。
Slotting the socket and base into this sconce, everything gets neatly hidden away.
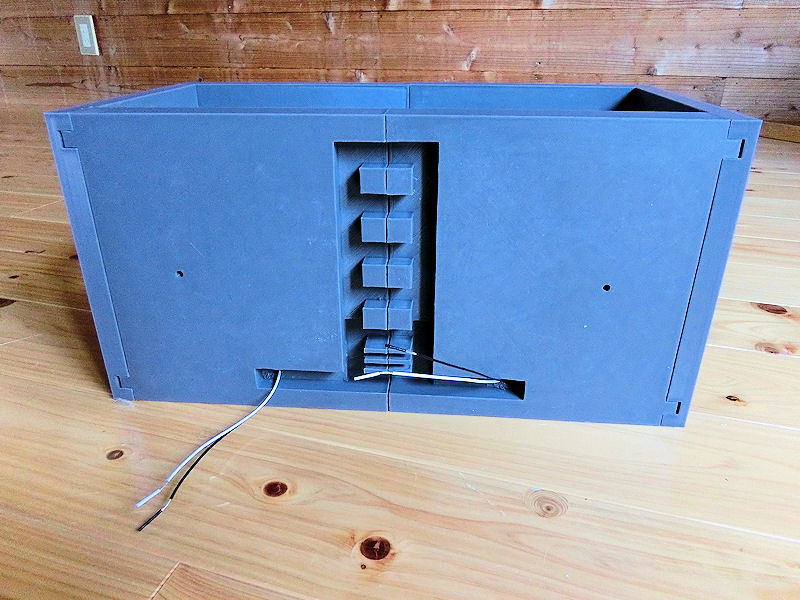
▲ 裏側の電気配線はこんな感じでした。
The rest of the wiring connections will be hidden at the back of the box.
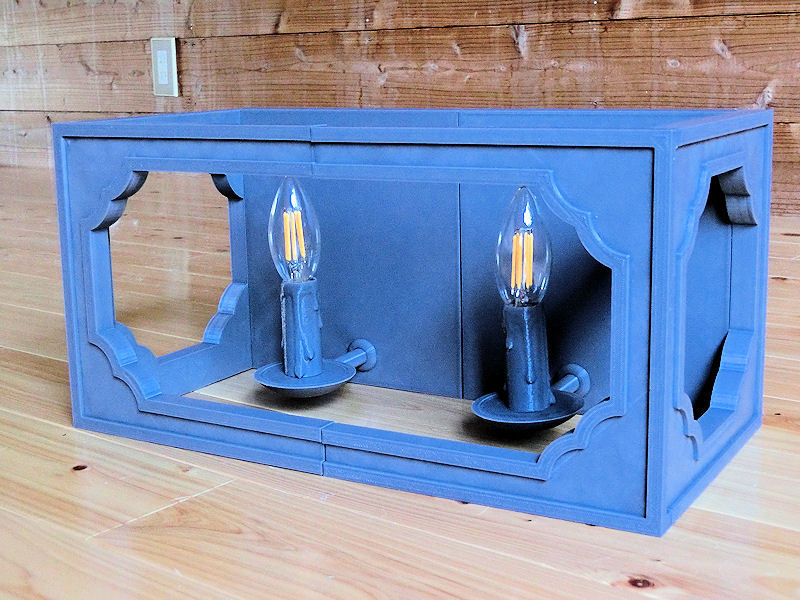
▲ すべてのパーツを組み合わせると完成品になりました。
しかし、アンティーク風にするとペイントが大事ですね!
Here's the finished light fitting, with bulbs in place.
However, that was only half the job, because for the correct rustic-feel, the paintjob would be very important.
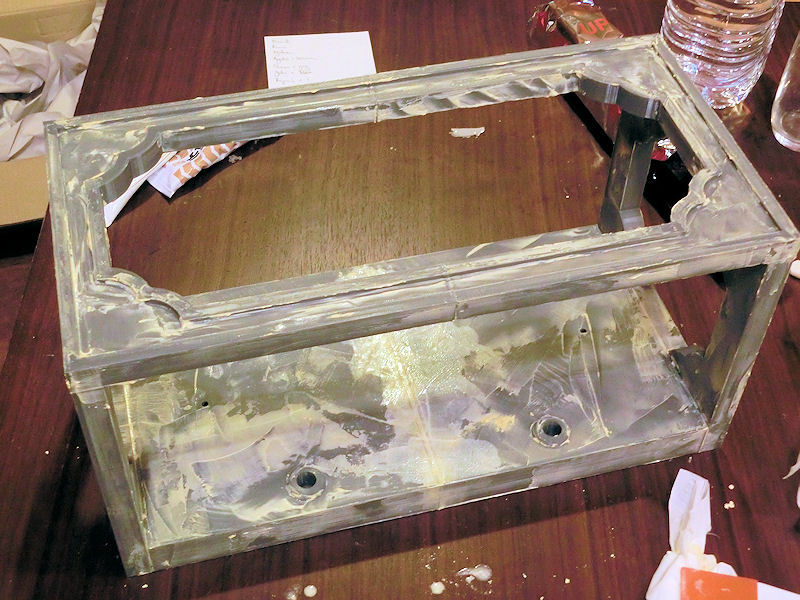
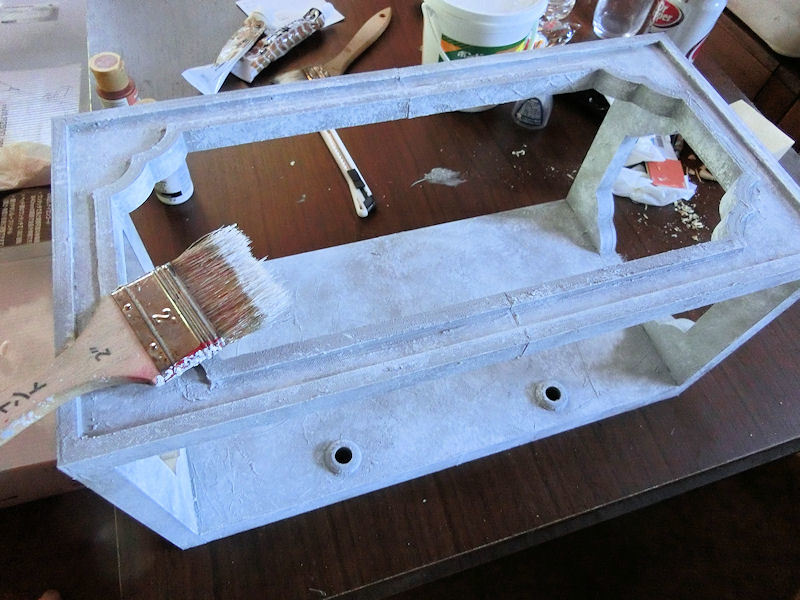
▲ ウッドパテを適当にベラでつけました。
I roughed up all those flat surfaces with some messy application of wood putty.
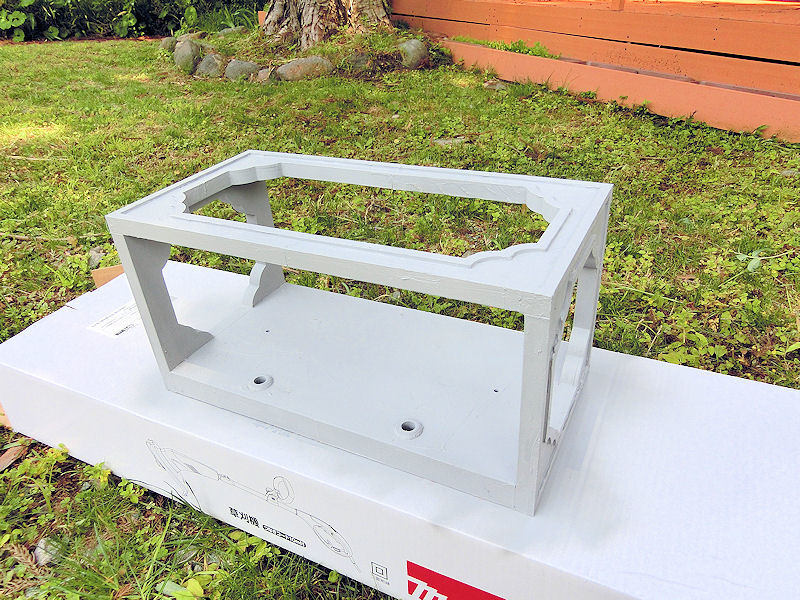
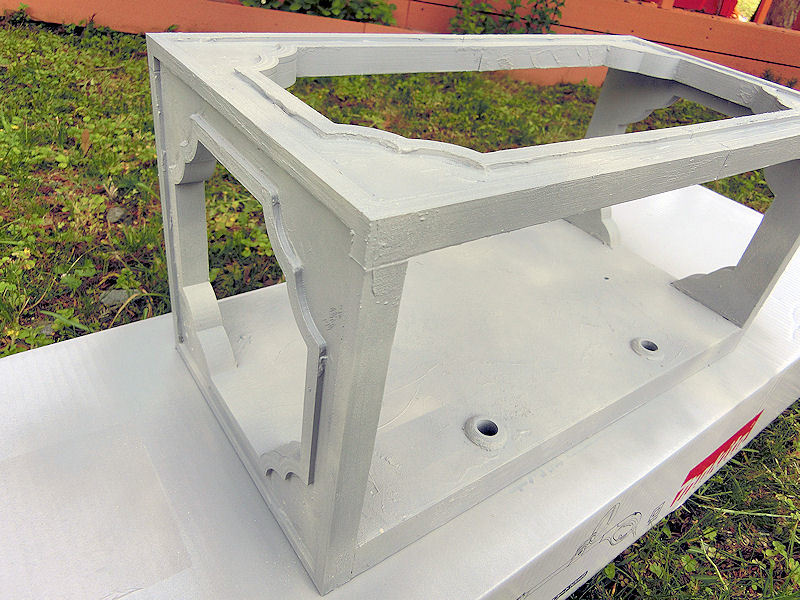
▲ そして、ライトグレーのツヤなしスプレーでベースコートしました。
Then the whole light was given a spray undercoat of light grey...
▲ その上に適当にクリーム色もあっちこっちにスプレーしました。
... followed by random patches of cream colour, sprayed on in light bursts.
▲ 白のアクリルペイントをちょっとづつでブラッシュで塗りました。英語の「stipple」は「点描」だそうです!
White acrylic paint was then carefully stippled on with a large brush, to break up the flatness.

▲ 飾りで、周りの部分に銅アクリルペイントをスポンジで押しました。アンティーク風ですのでこれも適当にしました。別にきれいじゃなくてもOKですね。銅の後に、金も同じ風にスポンジで押しました。
これで完成でした。。。
The edges received a patchy stippling with a sponge and some bronze paint ("Worn Penny", I think), and then again with gold paint just to brighten it up.
And with that, the light was finished!
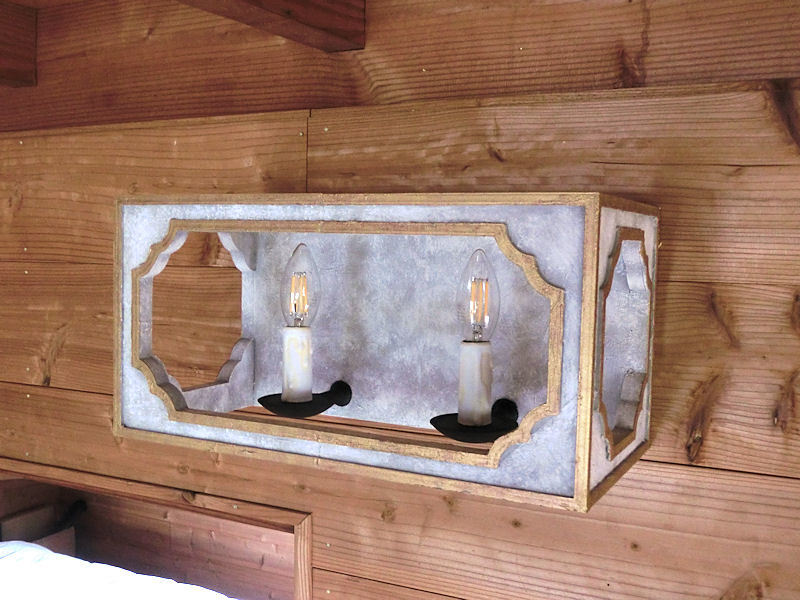
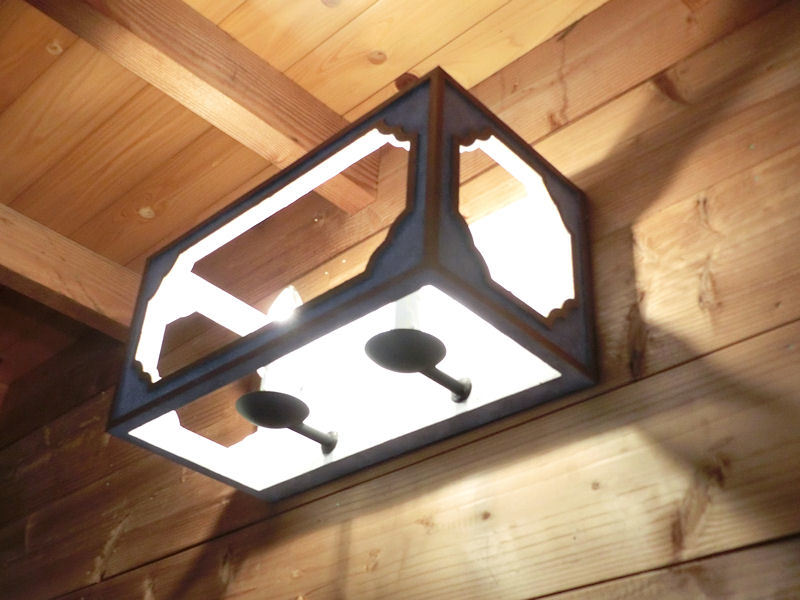
▲ 白い蝋燭を黒いホルダーの上に載せて、壁に付けました。どうでしょうか?
ちょっとユニークなライトになっていましたので、とても満足しています!
The matt black sconces were glued into place, and then the white candles slotted in on top and the whole light screwed to the wall.
I think it's a lovely unique design, and came out really well!
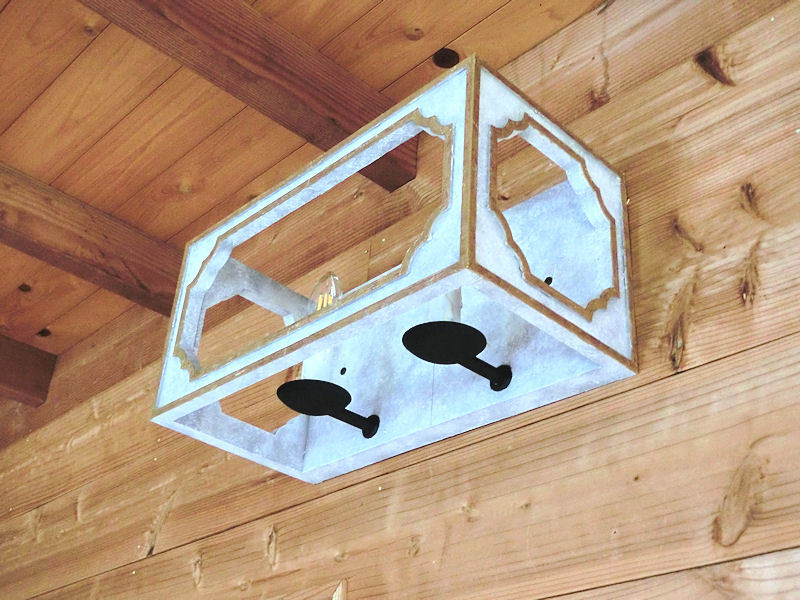
▲ 下から見ろと電気配線が全く見えません。
Even from directly beneath no wiring cables are visible.
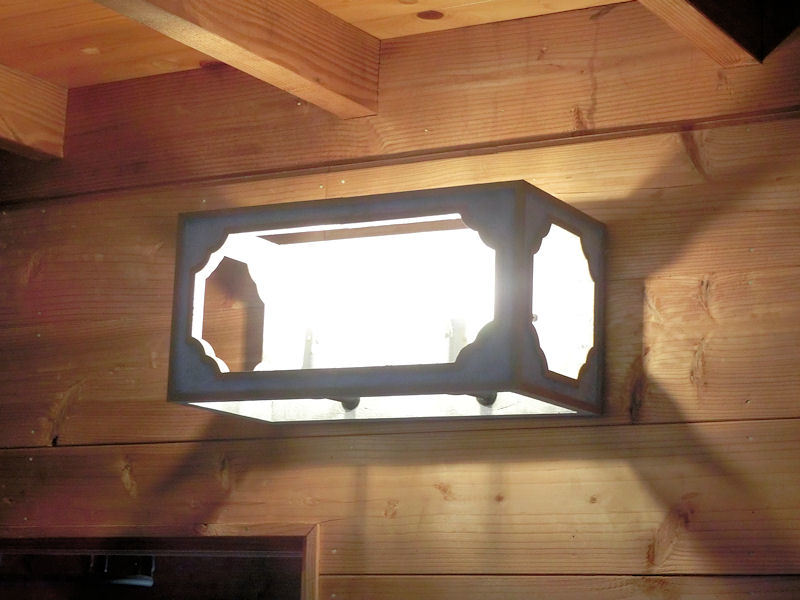
▲ ボックスの壁に大きい穴がありますので、結構照明が届きます。
The top and bottom of the light box let plenty of light through.
▲ ネット価格の25,000円とDIY価格の1,600円を比べたら、結構節約できました!やったー!
So for a project that cost only $16 instead of the $250 for the version on the net, I'm super happy with how it turned out!
| << Making a capiz shell chandelier カピス貝殻シャンデリア 2023-05-05 | Printing car parts 車パーツのプリント >> 2023-06-29 |
〒869-2226 熊本県阿蘇市乙姫2070-48
営業時間:13:00~17:00*
営業日:毎週金曜日・土曜日
(* ご来店前にお電話をお勧めします 090-1349-4029)


")
阿蘇山の3D地図テーブルを作ってみた! I made a 3D MAP table!
3D阿蘇カルデラはいかがですか? 3D Maps added to the shop
Painted models available 塗装済の模型発売中!
Making garage doors ガレージの扉DIY作成
New side-project... a hobbit house! ホビットの家
Shops added to the shop ショップにお店
Repainting a (mini) car ミニカーのリペイント
Buying land in Otohime 乙姫で土地探し
Scale model of the Inaba Residence 稲葉家下屋敷の模型
Customer request - Pokemon Ball! ポケモンボール
Garage construction ガレージ工事 PART 6
Secret Aso-volcano pool 阿蘇山の隠れプール
Garage construction ガレージ工事 PART 5
Garage construction ガレージ工事 PART 4
Garage construction ガレージ工事 PART 3
Garage construction ガレージ工事 PART 2
Garage construction ガレージ工事 PART 1
Making a capiz shell wall light カピス貝殻壁掛けライト
Making a rustic antique-style wall light アンティークなライト作成
Making a capiz shell chandelier カピス貝殻シャンデリア
Online store opening sale グランドオープンの割引
Opening a webstore 通信販売サイトを開店します!
A lucky escape with the typhoon! 台風がヤバいけどラッキー!
E-bike conversion DIYで電動自転車を作った!
$200 Underfloor heating 2万円でDIY床暖房
3D-printed OPEN/ CLOSED sign アトリエ看板作成


 神社
神社 寺
寺 茶屋
茶屋 城
城 店
店 家
家 農場
農場 建物その他
建物その他 壁・柵
壁・柵 橋
橋 池
池 LEDライト