

 ホーム
ホーム ブログ
ブログ アクセス
アクセス3Dプリントアトリエ
| << Making a rustic antique-style wall light アンティークなライト作成 2023-05-17 | Making a capiz shell wall light カピス貝殻壁掛けライト >> 2023-07-18 |
ずっと前から車のナンバーを変えたかったので、やっとできました!「北九州」ナンバーから「熊本」ナンバーに変更するのがせっかくですので、好きな番号の「1957」も選べました。
I'd been wanting to change the number plates on the car for a while now, and since I finally had all the documents ready to change it from the Kitakyushu plates to shiny new Kumamoto plates, I also splashed out an extra $30 to get a personalised number. (It was a right pain in the arse, though - with two mornings wasted in tedious paperwork at the prefectural motor vehicle department!)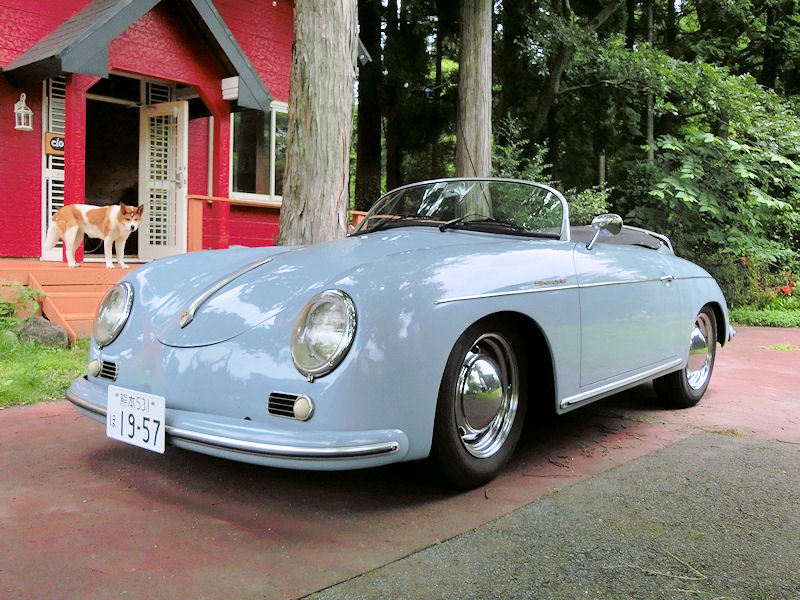
▲ このレプリカの年式が若干違うんですが、元のデザインは1957年でした。似合うでしょう?
Doesn't that look better?! Although this replica actually uses a 1968 chassis, I opted for these '1957' plates, which is the year of the original design of the Porsche 356. Looks lovely, I think. :)
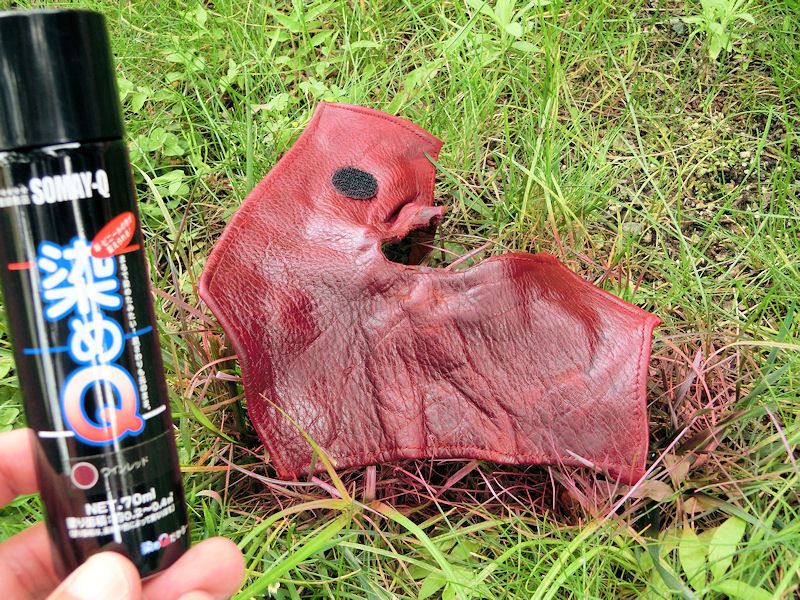
▲ そして、車のインテリアもちょっとリフレッシュするために、シフトレバーのカバーも再スプレーしました。何年前に作ったカバーを再び同じ色の「ワインレッド」革用のペイントにしたんです。
Anyway, to celebrate getting those cool plates I also decided to spruce up the interior a little, by respraying the shiftlever boot I made a few years back. A quick respray with this leather dye, and it looked as good as new.
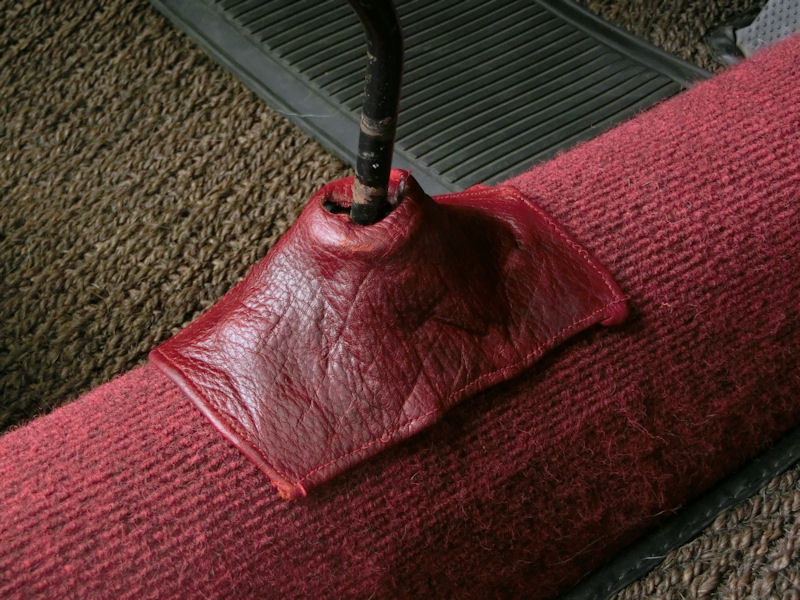
▲ なかなかいいでしょう?
That makes my heart smile!
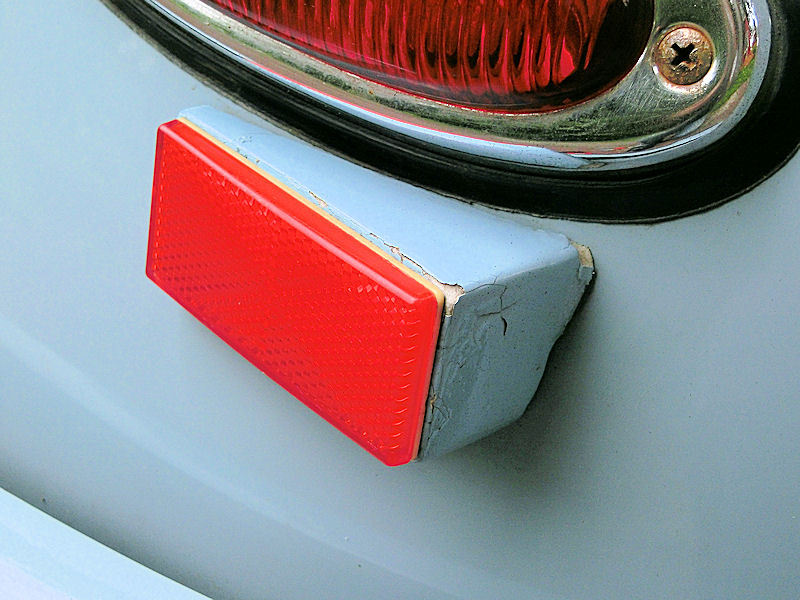
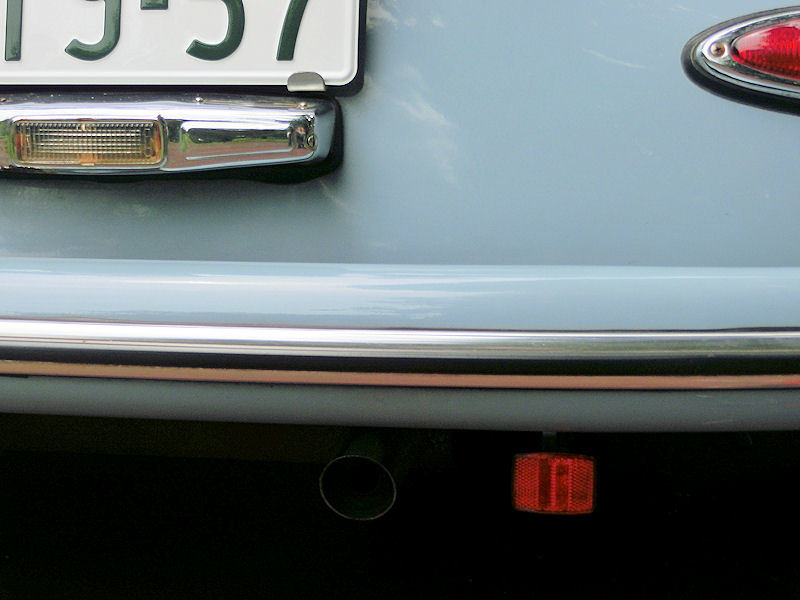
▲ そして、今回の作品は後ろにあったリフレクターですね。8年前に、日本の初車検の時にこれが必要だったみたいです。しかし、8年後の状態がよくないんですね。フォームで作られて、ペイントのひびもありますがネットで購入すると車のボディに穴を開けないといけないんです。あまりしたくないので、自作のやつを作れるかなぁと思ったんです。
Okay, on to the main point of today's blog..... these rear reflectors! In order to pass Japan's strict road-test when it was first registered 8 years ago, the importer's garage fitted these handmade foam blocks to mount rear reflectors. But over the past few years they've started to crack and split, and generally look a bit rubbish. I could remove them completely, but then it would be illegal for the next road-test, and also unsafe at night.
The only ones available for this type of car, apart from being stupidly expensive, also require you to drill holes in that lovely body. So, to avoid doing that, I decided to try my hand at designing my own mounts.
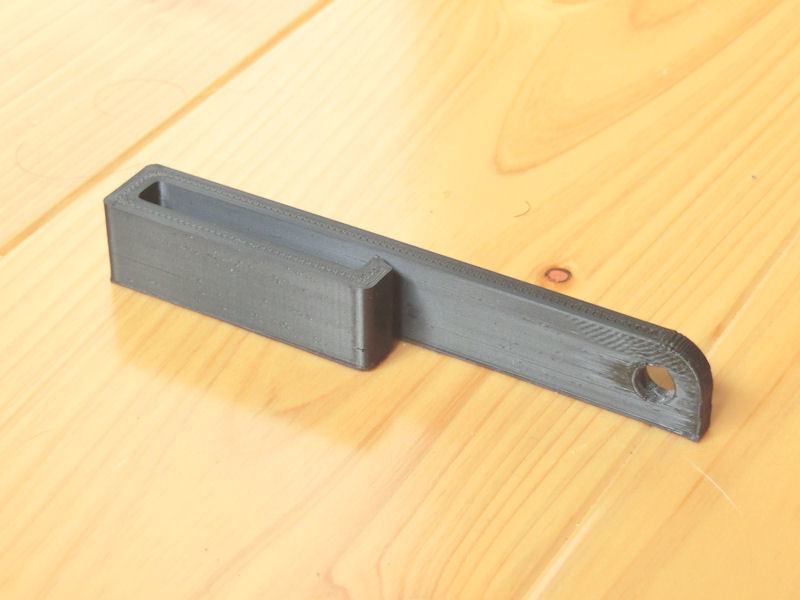
▲ 自作デザインで3Dプリントしました。しかし、いつも使われているPLAプラスチックが熱にちょっと弱いので、今回ABS材で作りました。PLAは200℃で溶けますがABSは約240℃で溶けるので、車パーツにも使えそうだ。
I came up with this simple bracket design (available on Thingiverse for anybody who wants it), and printed it on the 3D printer. I normally print in PLA plastic, but for car exterior parts I decided to try printing it in ABS plastic - which has a higher melting point and is therefore much more durable in the sun and rain. Happily, my first attempt with ABS seemed to work without problems, which is great for such a low-cost printer.
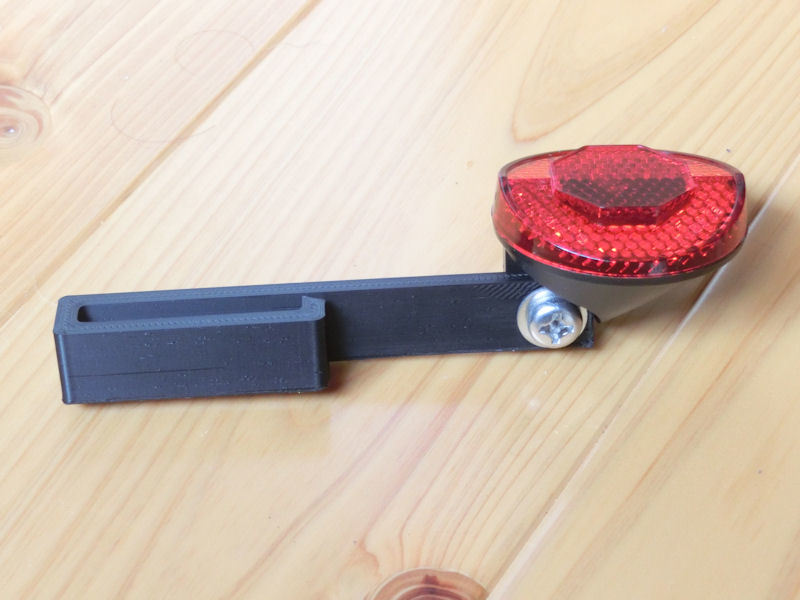
▲ 自転車用のリフレクターをボルトでつけるとこんな感じです。
I mounted a cheap bicycle reflector to the bracket with a simple bolt and nut.
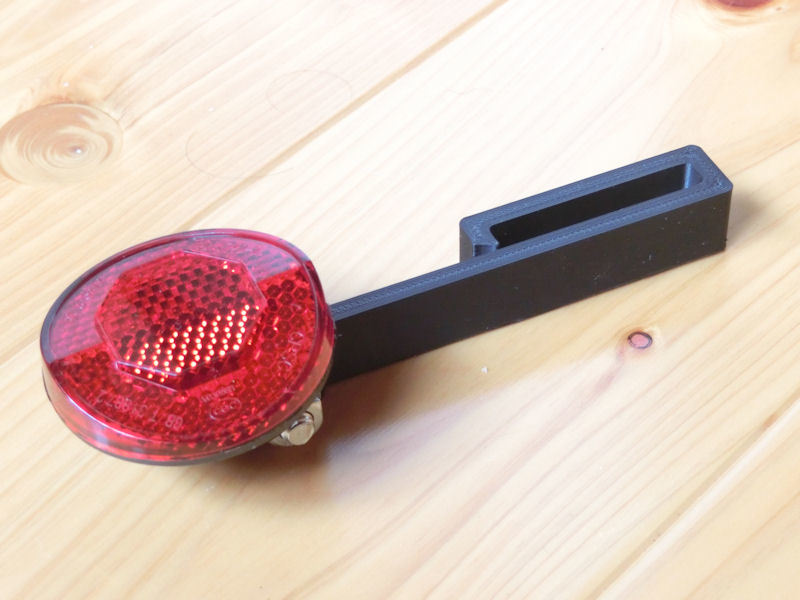
▲ 形を試すために3つのパターンを買いました。
In fact, I bought 3 different reflectors, to see which would look best on the car!
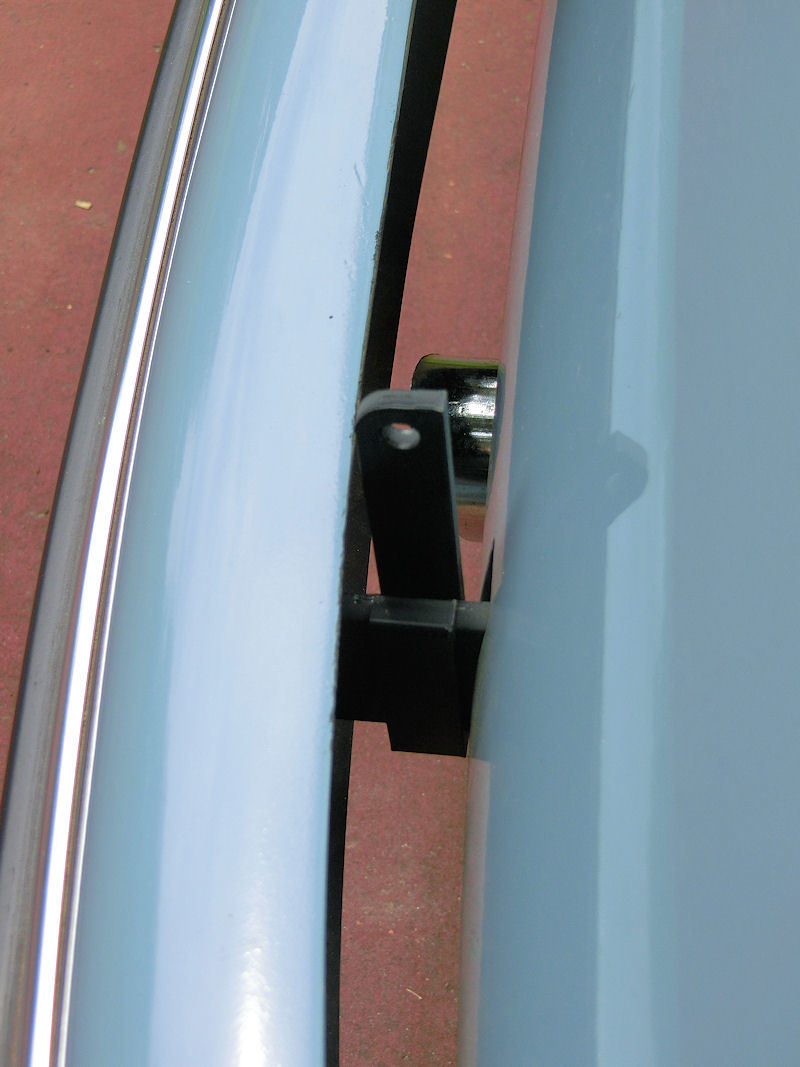
▲ リアバンパーの所にちょっと両面テープを付けると落ちないようにぴったりフィットします。
The bracket clips itself to the mounting bracket for the rear bumper, and a short piece of double-sided tape will hold it in place firmly.
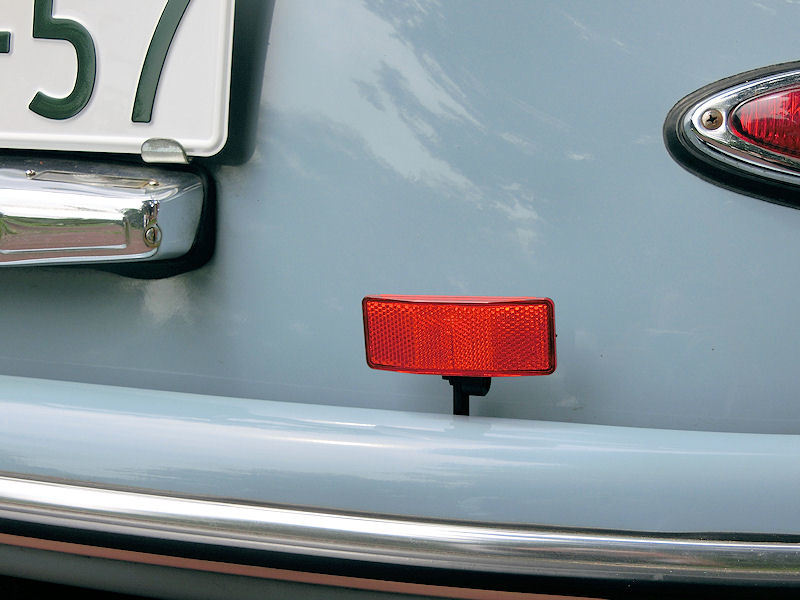
▲ バンパーの上に向いたらこんな感じとなります。やはり大きすぎです。
This was the first reflector shape I tried, which looked too big.
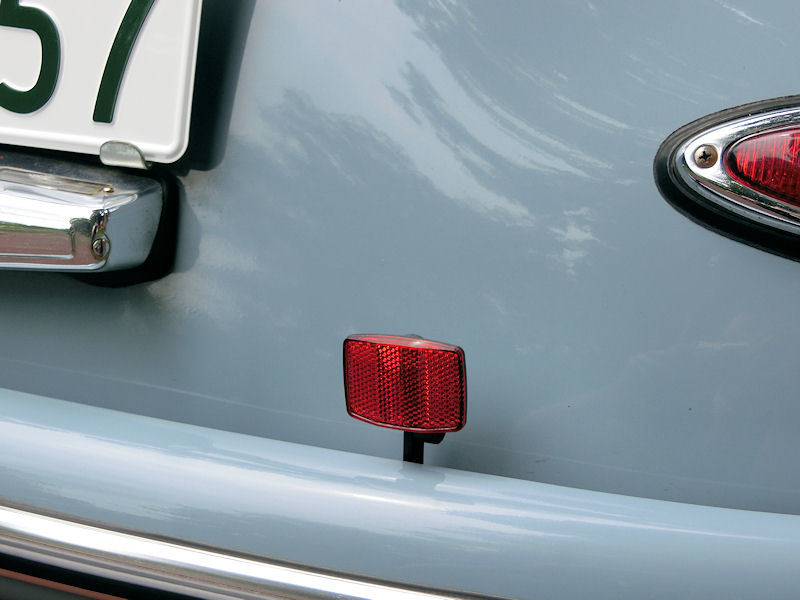
▲ 小さいサイズを付けるとよくなったが。。。
A smaller reflector looked better, but I had one more to try.
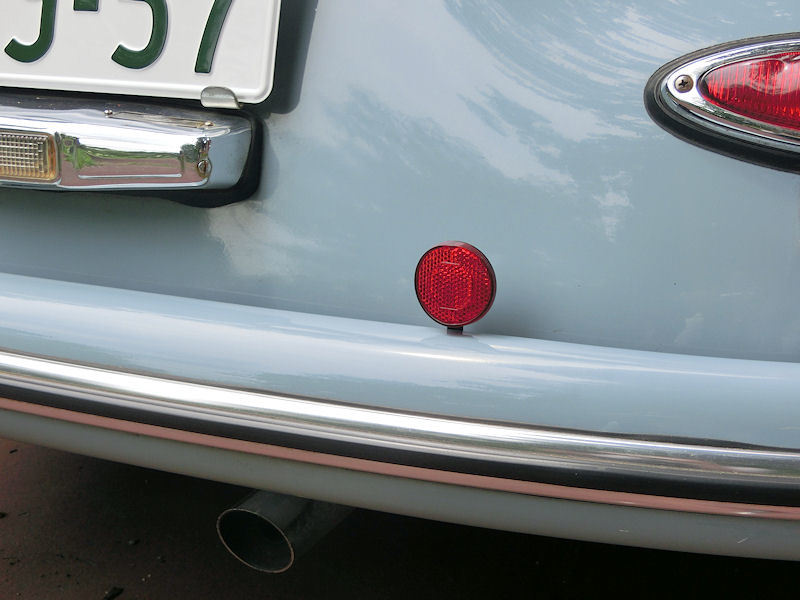
▲ 形的に丸いデザインのほうが好きです。
This little round reflector worked great, but looked a little odd above the bumper.
▲ しかし、バンパーの上だったらちょっと目立つすぎかもしれないので、下にも試してみました。
Luckily, the bracket could also be pointed down to mount a reflector below the bumper, so I tried all 3 designs again...
▲ よくなりましたが。。。
Smaller is definitely better...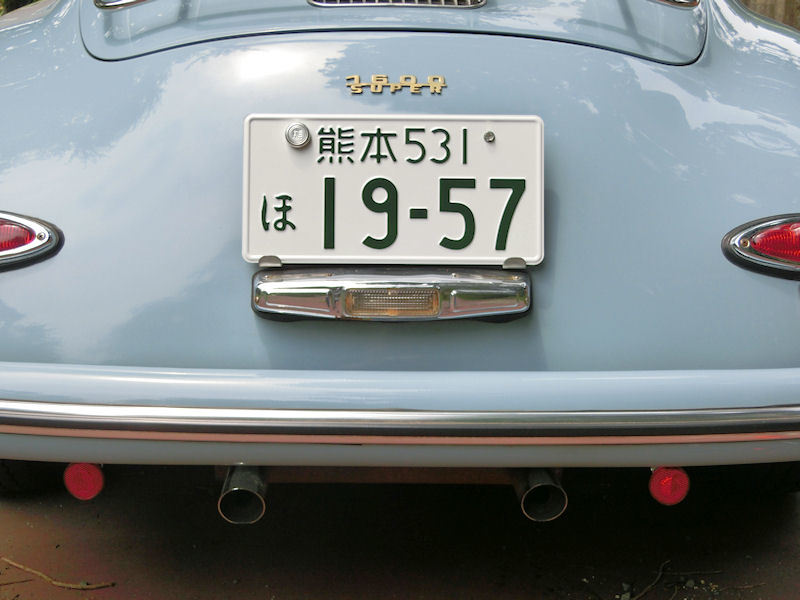
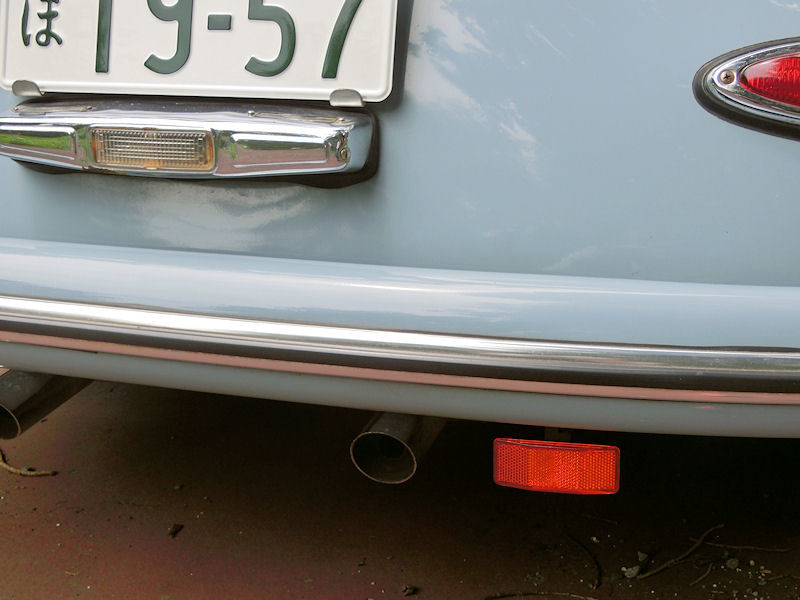
▲ やはりこの丸いデザインにしますね!
目立たないし、暗い道で見えますね。よし、決まりです!
...but I reckon the round ones look best, so we have a winner! They're discreetly placed below the bumper, but are perfectly positioned for cars behind. Success!
Next job is to get the garage built, so I have somewhere to keep this beautiful car!
| << Making a rustic antique-style wall light アンティークなライト作成 2023-05-17 | Making a capiz shell wall light カピス貝殻壁掛けライト >> 2023-07-18 |
〒869-2226 熊本県阿蘇市乙姫2070-48
営業時間:13:00~17:00*
営業日:毎週金曜日・土曜日
(* ドアが閉まっている場合もあります ー 近くにいます。ちょっとお待ち下さい!)


")
阿蘇山の3D地図テーブルを作ってみた! I made a 3D MAP table!
3D阿蘇カルデラはいかがですか? 3D Maps added to the shop
Painted models available 塗装済の模型発売中!
Making garage doors ガレージの扉DIY作成
New side-project... a hobbit house! ホビットの家
Shops added to the shop ショップにお店
Repainting a (mini) car ミニカーのリペイント
Buying land in Otohime 乙姫で土地探し
Scale model of the Inaba Residence 稲葉家下屋敷の模型
Customer request - Pokemon Ball! ポケモンボール
Garage construction ガレージ工事 PART 6
Secret Aso-volcano pool 阿蘇山の隠れプール
Garage construction ガレージ工事 PART 5
Garage construction ガレージ工事 PART 4
Garage construction ガレージ工事 PART 3
Garage construction ガレージ工事 PART 2
Garage construction ガレージ工事 PART 1
Making a capiz shell wall light カピス貝殻壁掛けライト
Making a rustic antique-style wall light アンティークなライト作成
Making a capiz shell chandelier カピス貝殻シャンデリア
Online store opening sale グランドオープンの割引
Opening a webstore 通信販売サイトを開店します!
A lucky escape with the typhoon! 台風がヤバいけどラッキー!
E-bike conversion DIYで電動自転車を作った!
$200 Underfloor heating 2万円でDIY床暖房
3D-printed OPEN/ CLOSED sign アトリエ看板作成


 神社
神社 寺
寺 茶屋
茶屋 城
城 店
店 家
家 農場
農場 建物その他
建物その他 壁・柵
壁・柵 橋
橋 池
池 LEDライト