


3D-Print Studio
| << Printing car parts 車パーツのプリント 2023-06-29 | Garage construction ガレージ工事 PART 1 >> 2023-07-25 |
今回2Fリビングの壁掛けライトを交換しようとしています。春に作ったカピスのシャンデリアが大変お満足していますので、壁掛けライトにもカピスを利用したいですね。ただし、丸い形の貝殻ではなく、四角の貝殻を注文しました。
Finally it's time to change out the last 3 lights in the house for something new, and I decided to try making some more capiz shell lights again, to match the giant capiz shell chandelier in the living room upstairs. These wall lights are much, much smaller than the 3m-tall chandelier, and I wanted to try square shells instead of round ones this time.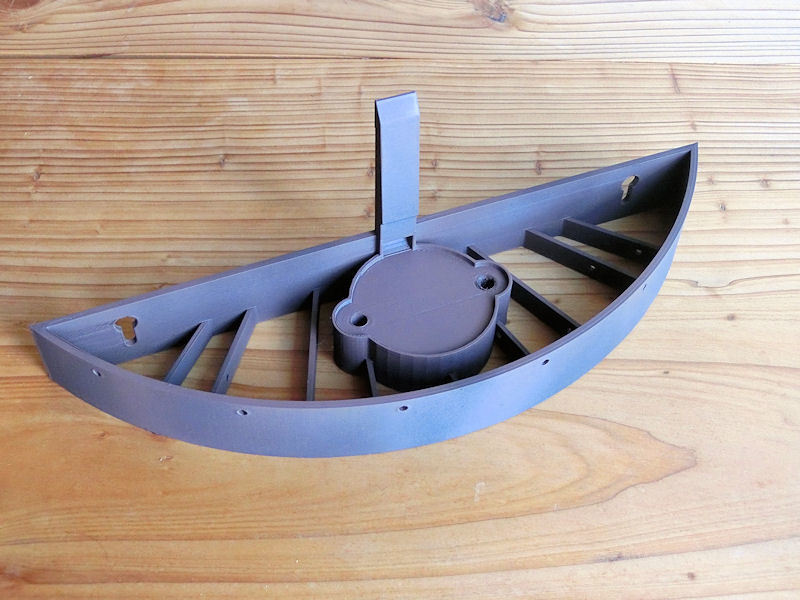
▲ この形の壁掛けライトを3Dプリントのソフトでデザインしました。ファイルをこちらに載せました。
I came up with this semi-circular wall light design, and managed to 3D print it in one piece. The print files are on Thingiverse for anybody who wants to try making their own!
▲ アンティーク風のゴールドに塗りました。黒のスプレーの上に磨き塗り(Drybrush)でペイントしました。
I painted the lights in a dark antique gold effect, to match the little metal rings I'd bought. This was a simple job of black spray undercoat, and then careful drybrushing and gentle stippling with gold acrylic paint.
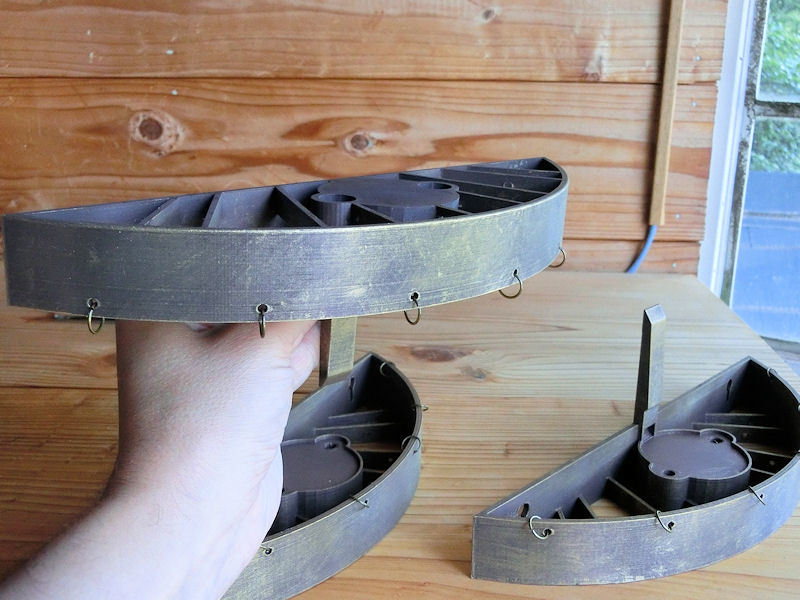
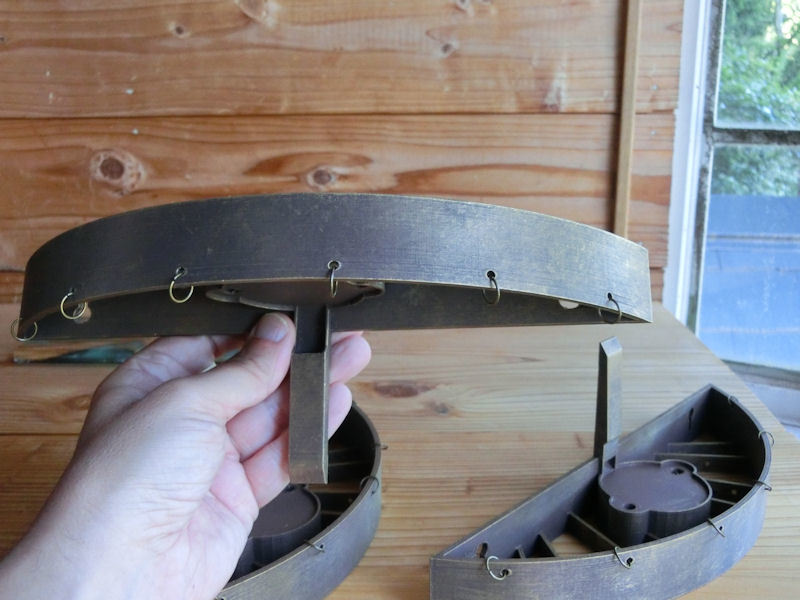
▲ そして、正面に10mmのリングを付けました。100個でたった300円でした。
I bought 100 of these small 10mm gold rings online, for about $3.
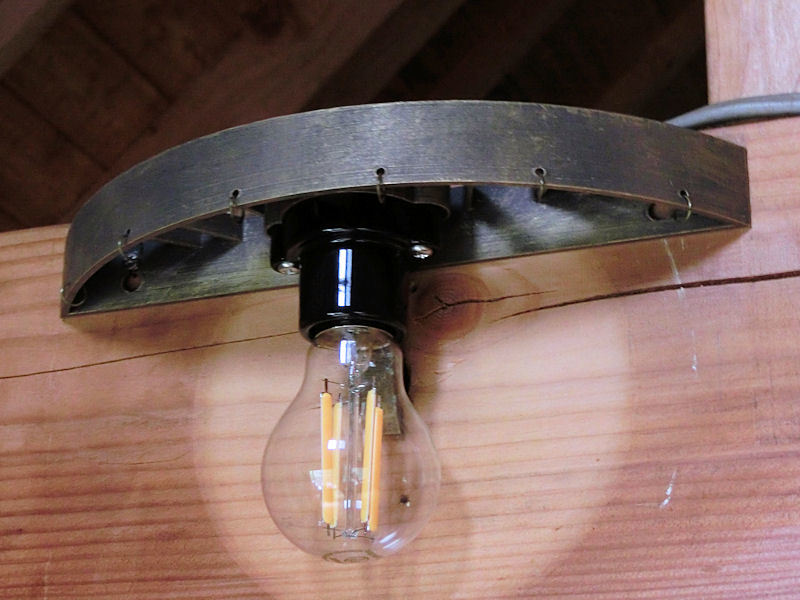
▲ このE27サイズのソケットをボルトで付けて、電気配線を見えない穴に入れました。
I also bought 3 of these basic lightbulb sockets from Amazon Japan, for E27 LED bulbs which I had spare in the cupboard. The wiring is hidden in a narrow cable channel in the back.
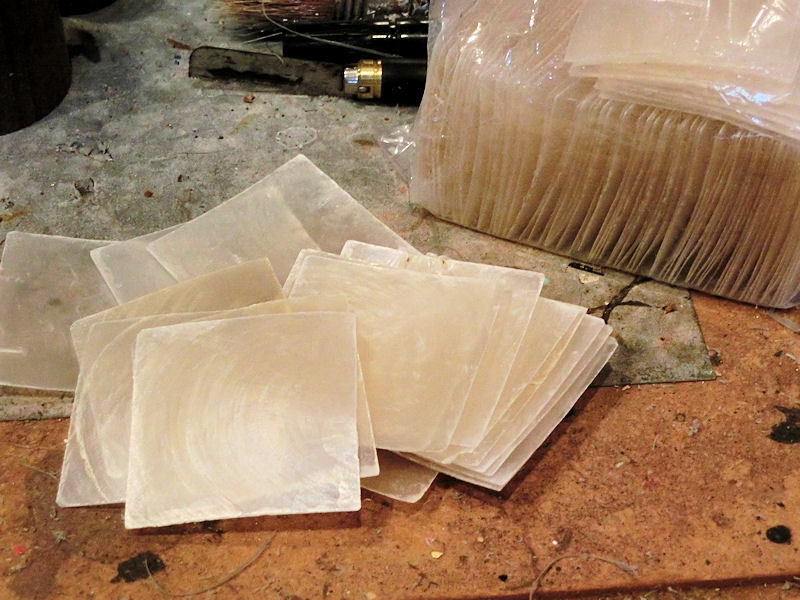
▲ 残りはカピスの貝殻ですね。Ebayのほうから100枚の四角貝殻を注文しましたが、届くまでは1か月ほどかかりました。しかし、丸い形が届いた!残念。Ebayにクレームをして、返金できたんです。そして、2回目も同じ店から注文しました。送料込みで8000円ほどでした。今回四角貝殻届きましたが、穴は空いていなかった!ガッカリ
The only expensive part of these lights was buying the capiz shells, as square ones are harder to find than round ones, and therefore cost more. I ordered a hundred of these 50mm square capiz shells from Ebay, for about $60 including shipping. Unfortunately, after waiting a whole month for them to arrive, I received a package of 100 ROUND ones! Oh dear.
Happily, Ebay refunded my money and I quickly placed another order from the same shop - and finally I received my square shells! (....but they did forget to drill the holes out.... grrrrr)
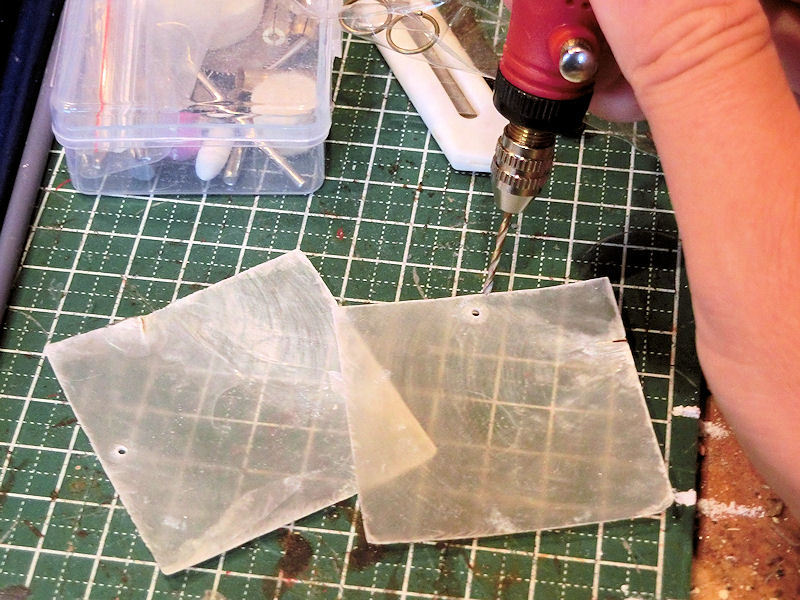
▲ ミニドリルで2ミリの穴を開けました。
I used a mini drill to drill 2mm holes in each one - and didn't break a single one! Yay
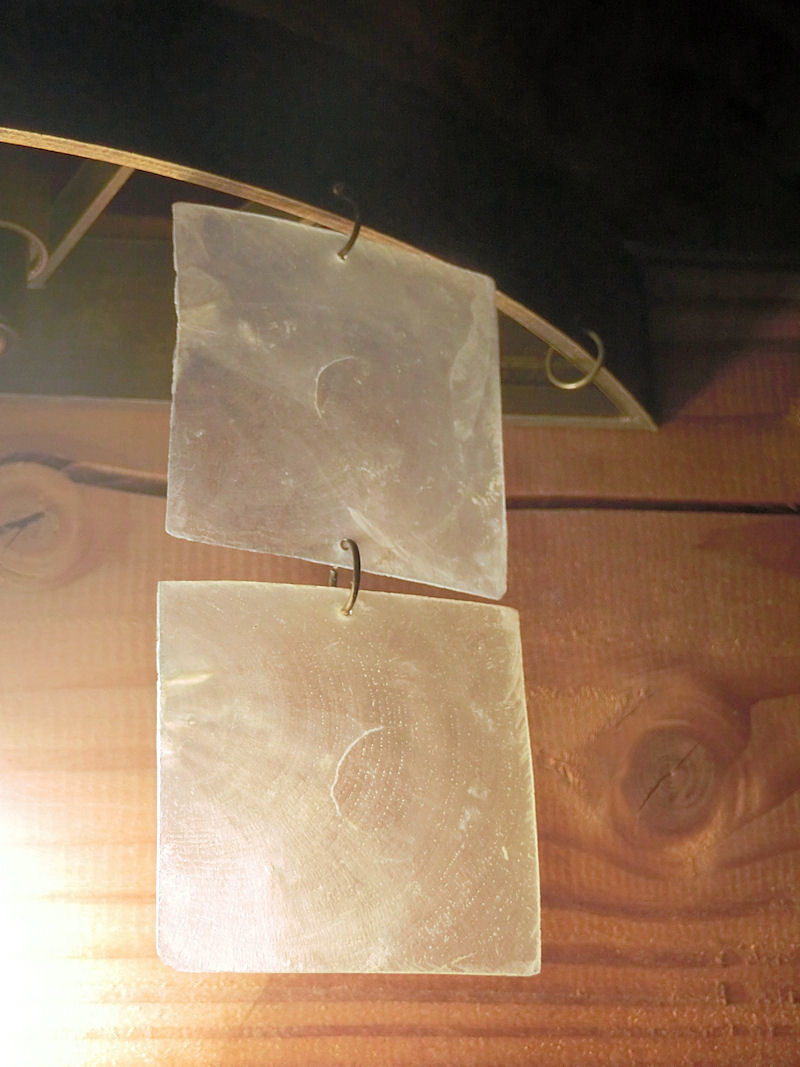
▲ リングでつながって、1行と2行の貝殻がこんな感じになりました。
This is how it looked when I test-fitted two shells. Good so far!
▲ 3行目の貝殻には透明の糸でつながろうとしましたが、やはり大変でした。貝殻が回って回ってしていました!
その代わりにハンガーをプリントしました。それが簡単でしたので、貝殻が前向きにちゃんと並べました。
I originally planned to hang the 3rd and 4th rows of shells with clear thread, but this proved very fiddly to tie in knots, and the shells kept spinning around - so I decided to print some simple hanging hooks instead. This were much easier to fit, and prevented the shells from spinning around.
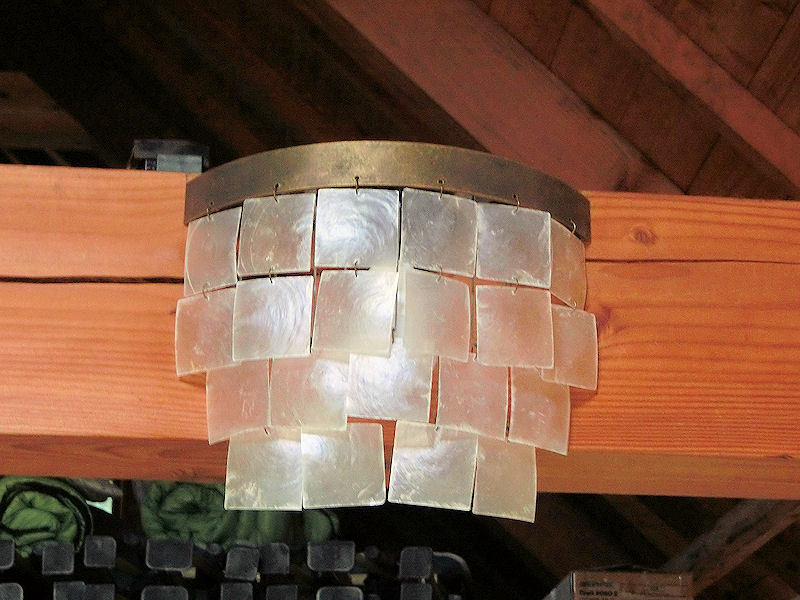
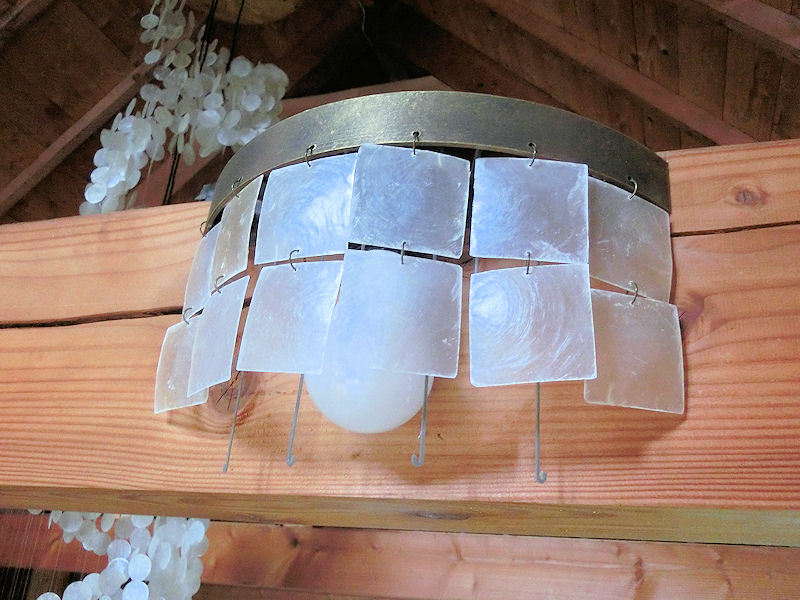
▲ 3行と4行をハンガーに下がると完成になりました!隙間があっちこっちにありますが、これでOKですね。
Hanging the 3rd and 4th rows of shells was easy enough, and I was happy with the end result!
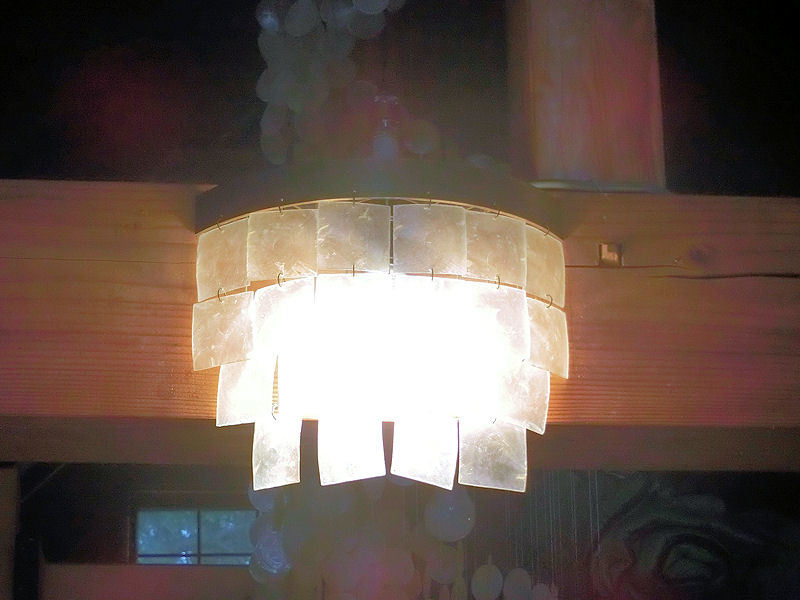
▲ ライトをつけるとこんな感じです!どうですか?
With the bulb turned on, it diffuses the light enough to look pretty good, I think. Do you like it?
| << Printing car parts 車パーツのプリント 2023-06-29 | Garage construction ガレージ工事 PART 1 >> 2023-07-25 |
〒869-2226 熊本県阿蘇市乙姫2070-48
Aso City, Otohime 2070-48
Open from 13:00~17:00*
Fridays & Saturdays
(* best to call beforehand 090-1349-4029!)


")
阿蘇山の3D地図テーブルを作ってみた! I made a 3D MAP table!
3D阿蘇カルデラはいかがですか? 3D Maps added to the shop
Painted models available 塗装済の模型発売中!
Making garage doors ガレージの扉DIY作成
New side-project... a hobbit house! ホビットの家
Shops added to the shop ショップにお店
Repainting a (mini) car ミニカーのリペイント
Buying land in Otohime 乙姫で土地探し
Scale model of the Inaba Residence 稲葉家下屋敷の模型
Customer request - Pokemon Ball! ポケモンボール
Garage construction ガレージ工事 PART 6
Secret Aso-volcano pool 阿蘇山の隠れプール
Garage construction ガレージ工事 PART 5
Garage construction ガレージ工事 PART 4
Garage construction ガレージ工事 PART 3
Garage construction ガレージ工事 PART 2
Garage construction ガレージ工事 PART 1
Making a capiz shell wall light カピス貝殻壁掛けライト
Making a rustic antique-style wall light アンティークなライト作成
Making a capiz shell chandelier カピス貝殻シャンデリア
Online store opening sale グランドオープンの割引
Opening a webstore 通信販売サイトを開店します!
A lucky escape with the typhoon! 台風がヤバいけどラッキー!
E-bike conversion DIYで電動自転車を作った!
$200 Underfloor heating 2万円でDIY床暖房
3D-printed OPEN/ CLOSED sign アトリエ看板作成


 Shrine
 Temple
 Teahouse
 Castle
 Shops
Shops Houses
 Farm
Farm Other Buildings
 Walls & Fences
 Bridges
 Ponds
Ponds LED Lights