


3D-Print Studio
| << Garage construction ガレージ工事 PART 4 2023-08-20 | Secret Aso-volcano pool 阿蘇山の隠れプール >> 2023-09-16 |
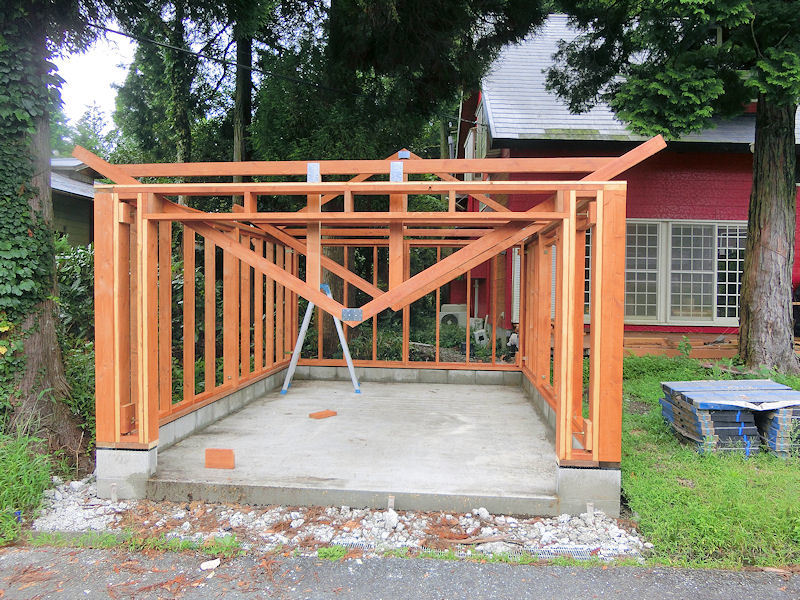
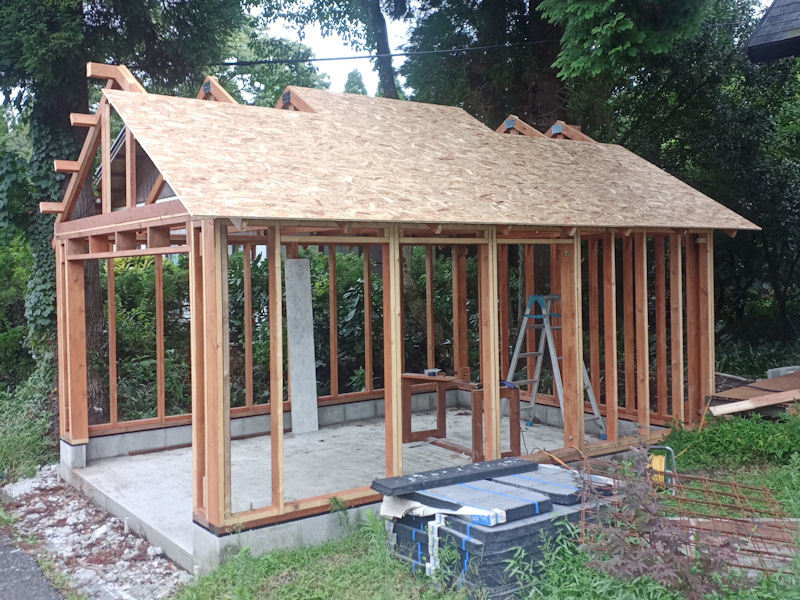
まだまだガレージ工事が半分しか完成していないんですが、これから早くできそうですね!壁のフレームができましたので、次は屋根のフレームですね。。。
The garage is about half-finished now, but thankfully all of the hard, backbreaking jobs are pretty much done, so everything should move along quite quickly from this point. The wall frames have all been bolted together, so the next part of the build is to add a roof frame....
▲ 屋根のフレームも安いツバイフォー(2x4s)でできています。簡単な三角な形なので作成は結構簡単でした。ただし、載せるのは一人ではちょっと難しかったので、誰かが手伝いできる日まで一応壁フレームの家に載せました。
The roof trusses were put together using reasonably cheap 2x4s, although this did require some pretty long beams this time. Thankfully, I was able to borrow the free kei truck from my local DIY store to bring everything to the house.
Putting together the trusses was pretty easy, and once the first was complete it was just a matter of stacking the next one on top and copying and pasting the process. But the main problem was actually getting those long trusses safely up on to the walls and screwed in place.
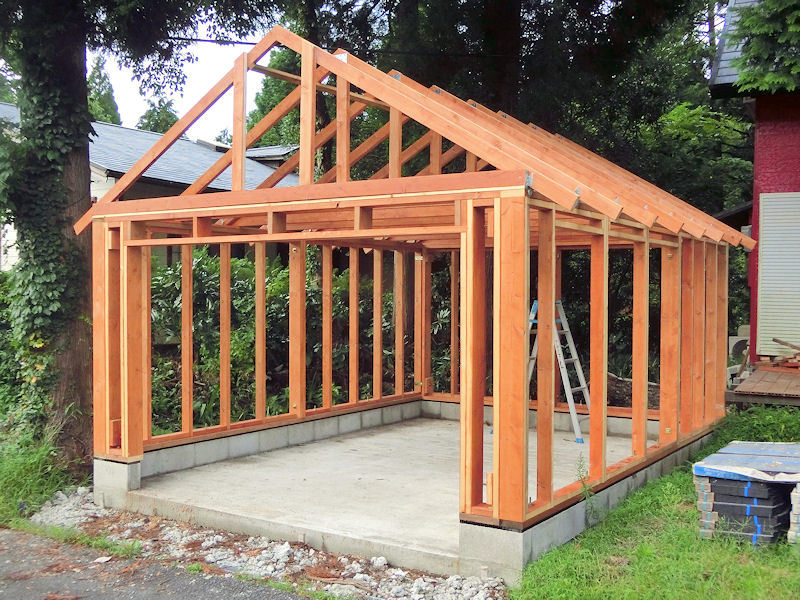
▲ そして、友達の開いている日に二人で上に載せて、「Simpson社」の台風用ブラケットで位置を固定しました。
Happily, a friend was able to give me a free hour of their time to push the trusses up and put them into place. I used cheap galvanised steel storm brackets to mark off the correct locations, and then simply slotted the trusses into each bracket before nailing and screwing them down.
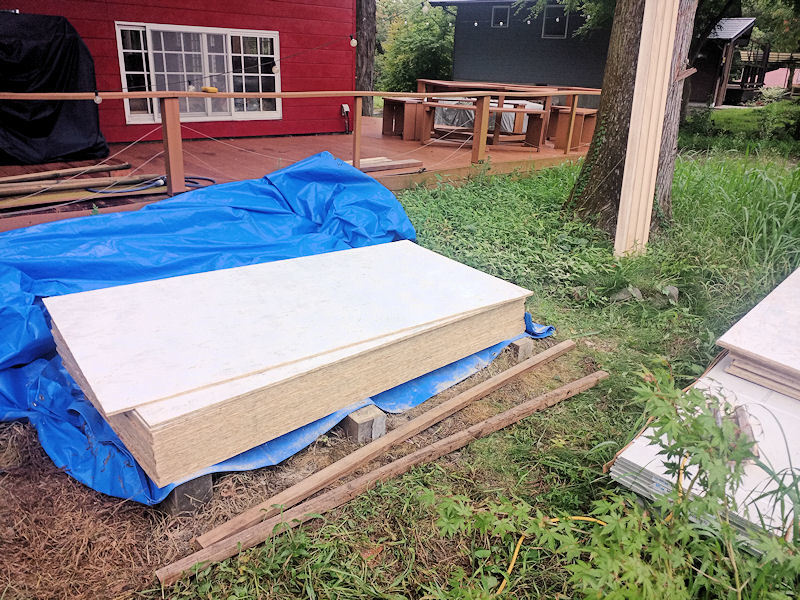
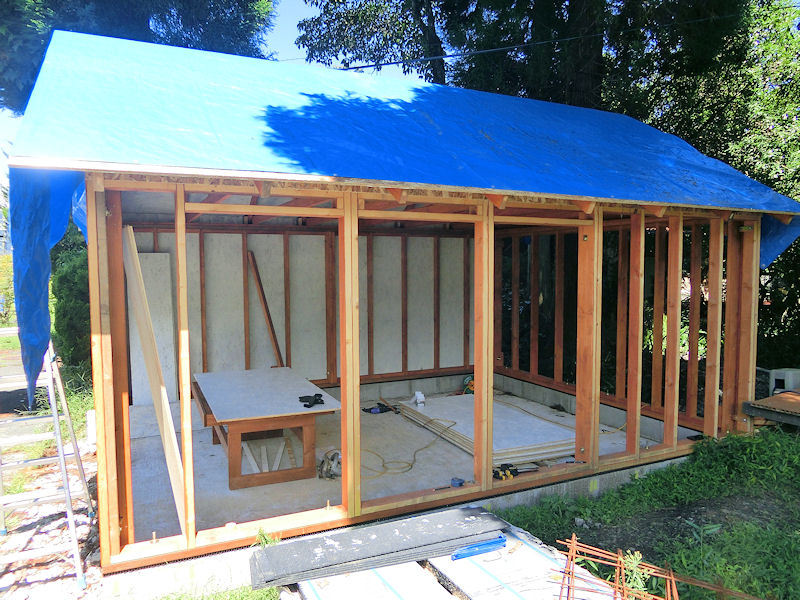
▲ 次は屋根のボードですね!このOSBボードを張れば、フレームを強化できますので壁でも屋根でも利用します。内面を白く塗れば、簡単なインテリア塗装もできそうですね。ただし、今回34枚もありますので、ローラーで塗りました。
The next step was to screw down a covering of boards onto the roof trusses, to tie them all together into a rigid structure. OSB boards are designed to strengthen to structure of a building, when used for roofing and walls, and I decided to also paint one side of each board white, to act as a cheap way of decorating the interior of the garage. Since there were 34 boards in total, I used a paint roller for the first time in my life!
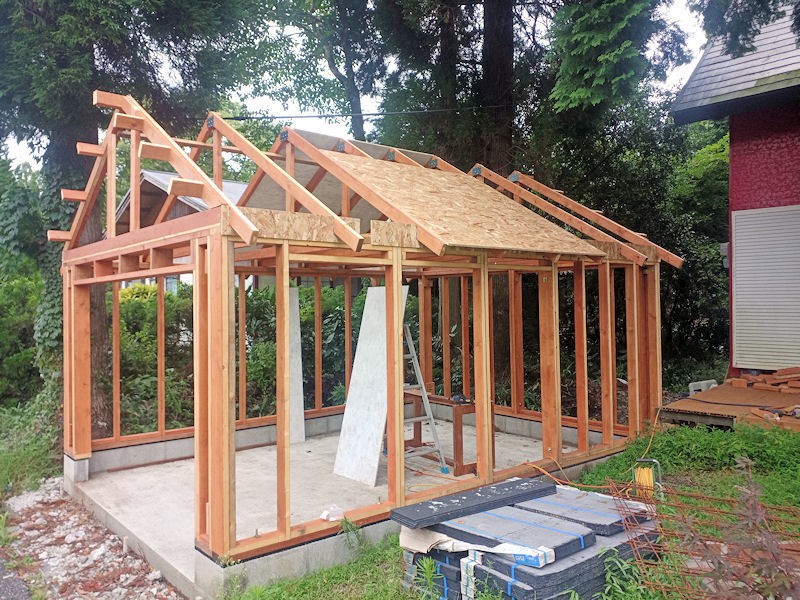
▲ まずは屋根から始めます。急に雨が降ったらカバーも置けますので、その順番がおすすめですね。屋根の三角フレームも前の日にボード幅に合わせて、設計しましたので、作業は簡単でした。
The first boards were screwed into place in the central part of the roof trusses, which had previously been placed to exactly fit the dimensions of the boards. So this was a pretty quick and simple process, and could mostly be done using a ladder from the inside of the building.
▲ 左側9枚と右側9枚で早く張れました!屋根のボード張りが終わったら、お隣さんから借りたブルーシートで一応カバーしました。
I used 18 boards in total for the roof, 9 on each side. Once they were screwed down in place, I quickly covered the roof with a big blue tarpaulin to protect it from any rain showers.
▲ 次のステップは壁でしたので、同じようにOSBボードを白く塗りました。
Then it was on to the walls! I used the same OSB boards for the walls of the garage, also painted white on one side.
▲ 左側の壁にボードを張ったときに感動しました!すごくうれしかった!
I can't express how happy it made me to finally get the first side wall covered in boards, after such a long time planning this build!
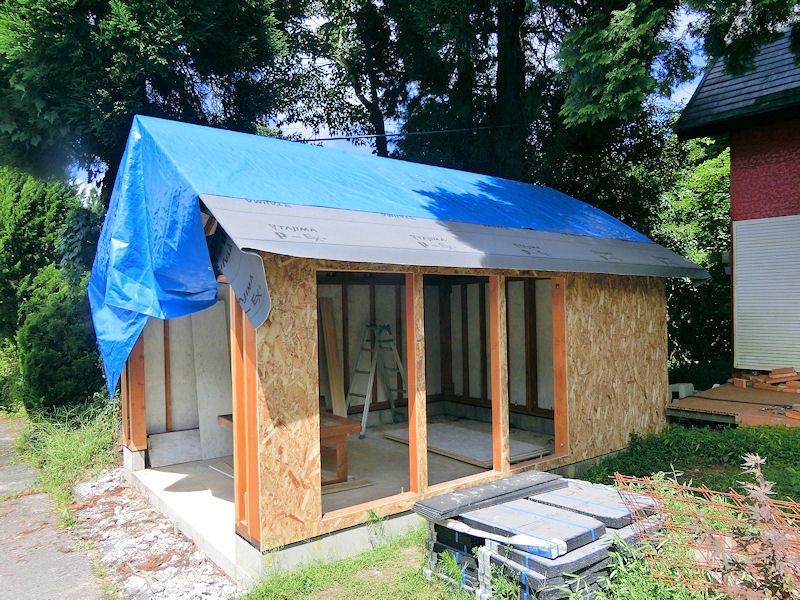
▲ 全部の壁が終わったら本当にガレージの感じになりました!
屋根のブルーシートがちょっと小さかったので、一列の防水シートも張りました。
The remaining walls quickly followed, and it properly began to look like a garage for the first time!
I also added one strip of waterproof roof felt to the roof, because the blue sheet was just a tiny bit too small.

▲ ボードの上に壁用の防水シートも張りました。そして、最後に三つ大きい窓サッシも入れました!
これで一応雨から守れる建物になりました!あとちょっとですね!
Once all the boards were in place, I quickly wrapped those walls in waterproof sheeting, and slotted the 3 large windows into their wall sections. So, with the roof and walls wrapped in sheeting, the garage is now mostly rain-proof. Finally, the end is in sight!!
屋根の材料予算は18万円でした。瓦/スレートがまだ張っていないんですが、その材料の費も含んでいます。
The budget for the roof section was 180,000yen, including quite a bit of money for the roof slates which have yet to be attached.
屋根:
2x4木材: 47,183円
金具: 5,620円
OSBボード18枚: 35,640円
防水アスファルトシート18m x 2巻: 10,500円
コロニアル瓦スレート: 58,140円
屋根用鋼板など: 12,900円
合計: 169,983円
Roof:
2x4s: 47,183yen
Brackets and fittings: 5,620yen
OSB boards x 18: 35,640yen
Asphalt roofing sheet 18m x 2 rolls: 10,500yen
'Colonial' roofing slates: 58,140yen
Edging/spine strips etc: 12,900yen
Total: 169,983yen
やった!また予算よりちょっと節約できました。何か嬉しいね。
Yay! So the roofing section came in slightly under budget again, which makes me happy. Not a huge saving, obviously, but every little bit helps, right?
| << Garage construction ガレージ工事 PART 4 2023-08-20 | Secret Aso-volcano pool 阿蘇山の隠れプール >> 2023-09-16 |
〒869-2226 熊本県阿蘇市乙姫2070-48
Aso City, Otohime 2070-48
Open from 13:00~17:00*
Fridays & Saturdays
(* if the door's closed, we might have popped out to walk the dog... back soon!)


")
阿蘇山の3D地図テーブルを作ってみた! I made a 3D MAP table!
3D阿蘇カルデラはいかがですか? 3D Maps added to the shop
Painted models available 塗装済の模型発売中!
Making garage doors ガレージの扉DIY作成
New side-project... a hobbit house! ホビットの家
Shops added to the shop ショップにお店
Repainting a (mini) car ミニカーのリペイント
Buying land in Otohime 乙姫で土地探し
Scale model of the Inaba Residence 稲葉家下屋敷の模型
Customer request - Pokemon Ball! ポケモンボール
Garage construction ガレージ工事 PART 6
Secret Aso-volcano pool 阿蘇山の隠れプール
Garage construction ガレージ工事 PART 5
Garage construction ガレージ工事 PART 4
Garage construction ガレージ工事 PART 3
Garage construction ガレージ工事 PART 2
Garage construction ガレージ工事 PART 1
Making a capiz shell wall light カピス貝殻壁掛けライト
Making a rustic antique-style wall light アンティークなライト作成
Making a capiz shell chandelier カピス貝殻シャンデリア
Online store opening sale グランドオープンの割引
Opening a webstore 通信販売サイトを開店します!
A lucky escape with the typhoon! 台風がヤバいけどラッキー!
E-bike conversion DIYで電動自転車を作った!
$200 Underfloor heating 2万円でDIY床暖房
3D-printed OPEN/ CLOSED sign アトリエ看板作成


 Shrine
 Temple
 Teahouse
 Castle
 Shops
Shops Houses
 Farm
Farm Other Buildings
 Walls & Fences
 Bridges
 Ponds
Ponds LED Lights