


3D-Print Studio
春が来ます!やっと!ということは家の周りにある林をきれいにしたいですので、バードハウスを作ります。
A quick project to brighten up the outside of the house, now that I am starting to turn my attention to the deck (not built yet!) and garden (also not built yet!). With spring on the way..... sometime?...... I wanted to make some little birdhouses.
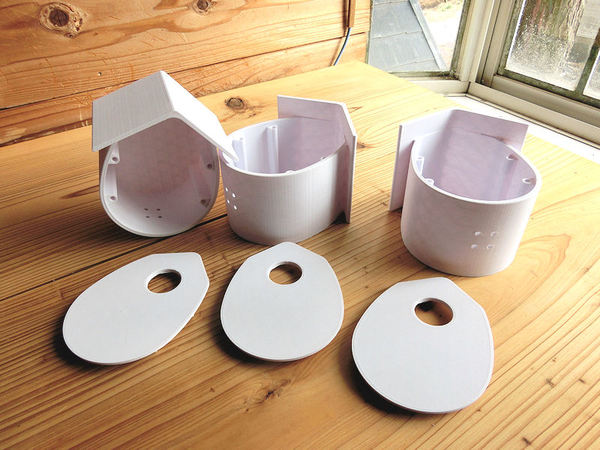
▲ バードハウスのかわいいデザインをネットで見つけて、3Dプリンターで3個も作りました。プラスチック材料は1個約500円でできましたので、安かったですね。
I 3D-printed these cute little birdhouses for about 500 yen each, from a free design I found on Thingiverse.com
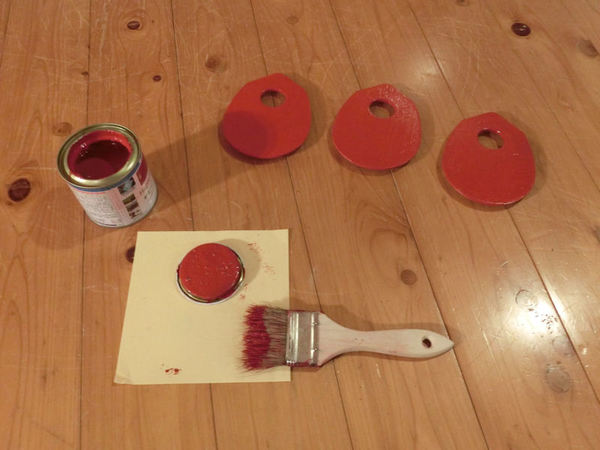
▲ 家も赤にペイントするつもりですので、バードハウスもマッチするようにペイントしました。
I used some red house paint to make them two-tone, so they'll eventually match the house.
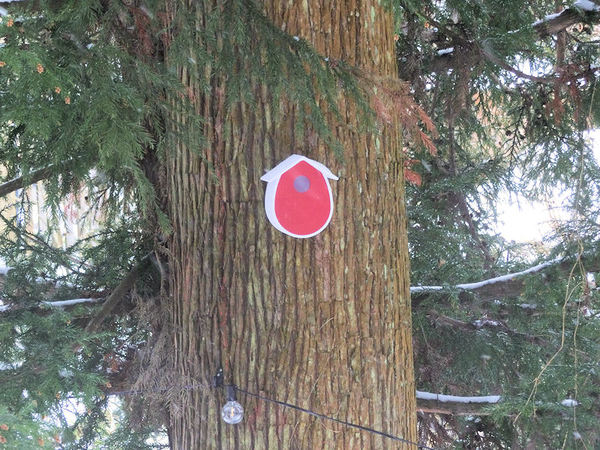
▲ できるだけ窓から見えるところに配置しました。1個目は2階のソファから見えます!
This first birdhouse is located on the big cedarpine tree right outside the side of the house, so I can see it from the 2nd floor living room sofa.

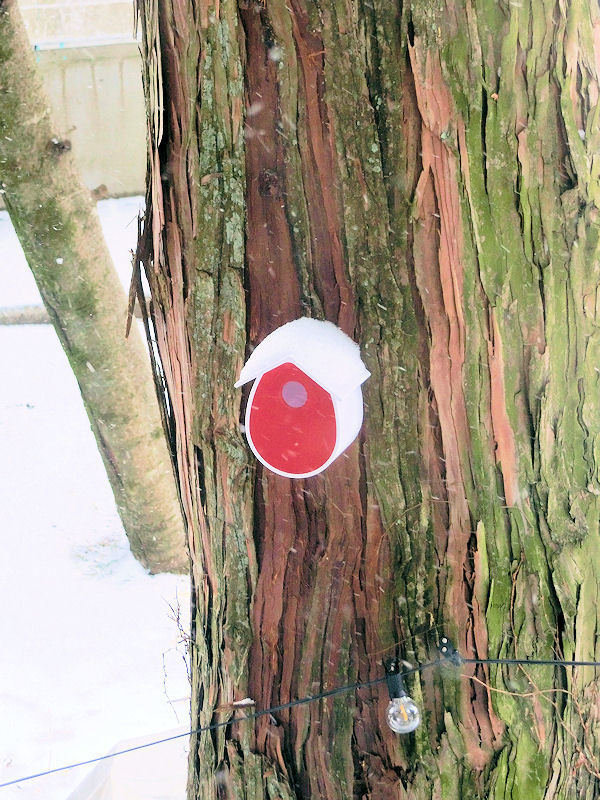
▲ 2個目は1階のホールから見えるところです。
The second birdhouse is also at the side of the house, visible from the 1st floor hall window.
▲ 3個目は玄関の読書スペースの新しい窓から見えます。ラッキー!
And finally, the 3rd birdhouse is at the front of the house, right outside the new reading nook in the entrance hall. Looks a bit nippy right now (!), but hopefully some little birds will find it useful in the spring.
薪ストーブの煙突も作らないといけないんですね。しかし、その前の作業には1階の部屋をちょっとリフォームしたいです!
The stove and platform are now in place, but next I have to fit a chimney pipe before I can use it to heat the downstairs hall. But first, I took the opportunity to redecorate....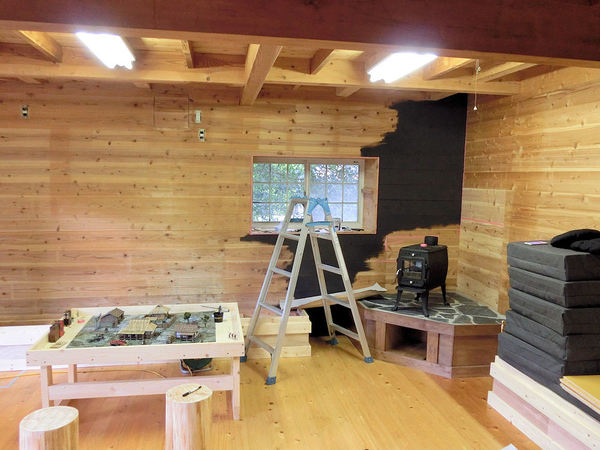
▲ この壁をもうちょっとインパクトがあればいいなぁと思ったので、つや消しの「チャコール」でペイントしました!
After removing the extractor fan and water taps from the far wall (it used to be a painter's workshop too), I decided to create a slightly more 'high-impact' wall, using matt paint in a "charcoal" colour.
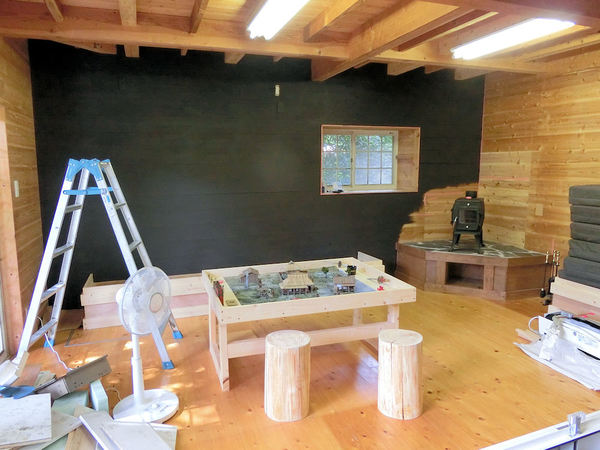
▲ どう?確かに違いますね!
LIKE it alot!
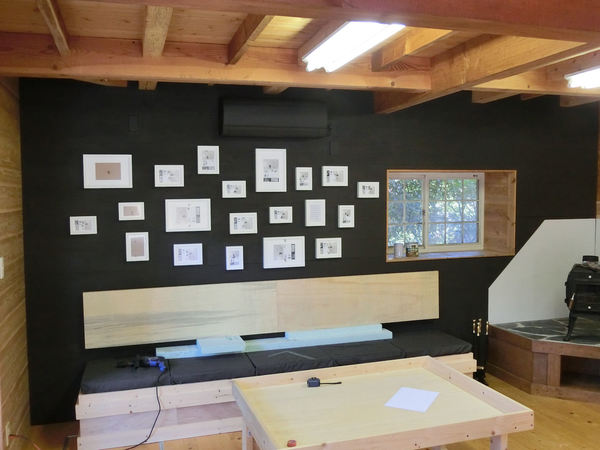
▲ ベンチソファの上に壁クッションを作りたいと思うので、それは木材に板のところです。その上にイケアの安いフレームを張りましたが、まだまだ内容は決まっていないんです。最後に、一番上に中古エアコンも付けました。エアコンも壁と同じ色でペイントしましたので、見づらいかも?
I thought the matt dark grey would make for a great contrast with these chunky thick white picture frames (from Ikea), where I can display some paintings, photos and artwork. I'll get to those later, I guess?!
The wide wooden boards are to mark out the location of a padded backrest for the sofa, and I even managed to squeeze in a used airconditioner above the picture frames, to help with heating and cooling. Of course I immediately painted that over in matt grey paint too, to keep the focus on the artwall!
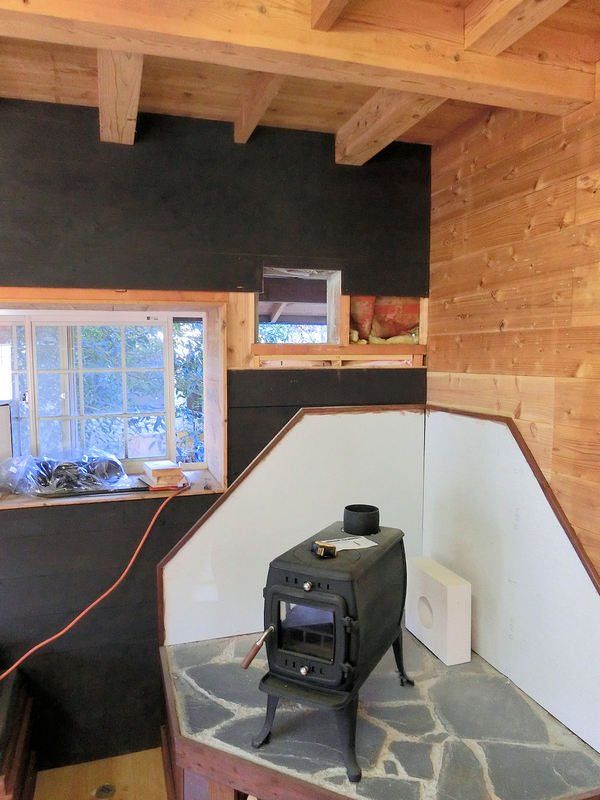
▲ 薪ストーブのコーナーに防熱のケイカル板を張りました。いつか飾りタイルで綺麗にしますが、特に急いでいない。
じゃ、次は煙突の作業です。この高さは全然問題なかったけど、屋根の上にH型のキャップなどを付けないといけないので、それは一人で大変でした。揺れる梯子の上にちょっと怖かったが、やっとできました。
In the corner I fixed two heat-resistant boards made from calcium silicate, from my local DIY store. The stove is not very high output, and it's also positioned at an angle to the walls and at quite a distance, so I judged it safe from fire hazards there. For the chimney, there needs to be a large square hole in the wall empty of any wood or insulation materials, and into that hole you place a super thick block of calcium silicate (with a hole for the chimney pipe) - which you can see behind the stove there.
Then it's a fairly simple task of running the 10cm diameter chimney pipe up and through the hole, and all the way to an end point above the eaves of the house. Getting that last heavy section of pipe secured at the top of a wobbling 8m ladder was quite hair-raising, but in the end it slotted into place and I was finally done!
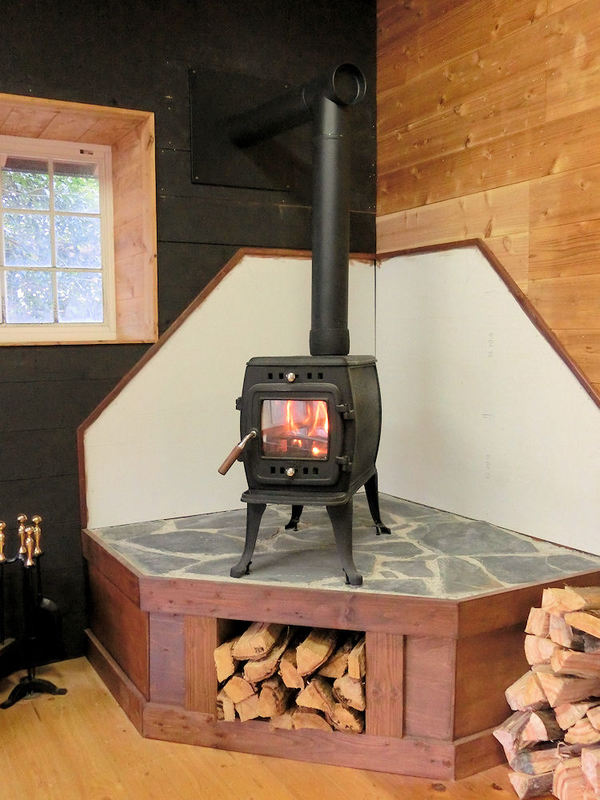
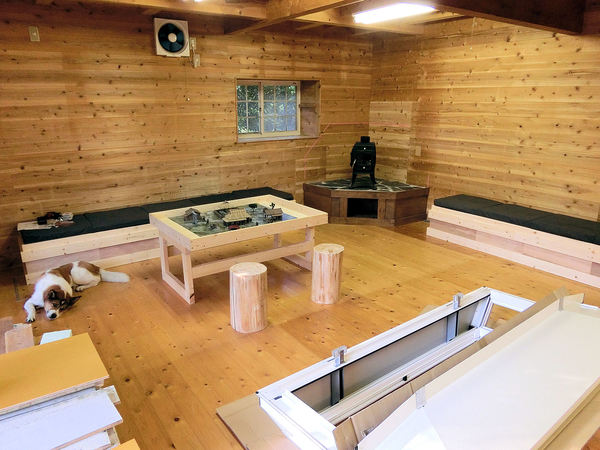
▲ 薪ストーブの初デビューです!使えるようになりました!
The first test-fire of my new wood stove! House didn't burn down so..... SUCCESS!!!!!
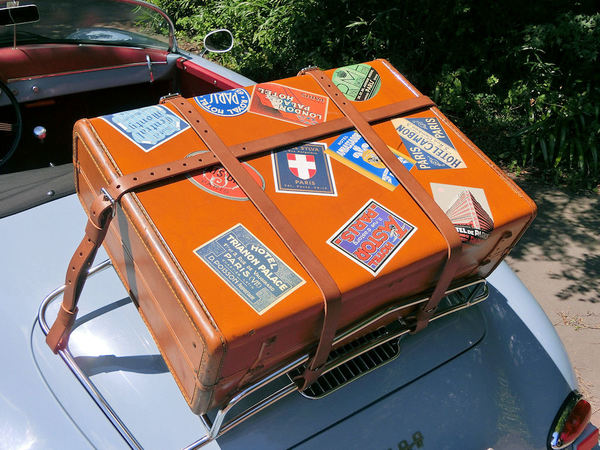
車の収納スペースを増やしたいので、海外のオークションサイトEbay.comで50年代のスーツケースを買いました。「50s case」または「50s trunk」で探せば、いっぱい出てきます。
アメリカでは本物の50年代ケース(アンティークか?)をまだまだ簡単に手に入ります。買った「Samsonite社」ケースはたった3000円でしたが、もちろん送料もありますね。5000円ほどの送料だったけど、ケースの中はほぼほぼ新品のようになっています。
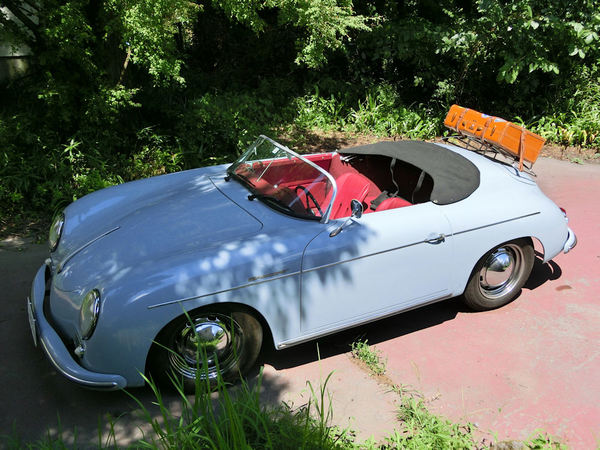
My car has a tiny amount of storage space, so I decided to invest in a rear luggage rack and a suitcase that fitted the look and style of the car. The car's a replica of a 1957 Porsche Speedster 356, but thankfully isn't worth the hundreds of thousands of dollars the real ones are these days - so I can drive it normally, at least! It's actually built on a chassis from about 1968, I think.
I found this period 1950s Samsonite suitcase on Ebay in America, for about $30, plus about $50 for shipping. The condition is perfect inside, as good as new. The outside was a little scuffed and marked, but after some careful clean up (but not too much!) I was left with a really nice aged patina.
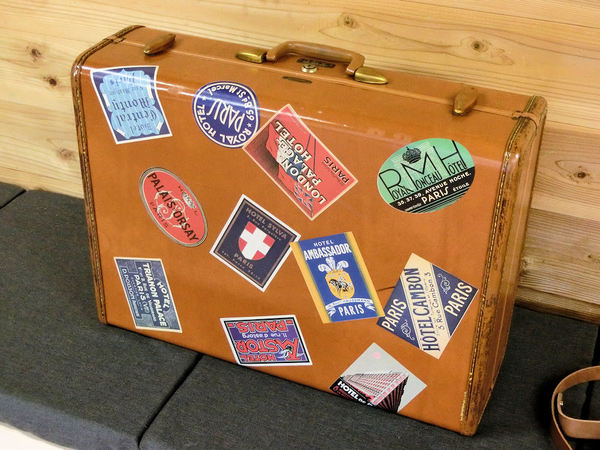
▲ 見た目は確かにきれいでしたが、その上にステッカーも張りました。「LaughingElephant」のメーカーからヴィンテージステッカー20枚セットを買いました(2000円): https://laughingelephant.com/stickers/
テーマはヨーロッパのホテルだったので、ケースと車に合うと思った。
Although the case is immediately recognisable as an antique, I wanted to add travel stickers to it, so give it a great look to match the car. I found this set of 20 reproduction stickers from Laughing Elephant, themed around European hotels of yesteryear.
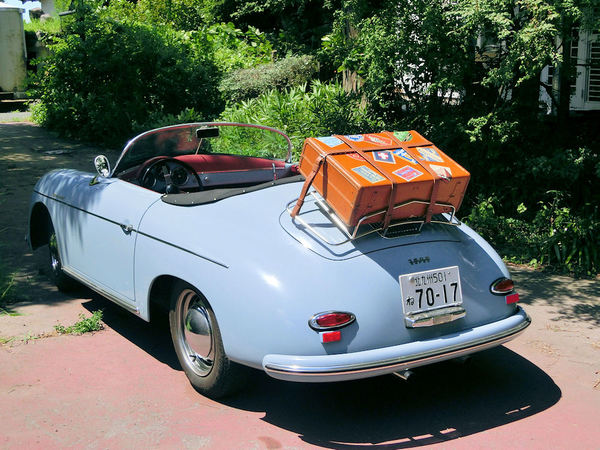
▲ 可愛いでしょう!ラックに載せたら完璧!
A perfect match for the car... and I doubled my storage space!
▲ ステッカの上に透明のツヤありペイントをスプレーしましたが、100%防水じゃないから天気を見ないといけないですね。
I added several layers of spray-on clear varnish, to try and waterproof the stickers and leather as much as possible. Even so, it's not 100% waterproof, so I have to watch the weather carefully!
▲ 長い旅にはちょうどいいですね!
Just right for a long drive on a sunny day!
2階のほうは暮らせるスペースになったので、今度は1階の作業が始まります!
The upstairs of the house now looks pretty good, so it's time to move on to the downstairs space....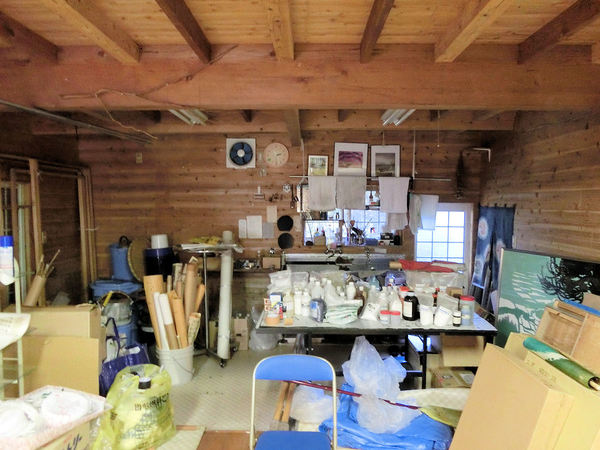
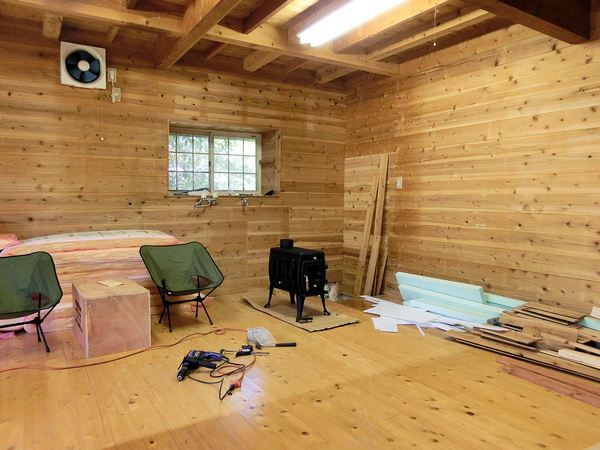
▲ 買う前に見学したときの様子。スタジオっぽいけど、暗かった。だけど、広い部屋が頭の中に想像できた。
When I originally went to see the house before buying it, this is what the downstairs looked like! With the storm shutters closed and a ton of painting supplies strewn around, it was quite hard to envision what it could look like empty.....
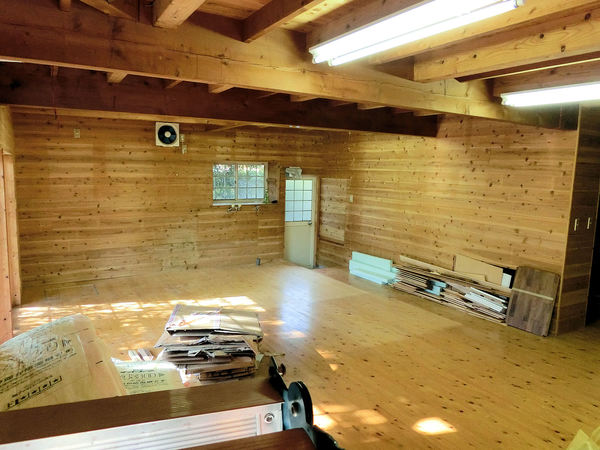
▲ 買った頃の写真です。物を全部外して、雨戸を開くとやっぱり広かったですね!
... but once everything was cleared out, and the storm shutters were open, it looked a whole lot more promising!

▲ 外にある杉松の影が多いので、昼間にも電気つけないとちょっと暗いです。将来的に林をちょっときれいにしますが、その前に部屋の目的を考えよう。。。
There are quite a few giant cedar pine trees surrounding the house, which make it a touch dark even in the daytime, but at some point I'll trim those to brighten things up. Until then, the lights and large windows keep it bright and quite airy.
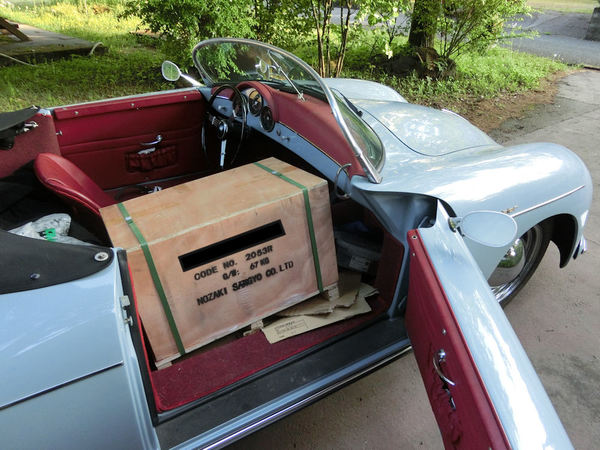
▲ まずは冬用の暖房要りますね!阿蘇では薪ストーブが多いですので、ヤフーオークションで35,000円で買いました。販売店が熊本市の近くでしたので、相変わらず青い車で取りに行きました!ただし、何と70kgでしたので、車を入れたときに店のフォークリフトを使いました。阿蘇に家に届いたときに息子のゆあんさんの力を借りました!????
The first project I wanted to tackle in this room was some heating, as it required some small structural changes. Aso is quite a rural area, and many of the houses here have wood-burning log stoves. I managed to snag this one on Yahoo Auctions for $350. It's pretty small for a wood stove, but it still weighs 70kg! So when I drove to get it (after removing the passenger seat in my little car!), we had to load it in with a forklift truck! The lift driver did look a bit nervous! ???? Of course when I got back to the Aso house, I had to enlist the help of Euan (my son) to get it out of the car and into the house!
▲ 部屋のコーナーに薪ストーブと煙突を入れますので、不要の勝手口を壁にしました。横にデッキを作るつもりですので、そっちから外に行けます。まだまだ壁の木材を見ると色違いが見えると思いますが、あとから隠せるだと思う。
The stove is going in the corner of the room, so I can maximise the rest of the space, and this meant that I needed to board up the backdoor. Every Japanese house insists on having a narrow back door, for access to.... bins?! No, not really a reason. But since I can use the big glass doors onto the deck on the other side of the room to get outside, this back door was fairly redundant. So I boarded it up, and should be able to disguise the different wood colours later on.
▲ 次はパインの2x4で強い台を作りました。前の勝手口の低い床も隠せた。
Next I knocked together a very sturdy platform for the stove, from cheap 2x4s, which also enabled me to cover the lowered floor by the back door.
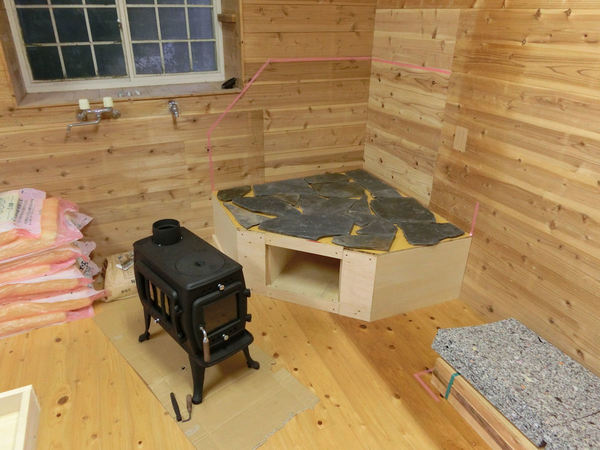
▲ その上にコンパネ板と石を置きました。ハンズマンから1平方メートルを買いました。
On top of the platform I placed thick plywood and then about 1 square metre of slate-like stone, bought from my local Handsman DIY shop.
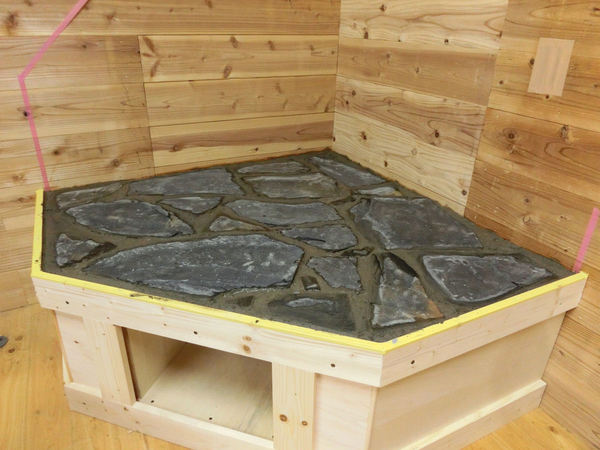
▲ 石を位置を決定してからコンクリートを入れました。
Once I had arranged the stones to my liking, I set them in concrete, and added a few more decorative strips of wood.
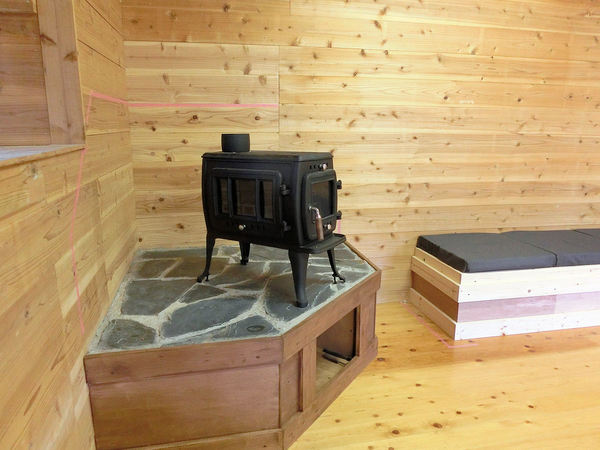
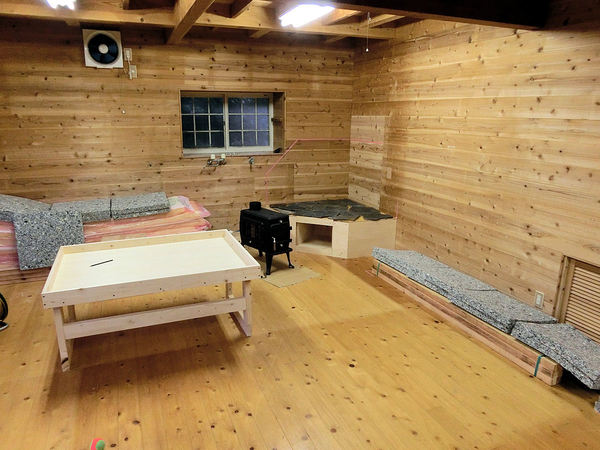
▲ 最後にウォルナット色でステインしてから、薪ストーブを載せました。壁に防熱の板をこれから張りますが、とりあえずこれで行きます。
Lastly, I woodstained the platform in a walnut colour, and lifted the stove up on top. Thanks, guys, for helping me out there! I'll be adding heatshielding material to the walls later on, but for now I can call this done.
▲ 煙突の作業もいつかしないといけないんですが、その前にソファとテーブルを塗らないとね。
Of course I will also need to add a pipe chimney at some point too, but first I can move on to painting up these sofas and chairs!
この家のベッドルームは6坪の畳式部屋です。もちろん布団のために大きい収納もありますが、私はベッドのほうが好きですから、その収納スペースをなくして、約7.5坪ほどの部屋に変更しました。夜寒いの阿蘇には暖かい暖房が必要ですが灯油ストーブはめんどくさいですので、今回DIYで床暖房を作りたいと思います!
思ったより安かったで、朝まで安心でポカポカしていきます!
Japanese rooms are traditionally measured in "tsubo" units, which are based on how many tatami mats would cover the floor. So my bedroom here is a 6-tsubo room, meaning that it would fit 6 tatami mats. And indeed, unlike the rest of the house, it actually has tatami mats for flooring. I've got nothing against tatami floors, but they tend to look scratched and old pretty quickly, especially with a large dog in the house.
So I decided to remove the tatami mats in the bedroom, and replace them with wood flooring. While I was doing that, it seemed a good opportunity to rip out the built in cupboard at one end, and enlarge the bedroom with that space instead. Finally, I wanted to try installing some underfloor heating, so that at least I would have one cosy room with modern technology. If you've never experienced the warmth of underfloor heating, you're really missing out! It's great!
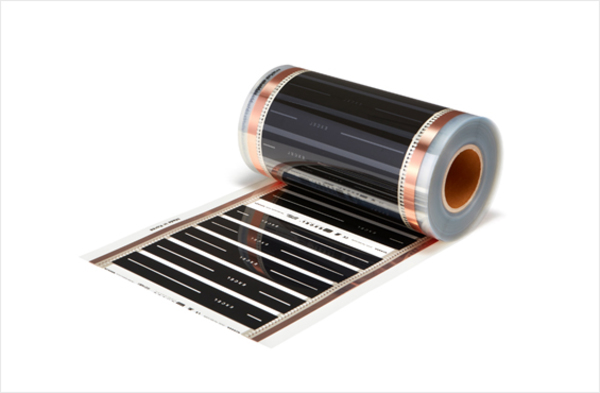
▲ まずは電気床暖房用の「ヒーティングフィルム」が必要です。Ebayで「heating film」を探せばいっぱい出てきますが、買ったフィルムは韓国のFELIX社の「EXCEL305」でした。幅50センチで来ますので、7.5坪の部屋には20mを注文しました。20mでたった12,000円でしたが送料は追加の1万円かかりました。
Fitting you own electric underfloor heating system is actually not that complicated, as long as you do your homework properly! Happily, I'll write it all down for you, to save you some effort!
The first thing you'll need is electric heating film. This is normally sold in 50cm-wide rolls, as shown in the photo. There are loads of brands on Ebay, and after some checking I went with this "Excel305" by the Korean firm FELIX. With my enlargened room now measuring approximately 2.5m x 4m of floorspace, I ordered 20m of heating film for $108. It was a little heavy, so shipping was a further $117.

▲ 床暖房にはコントローラーも要りますね。この商品はたった1900円(送料込)で買いました。「110v floor heating controller」で検索するといっぱい出てきます。この商品は100v~240vまで接続できますので、安心しました。自動センサーも付いてきますので、ご希望の温度に設定すると自動的にキープできます。
部屋の大きさによって3600ワットの制限はありますが、簡単に計算できます。ヒーティングフィルムの機能を調べると50cm幅で各100cmには110ワットを使うそうです。ということは1平方メートルには220ワットを使います。コントローラー機械は3600ワットまでですので、1個には16平方メートルのフィルムをつなぐことができます。それは約4mx4mの広い床ですね。
The second bit of tech you'll need for this project is a thermostat controller. If you search for "110v floor heating controller" on Ebay you'll find tons. The one I bought (pictured) cost only $18, shipping included! This one can handle mains voltage anywhere from 100V to 240V, so is fine for Japan. It has scheduling functions, and two temperature sensors, so you can set it to heat to 20 degrees, for example, and it will keep it there all night.
There's a little bit of maths you'll need to do, to check the maximum wattage isn't exceeded. A single controller can supply up top 3600 watts of power to your heating system, so you'll need to check the per-metre wattage of your heating film. The film I bought uses 110W for every 1 metre of 50cm-wide film, so for one square metre of film it will require 220W. So working backwards, you can calculate that one 3600W controller can work with approximately 16m² of heating film - which gives you a maximum area of 4mx4m for one controller.

▲ ほかの必要な商品は電気ケーブルとこのフィルム用のクリップです。これもEbayで822円で40個を買ったです。「heating film clamp connector」を探せば出ます。
You'll also need some clamp connectors for the heating film, and plenty of electrical cable. I bought this pack of 40 clamp connectors for about $8 from Ebay.
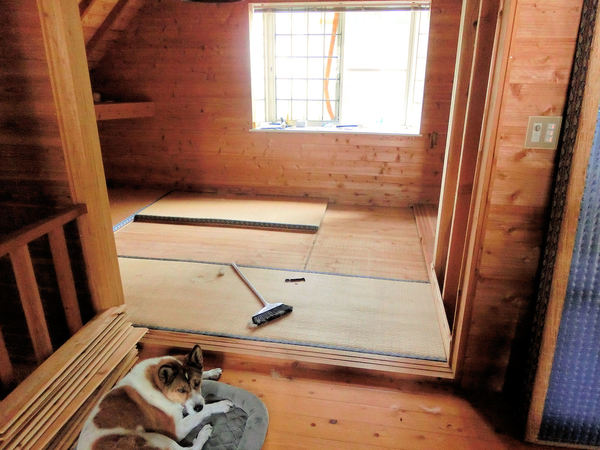
▲ 作業を始めましょう!まずは古い畳を外しました。その下には1枚の薄いコンパネ板しかなかったので、断熱材を入れないといけないですね!
Time to get to work! First thing to do was to remove all the old tatami mats. Having removed them, I found that the "underfloor" was a laughably thin single sheet of plywood, so I guess I'll need to add some extra insulation!
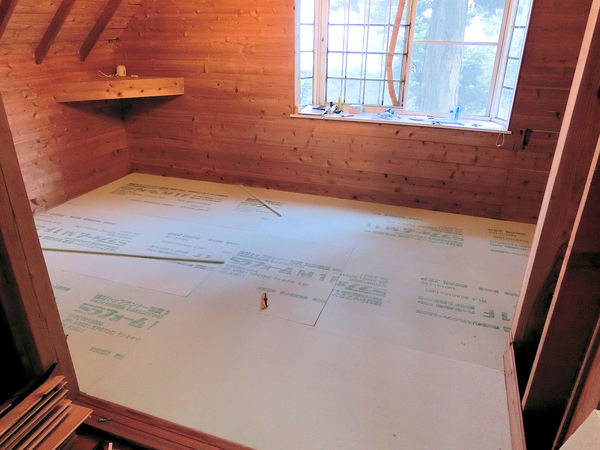
▲ 断熱材板は特に必要ないですが、お勧めです。30mm厚みのフォームを入れました。
Thankfully tatami mats are quite thick (about 5cm), so removing them left enough room for 30mm of insulation foam sheets, plus the wooden floor I planned to add on top.
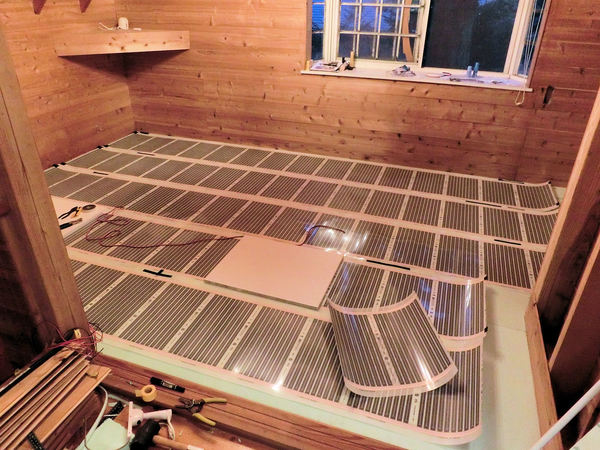
▲ その上にヒーティングフィルムを置きます。各50センチのフィルムには2個のクランプつなぎでケーブルに接続します。+とーを間違いないように赤と黒のケーブルを使いました。クランプをブチルテープで囲みました。
Then you simply unroll the heating film on top, in strips of 50cm width. The strips will each need 2 clamp connectors at one end (the wall end), to connect to the positive and negative sides of each film. I used red and black cables for the wiring, and covered each clamp connector with waterproof butyl tape.
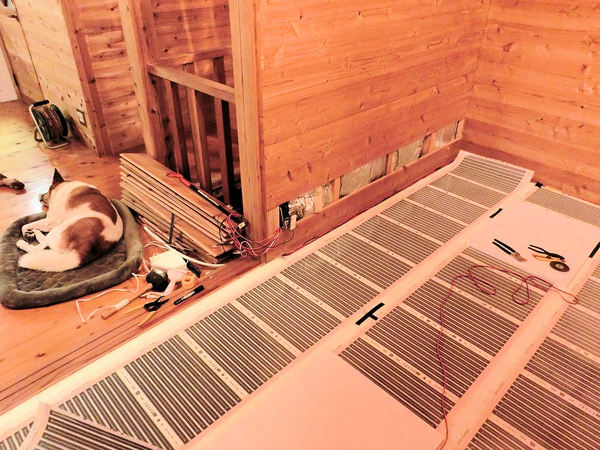
▲ 各フィルムからコントローラー機械までケーブルを通さないといけないので、壁の横に1センチほどのケーブル用にスペースを掘りました。そして、壁の中に入れます。そこで5本の赤いケーブル(+線)を配線コネクターで一本にまとめました。黒いケーブル(ー線)も同じ風にまとめました。最後に赤い線と黒い線をコントローラーに差し込んで、電源につなぎます。私が近くのコンセントから電源につなぎました。
テスト起動は成功したら完成です。
Each strip of film needs to be connected via cables to the thermostat controller, which I mounted in the wall near the door. The insulation foam made this an easy job, by just cutting a 1cm wide channel in the foam for the cables alongside the walls. The 5 red cables and 5 black cables then went inside the wall, and were joined using simple cable connectors into a single red and single black cable. These two cables are then inserted into the controller unit, and the mains power is connected. I ran an extension from a nearby power socket for the main power.
Then it's time to test fire your new heating system. If it works as it should, then you're ready to cover over the heating film strips and wrap up!
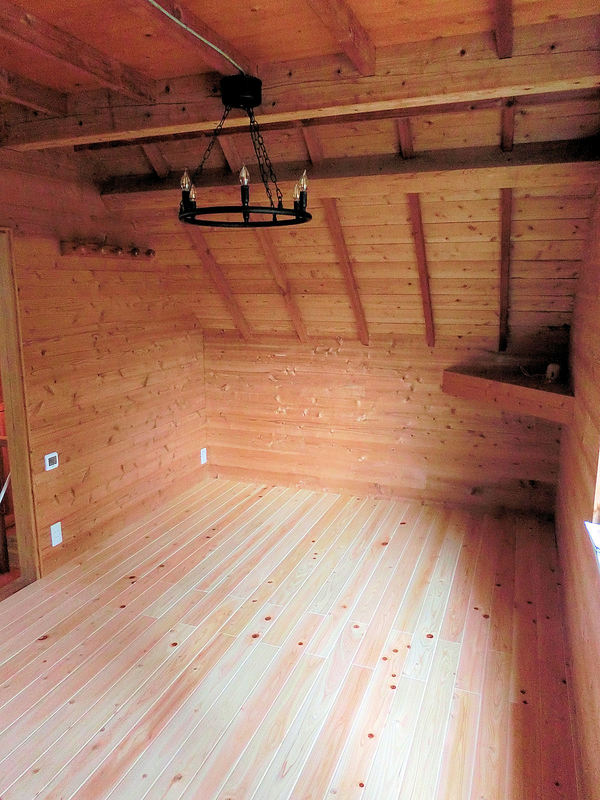
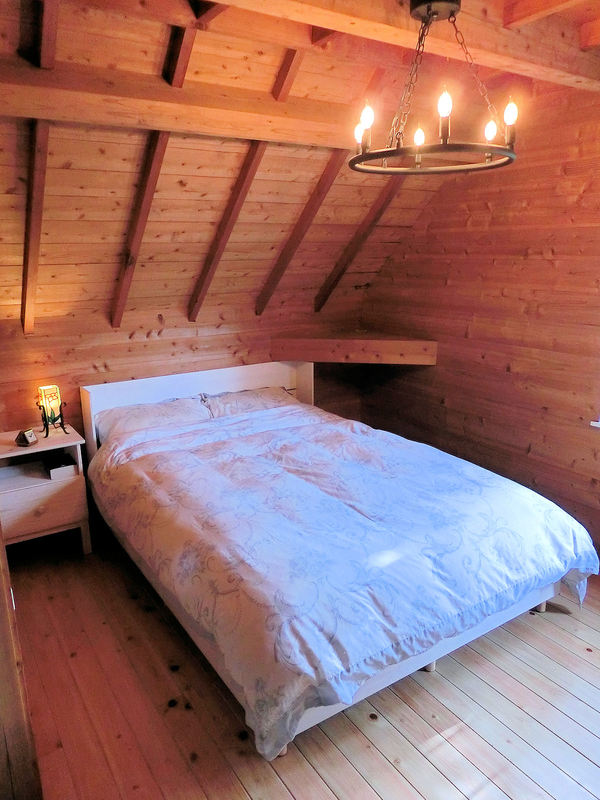
▲ その上にフローリングを置けます。畳にも使えそうですが、この新しいベッドルームにはフローリングにしたかったです。
写真の左側にコントローラーがあります。コンセント2個も入れました。
ライトはもちろんイケアから買いました!
I chose a light coloured wood flooring for the bedroom, but you can apparently use tatami mats instead if you prefer.
On the left-hand wall you can see the two power sockets close to the floor, and the square thermostat controller unit above that near the door. The new ceiling light is from Ikea - no surprise there!
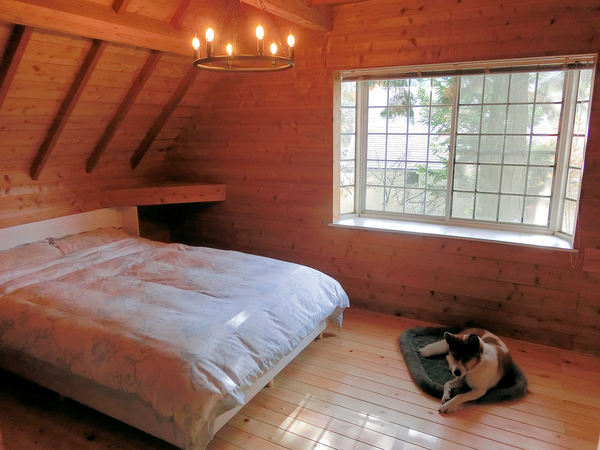
▲ 2x4パインで簡単なベッドフレームを作りました。とりあえずこれで行こうかなぁ。。。
犬のケイティちゃんも新しい3万円の床暖房には大満足ですね!
I knocked together a cheap and cheerful bedframe from 2x4s, which will do for now, I think.
For a $300 heating system, this was a project well worth doing - Katie the dog certainly likes it!
▲ ちょっと古いスタイルですが、それは好みですね。
The interior maybe a little traditional, but I like old stuff!
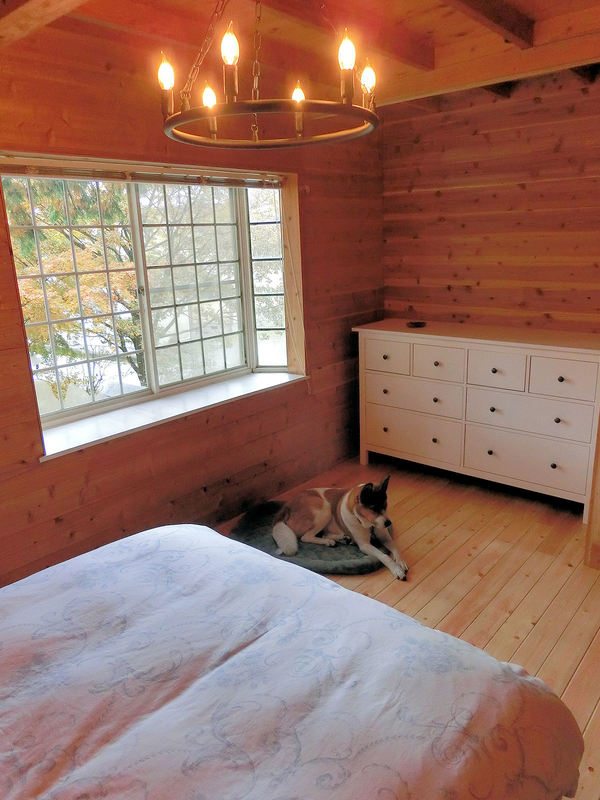
▲ この大きいたんすもイケアから買いました。外した収納スペースのところに入れました。収納的にちょっと小さくなりましたが、部屋がすごく広く感じがしますね。
On the far wall you can see the space that was opened up by pulling out the built-in storage cupboard. Instead of that floor-to-ceiling cupboard, I switched to a large chest of drawers (again, from Ikea) which gives plenty of storage spce but keeps all that open space above it. The bedroom certainly feels a lot larger!
〒869-2226 熊本県阿蘇市乙姫2070-48
Aso City, Otohime 2070-48
Open from 13:00~17:00*
Fridays & Saturdays
(* if the door's closed, we might have popped out to walk the dog... back soon!)


")
阿蘇山の3D地図テーブルを作ってみた! I made a 3D MAP table!
3D阿蘇カルデラはいかがですか? 3D Maps added to the shop
Painted models available 塗装済の模型発売中!
Making garage doors ガレージの扉DIY作成
New side-project... a hobbit house! ホビットの家
Shops added to the shop ショップにお店
Repainting a (mini) car ミニカーのリペイント
Buying land in Otohime 乙姫で土地探し
Scale model of the Inaba Residence 稲葉家下屋敷の模型
Customer request - Pokemon Ball! ポケモンボール
Garage construction ガレージ工事 PART 6
Secret Aso-volcano pool 阿蘇山の隠れプール
Garage construction ガレージ工事 PART 5
Garage construction ガレージ工事 PART 4
Garage construction ガレージ工事 PART 3
Garage construction ガレージ工事 PART 2
Garage construction ガレージ工事 PART 1
Making a capiz shell wall light カピス貝殻壁掛けライト
Making a rustic antique-style wall light アンティークなライト作成
Making a capiz shell chandelier カピス貝殻シャンデリア
Online store opening sale グランドオープンの割引
Opening a webstore 通信販売サイトを開店します!
A lucky escape with the typhoon! 台風がヤバいけどラッキー!
E-bike conversion DIYで電動自転車を作った!
$200 Underfloor heating 2万円でDIY床暖房
3D-printed OPEN/ CLOSED sign アトリエ看板作成


 Shrine
 Temple
 Teahouse
 Castle
 Shops
Shops Houses
 Farm
Farm Other Buildings
 Walls & Fences
 Bridges
 Ponds
Ponds LED Lights
0 Comments :
Write a comment :