

 ホーム
ホーム ブログ
ブログ アクセス
アクセス3Dプリントアトリエ
先週の作業でコンクリートの型を作りましたので、今週生コンクリートを入れようとします。近くにある「株式会社レミコン」の事務所に訪ねて、2立米の生コンクリートを注文しました。
Last week's job was to prepare the forms for the concrete foundations, and this week it was finally time to pour in the concrete for the garage base. I dropped in to the offices of a local concrete supplier (who were quite surprised to see me!), and organised for 2 cubic metres of wet concrete to be delivered two days later. Exciting stuff!!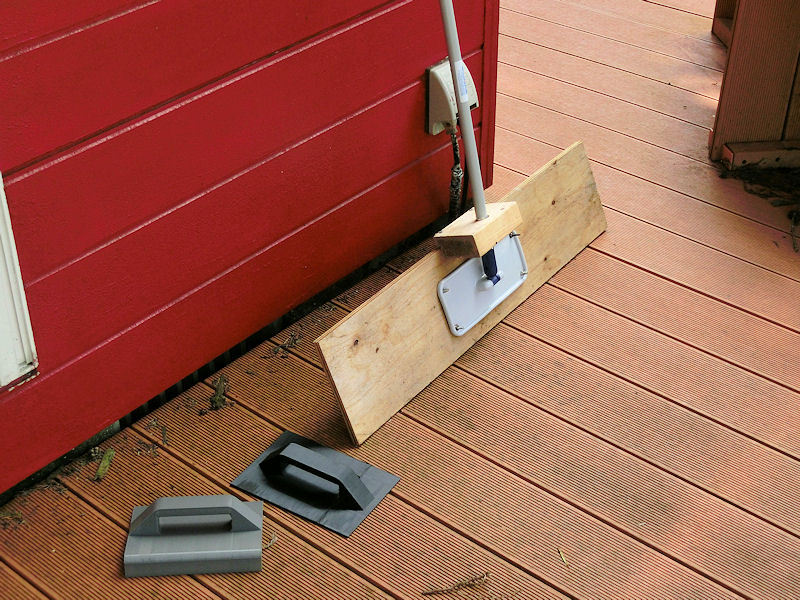
▲ 生コンクリートを入れるために道具を用意しました。但し、いつものケチな私が道具を買うじゃなくて、自分で作る決まりにしました。小さい道具は約5000円でアマゾンで買えますが、簡単なデザインで考えて3Dプリンターで作りました。値段はゼロ円!
そして、大きいフロート道具は大体6~7万円でネット販売していますが、1100円の雑巾モップと木材で作りました。一回しか使わないので、結構お金の節約できましたね。
I'd put together some smoothing tools known as "concrete floats", and as always I'd opted to make these myself and save as much money as possible! The little hand tools sell for about 5000yen each, but I produced them for free by designing and printing them on the 3D printers. They aren't as durable as proper metals ones, but I'll only be using them once!
The big bull float is a handy tool for professionals, but retails at several hundred dollars, so I made my own from a plastic mop, and two bits of wood. It's not perfect, but should work okay?
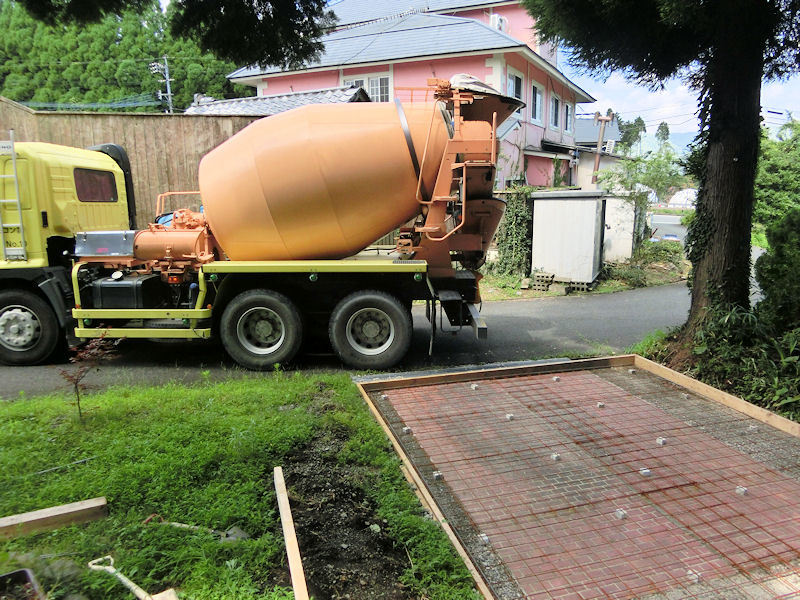
▲ 午前11:00にこのミクサー車が来ました!しかし、今年最高温度の32℃の日に!
The mixer truck turned up at 11am, just as the heat of the day was reaching its height. Unfortunately, it only had a 1 metre chute, so I had to waste lots of time pushing 3 tons of concrete to the far end of the foundation area. It also turned out to be the hottest day of the year so far, which caused problems with the concrete setting pretty fast.
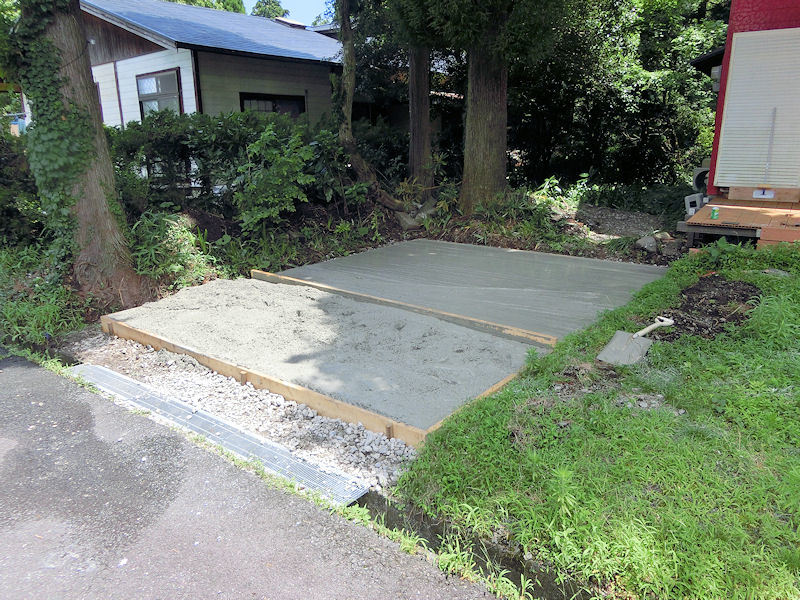
▲ 優しいドライバーさんがちょっと手伝いましたが、やはりこんなに暑い日は大変でした!
The driver kindly helped out at the start, shifting the concrete, and then had to leave. So I was left with 3 tons of fast-setting concrete which needed to be flattened out, using that long piece of wood to scree the top surface.
As you can see, the side near the road was soon in full sunshine, which made it set even faster :(
▲ 道揃えは早く乾燥した過ぎたのはちょっと残念でしたが、やっと使える基礎にできました!
So the edge near the road turned out a little rough, due to the faster drying time, but all the edges are nice and flat - so it should work fine to build on top of. Finally, I had a usable concrete foundation for my garage!
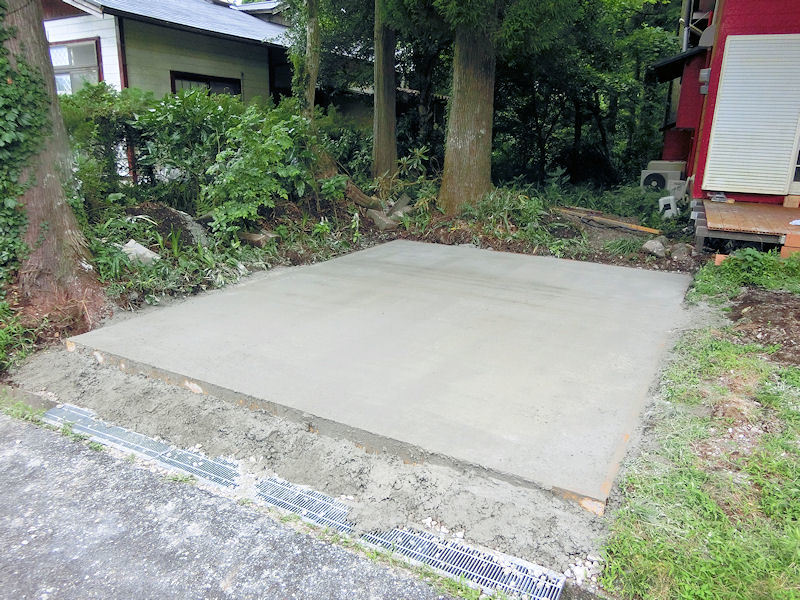
▲ 二日間後、木材の型を外した時にこんな感じですね!成功だ!
Two days later, I pulled off the wooden frame to find that everything seemed to have worked fine. So let's take a look at the total costs, compared to my initial budget of 90,000yen.
ここまでの基礎工事は9万円の予算でしたが、詳細は次のようでした:
材料
型の木材: 16,538yen (建物のフレームで再利用できます)
砕石 (1m³・配送込): 6,600yen
網メッシュ (10枚): 6,780yen
鉄筋 (4本): 1,352yen
メッシュ結び: 128yen
メッシュ用の載せるブロック: 450yen
生コンクリート (2m³・配送込み): 49,900yen
道具
仕上げ用の木材: 1,980yen
ゴムブーツ: (友達から借りた) 0yen
糸: 498yen
三角定規: 1,170yen
コンクリートフロート (モップと木材): 1,277yen
合計: 87,349円
知り合いから28万円のお見積りをもらいましたが、やはりDIYにしたらできることですね。
Materials
Wooden frame: 16,538yen (but I can re-use these for the building itself)
Gravel (1m³ incl. delivery): 6,600yen
Wire mesh (10 panels): 6,780yen
Rebar (x4): 1,352yen
Mesh ties: 128yen
Concrete "chairs" to lift the mesh up: 450yen
Concrete pour (2m³ incl. delivery): 49,900yen
Tools
Scree wood: 1,980yen
Rubber boots: (borrowed from friend) 0yen
String: 498yen
Triangular ruler: 1,170yen
Bull float (mop & wood): 1,277yen
Total cost: 87,349yen
知り合いから28万円のお見積りをもらいましたが、やはりDIYにしたらできることですね。
So it was under budget, and saved a whole load of money compared to having a company do it for me - one 'friend' of a friend quoted 280,000yen, which would have been half my budget for the whole garage build!
Bearing in mind that I had no experience of doing this before and no specialist tools, and learnt how to do it from YouTube videos, it's an achievable if time-consuming project for a keen DIYer!
やっとガレージ工事が始まりました!梅雨にもう入りましたので時間結構かかったが、頑張ったよ!
At looooong last it's time to begin the construction of the garage..... and of course rainy season starts at exactly the same time too. Oh yay. This'll be fun.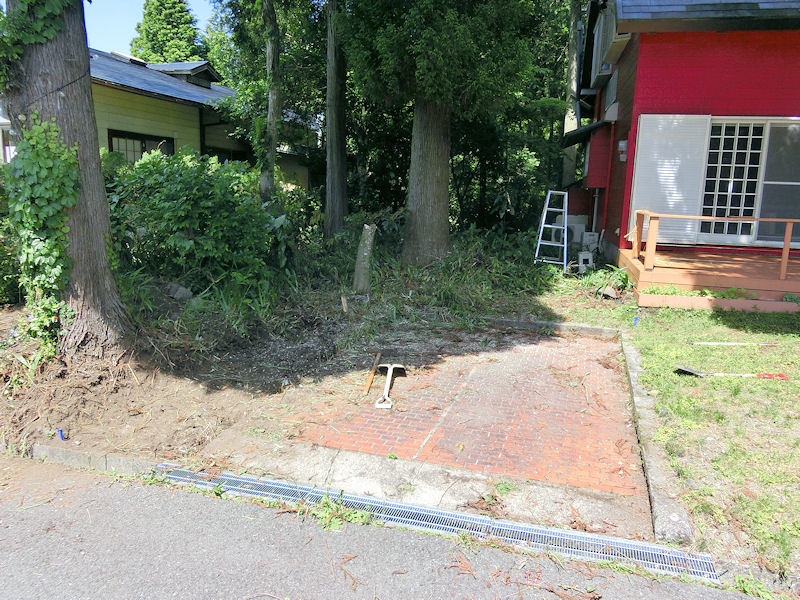
▲ まずは基礎の位置を大体決まりました。しかし、大きい紅葉の木が邪魔でしたので、チェーンソーで切りました。残念ですね!
First job was to start clearing out the area where the garage will be built, and the hardest job was to remove a lovely Japanese maple tree from one corner. It made me so sad to chainsaw it down, but unfortunately it was too big to pull it out and relocate it.
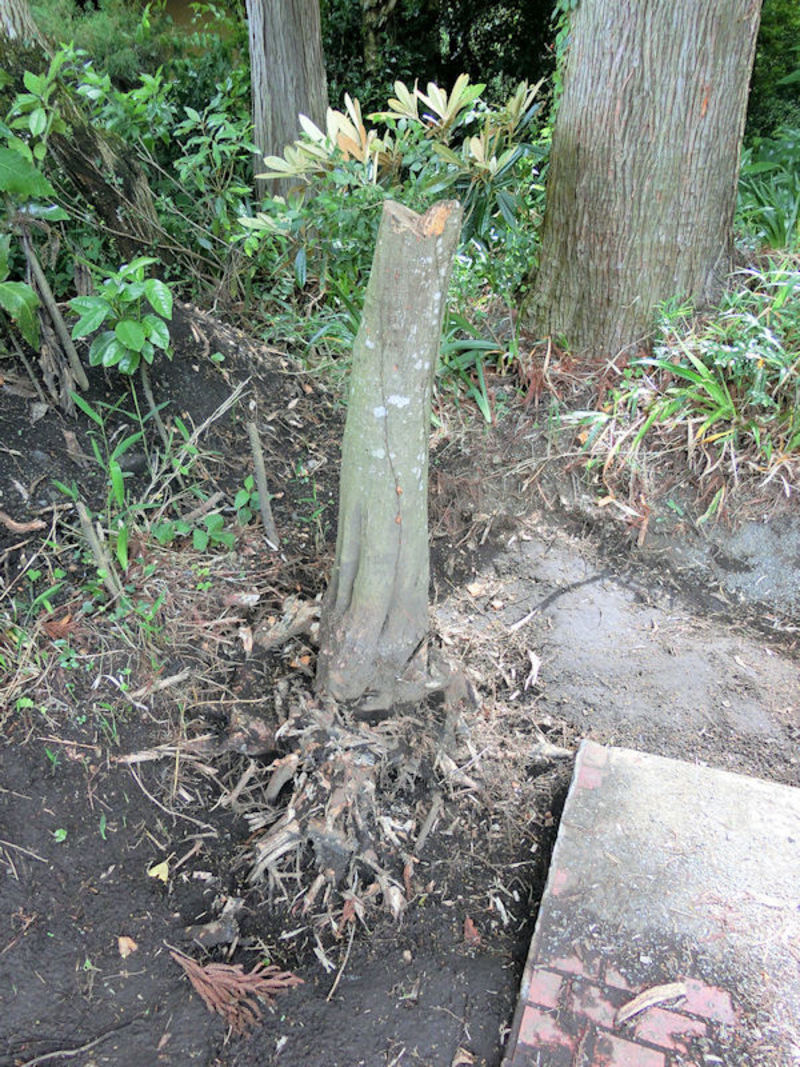
▲ 幹がたた20センチしかなかったので、簡単だと思っていましたがやはり根がすごかったですね!
I was optimistic that it wouldn't be too hard to remove the stump, but the 20cm-wide trunk became ever wider, the further down I dug! Eventually the main root ball was revealed to be about 1 metre across, with THREE 15cm-thick main roots branching off from that. Oh dear.
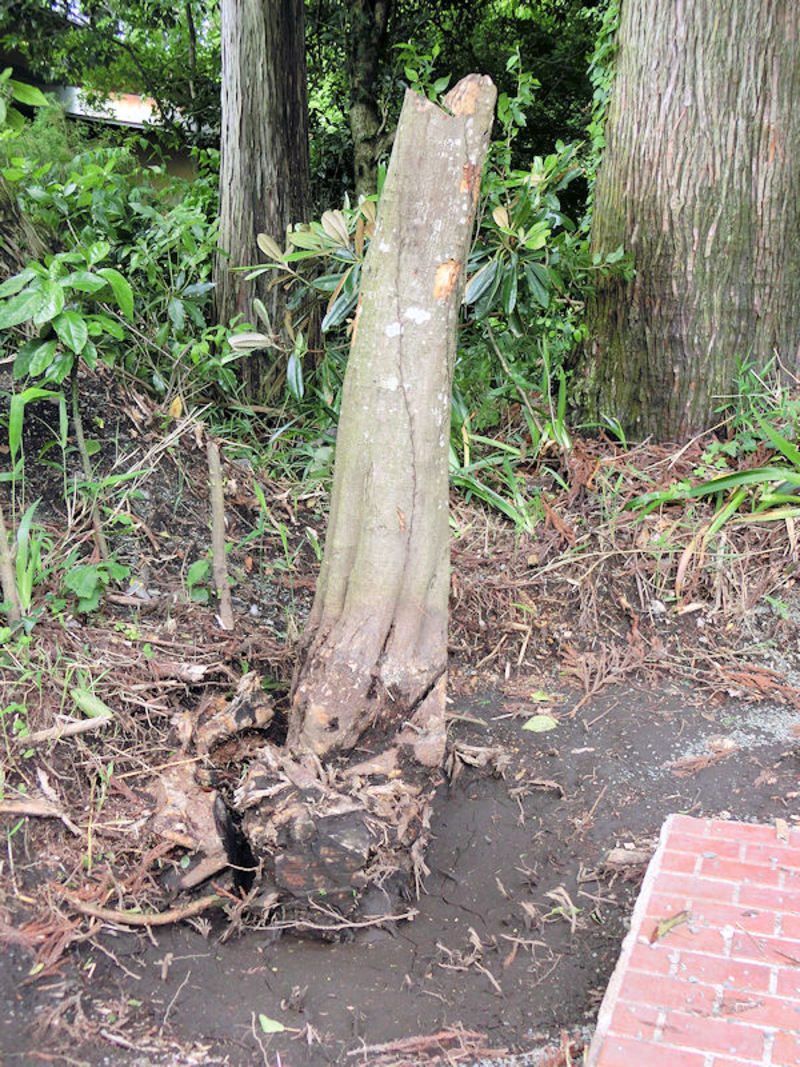
▲ 木の周りに1.5メートルぐらいの穴を掘って、根を一個づつで切るしかないんです。ただし、チェーンソーは土の中で利用できないので、ものすごい時間かかりました。2週間ほどかなぁ?
So I just had to keep digging down and out, until I was right under the tree's rootball. Then I had to cut each root out from the surrounding area with an axe, because I couldn't use the chainsaw there (it kills the blade to use it in soil!). All in all, it took me about 2 weeks of blood sweat and tears to get that tree out!

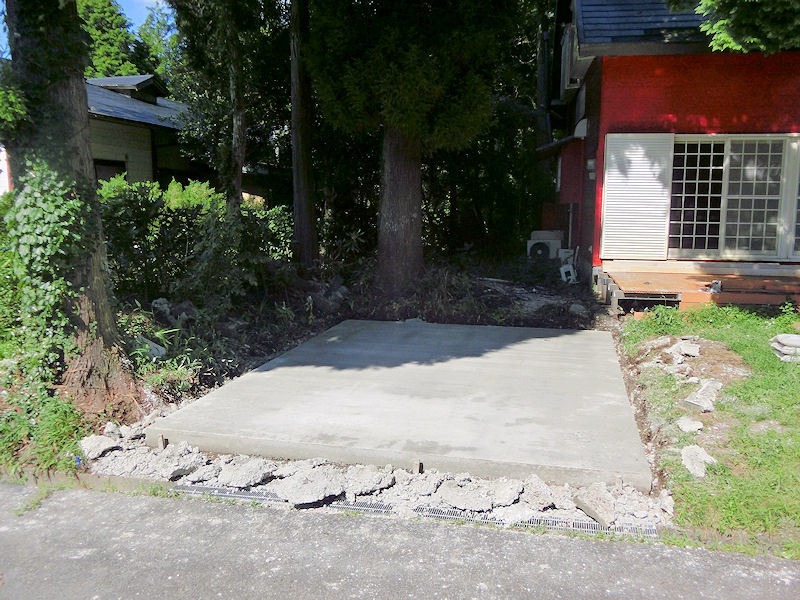
▲ 前からあった赤いレンガの駐車場ところがそのまま基礎として利用できますので、嬉しかった!左と後ろのほうに約80センチをきれいにしました。
Once the tree had been removed, I was left with a reasonably neat area, which needed to be levelled off flat. Luckily, I found that the existing brick parking space had its own concrete foundations, so I didn't need to remove it. Instead, I'll be able to use that brick area as part of the sub-foundations, and save some time and cost.
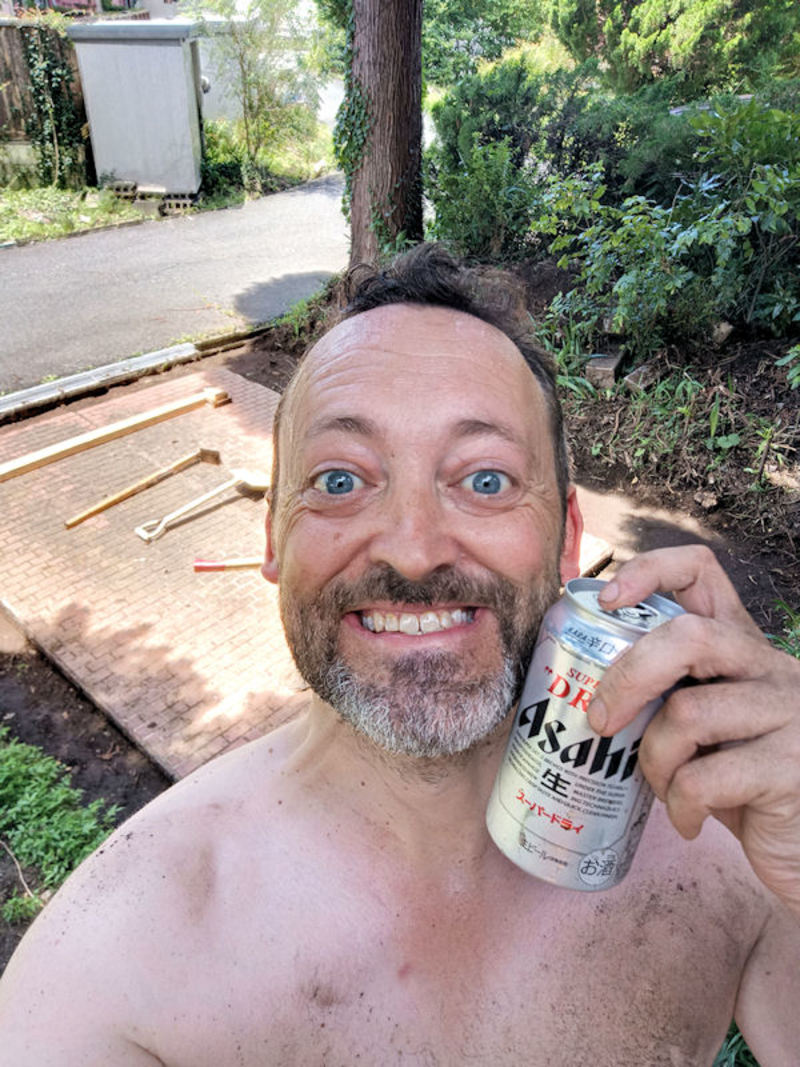
▲ こんな気分ですよ、綺麗にできたら!毎朝1~2時間かかったが、一番大変な作業がやっと終わりました!
After digging away for an hour or two each morning (before the real heat and humidity of the day hit), I was able to complete the tidy up in and around rainy season's unpredictable weather. That deserved a beer and a commemorative selfie, I thought! Please excuse the sweat and dirt!
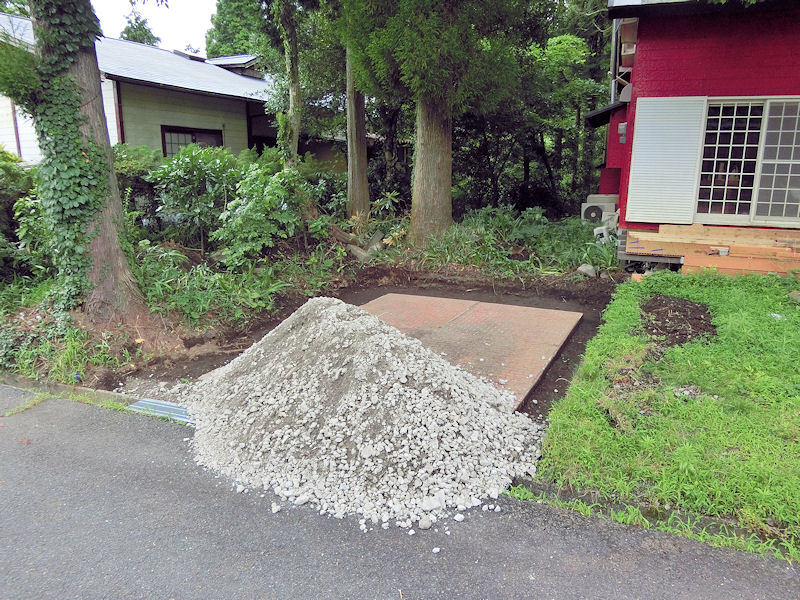
▲ そして、新しいガレージの工事がこれから始まりますよ!最初に赤煉瓦の高さまで砕石を入れますので、近くにある「春山商会」から1立米の砕石を注文しました。トラックでの配送込みで6600円でした。その赤煉瓦の部分がない場合だったら約2万円ほどの砕石が必要だったので、ちょっと節約できました。
Time to start the build! The first thing I needed to do was to build up the sub-foundations to the height of that brick area, to give a flat and stable base to pour concrete on top of. My lovely neighbour Teru suggested I visit a nearby company called Haruyama Shokai (in Aso city), who kindly delivered a cubic metre of stone gravel for 6600 yen. The cost would have been closer to 20,000 yen if I hadn't been able to reuse the brick area, so that saved me some money!
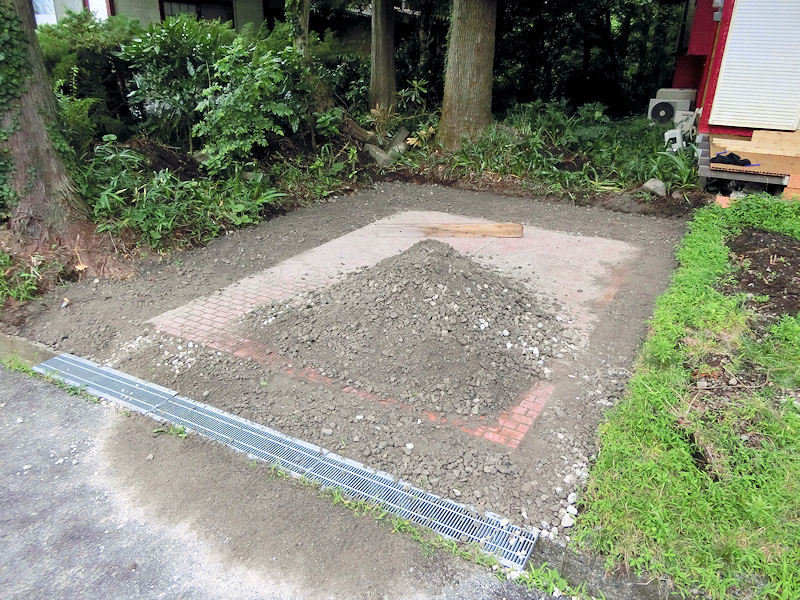
▲ 砕石の基礎には固めるのが大事です。スペースが広かったら「前後進バイブロコンパクター」を借りるのはおすすめですが、今回砕石の所が狭かったので、その代わりに重い木材で何回も叩いてしました。
Pushing that gravel down tight is very important for a garage foundation, to prevent the concrete moving or cracking later on. Normally, this would involve renting a petrol-powered gravel compactor to bounce up and down on top, but this didn't seem worth it for the narrow strips of gravel I was using. So instead, like a scene out of a Rocky movie, I borrowed a spare heavy wooden beam from my neighbour, and slammed that up and down over and over. This process is called tamping, by the way, and was pretty good exercise!
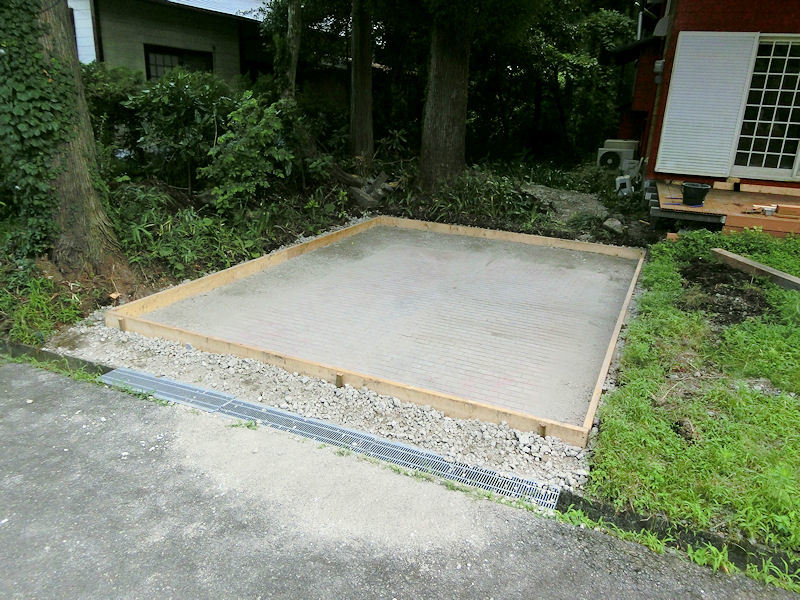
▲ 砕石と煉瓦の上に10センチ厚みのコンクリートを注ぎますので、コンクリート型を作成しないといけないんです。2x6材で型を作りました。現在、ツバイフォー材が高いんですので、予算オーバーになりましたが、ガレージの木材フレームの時にまたリサイクルできるかもしれない?
In order to pour concrete on top of the gravel, I needed to make a strong wooden frame. I was originally planning to build a cheap wooden frame and then throw it away afterwards, but instead I decided to spend more on some thick 2x6 beams. This did blow my budget a little for this part of the build, but I'm optimistic that I'll be able to clean up those beams later, and re-use them for the wall frames!
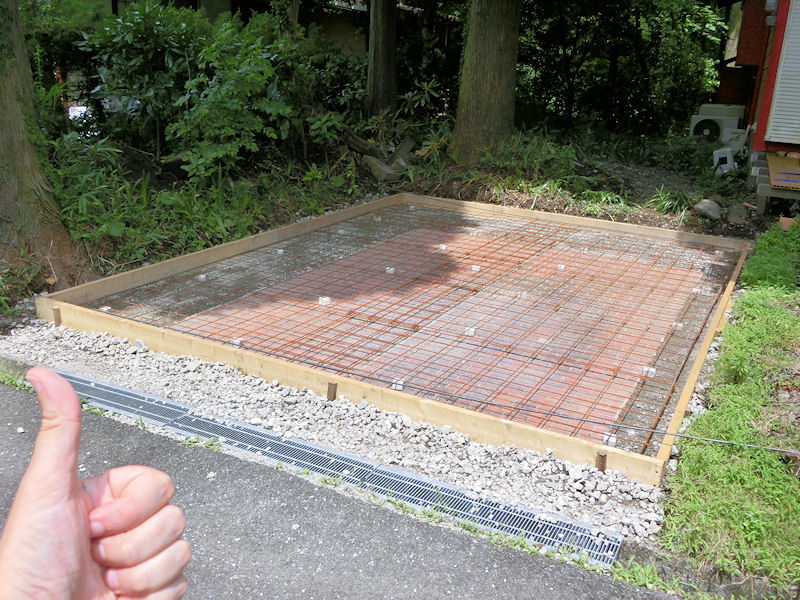
▲ 最後に金属メッシュを用意しました。この金属メッシュでコンクリートが強くなりますので、お勧めですね!
次が生コンクリートの配達ですね!楽しみにしています。
The last job of preparation was to lay down panels of thick wire mesh, tied together and reinforced with rebar, which will sit inside the concrete once it's been poured. This strengthens the concrete foundation, and hopefully prevents it from cracking or shifting.
So it's off to a local concrete company, to try and arrange for some concrete delivery later this week!
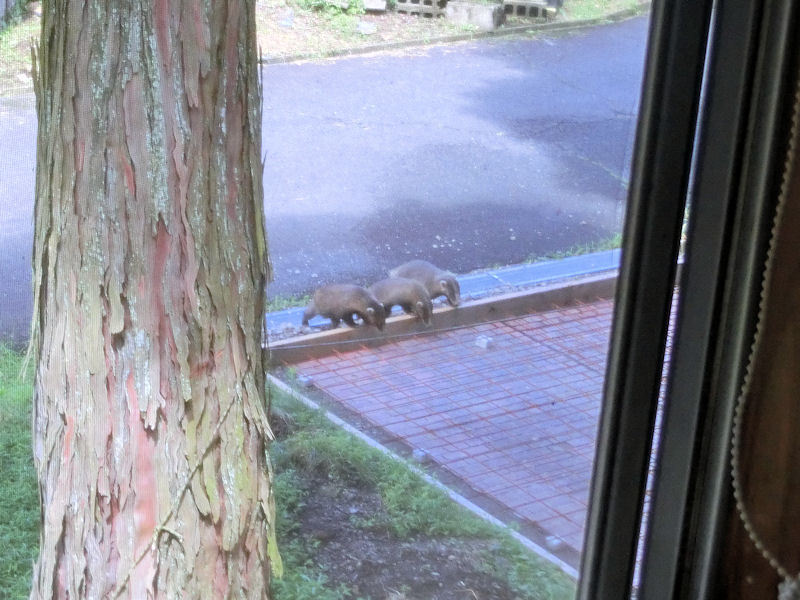
▲ 今朝、窓から見るとこの3匹の動物が見学をするに来ました!可愛い!
だが、生コンクリートが入れた後にこないでほしいですね。
I have to share this adorable pic with you. Just as I was looking out of the window this morning, I noticed these three cuties strolling past the house. I think they are Japanese badgers, and they kindly came by to take a look at what I've been working on. Thanks, little guys!
(I just hope they don't come back when the concrete's freshly poured!)
今回2Fリビングの壁掛けライトを交換しようとしています。春に作ったカピスのシャンデリアが大変お満足していますので、壁掛けライトにもカピスを利用したいですね。ただし、丸い形の貝殻ではなく、四角の貝殻を注文しました。
Finally it's time to change out the last 3 lights in the house for something new, and I decided to try making some more capiz shell lights again, to match the giant capiz shell chandelier in the living room upstairs. These wall lights are much, much smaller than the 3m-tall chandelier, and I wanted to try square shells instead of round ones this time.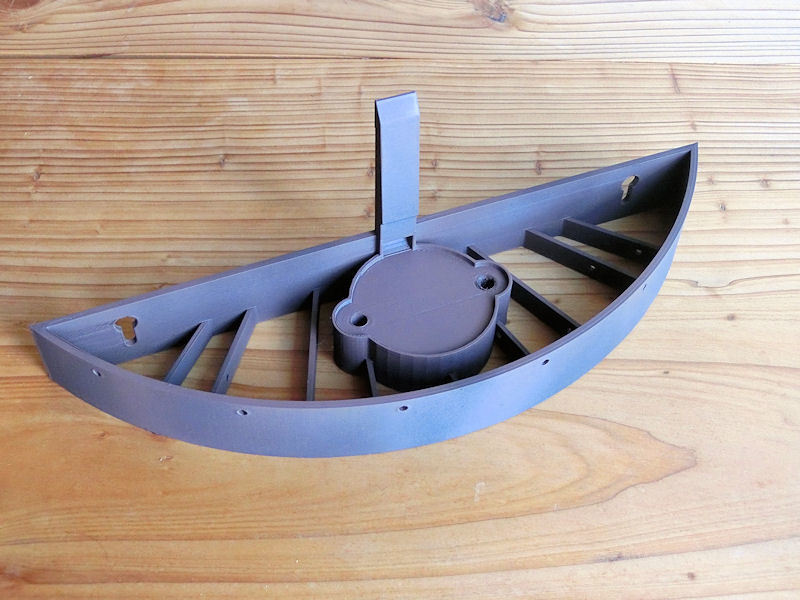
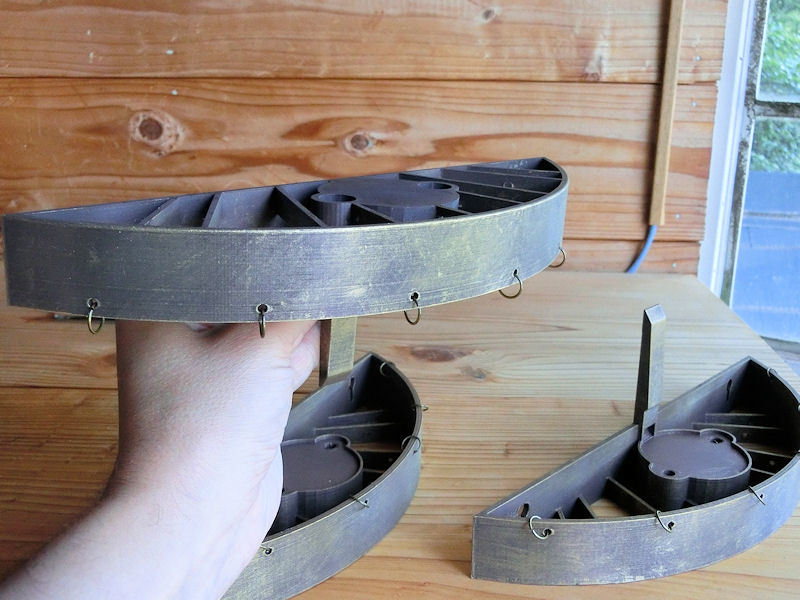
▲ この形の壁掛けライトを3Dプリントのソフトでデザインしました。ファイルをこちらに載せました。
I came up with this semi-circular wall light design, and managed to 3D print it in one piece. The print files are on Thingiverse for anybody who wants to try making their own!
▲ アンティーク風のゴールドに塗りました。黒のスプレーの上に磨き塗り(Drybrush)でペイントしました。
I painted the lights in a dark antique gold effect, to match the little metal rings I'd bought. This was a simple job of black spray undercoat, and then careful drybrushing and gentle stippling with gold acrylic paint.
▲ そして、正面に10mmのリングを付けました。100個でたった300円でした。
I bought 100 of these small 10mm gold rings online, for about $3.
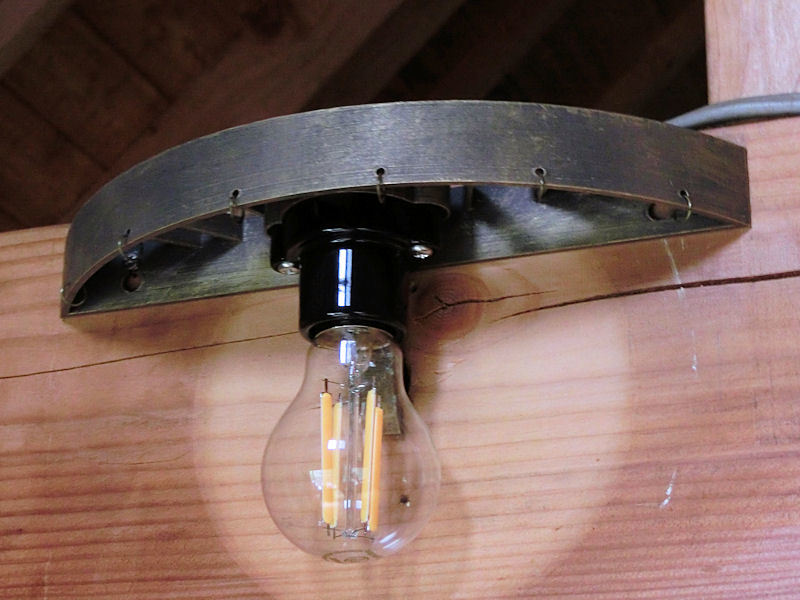
▲ このE27サイズのソケットをボルトで付けて、電気配線を見えない穴に入れました。
I also bought 3 of these basic lightbulb sockets from Amazon Japan, for E27 LED bulbs which I had spare in the cupboard. The wiring is hidden in a narrow cable channel in the back.
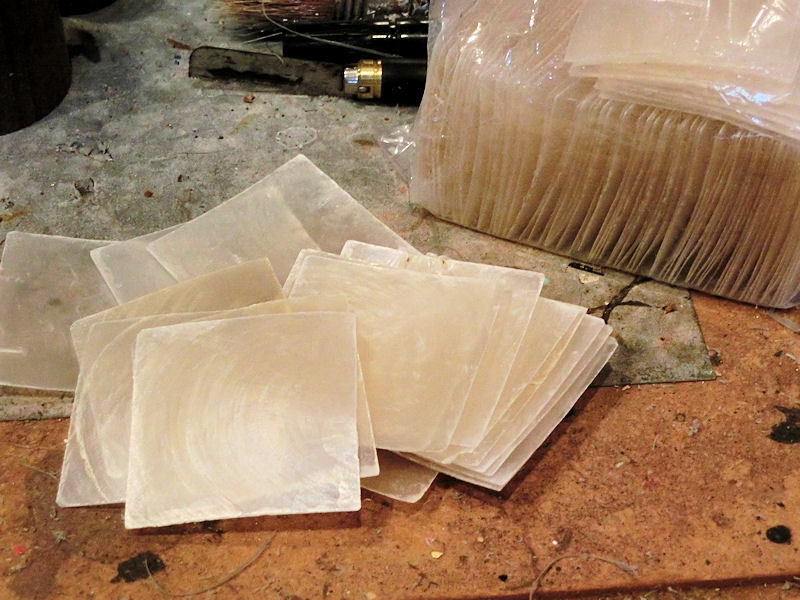
▲ 残りはカピスの貝殻ですね。Ebayのほうから100枚の四角貝殻を注文しましたが、届くまでは1か月ほどかかりました。しかし、丸い形が届いた!残念。Ebayにクレームをして、返金できたんです。そして、2回目も同じ店から注文しました。送料込みで8000円ほどでした。今回四角貝殻届きましたが、穴は空いていなかった!ガッカリ
The only expensive part of these lights was buying the capiz shells, as square ones are harder to find than round ones, and therefore cost more. I ordered a hundred of these 50mm square capiz shells from Ebay, for about $60 including shipping. Unfortunately, after waiting a whole month for them to arrive, I received a package of 100 ROUND ones! Oh dear.
Happily, Ebay refunded my money and I quickly placed another order from the same shop - and finally I received my square shells! (....but they did forget to drill the holes out.... grrrrr)
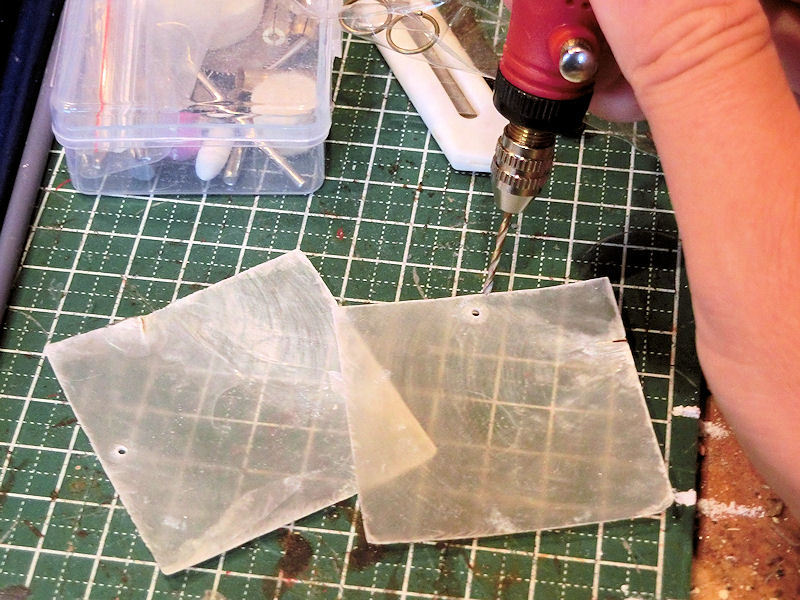
▲ ミニドリルで2ミリの穴を開けました。
I used a mini drill to drill 2mm holes in each one - and didn't break a single one! Yay
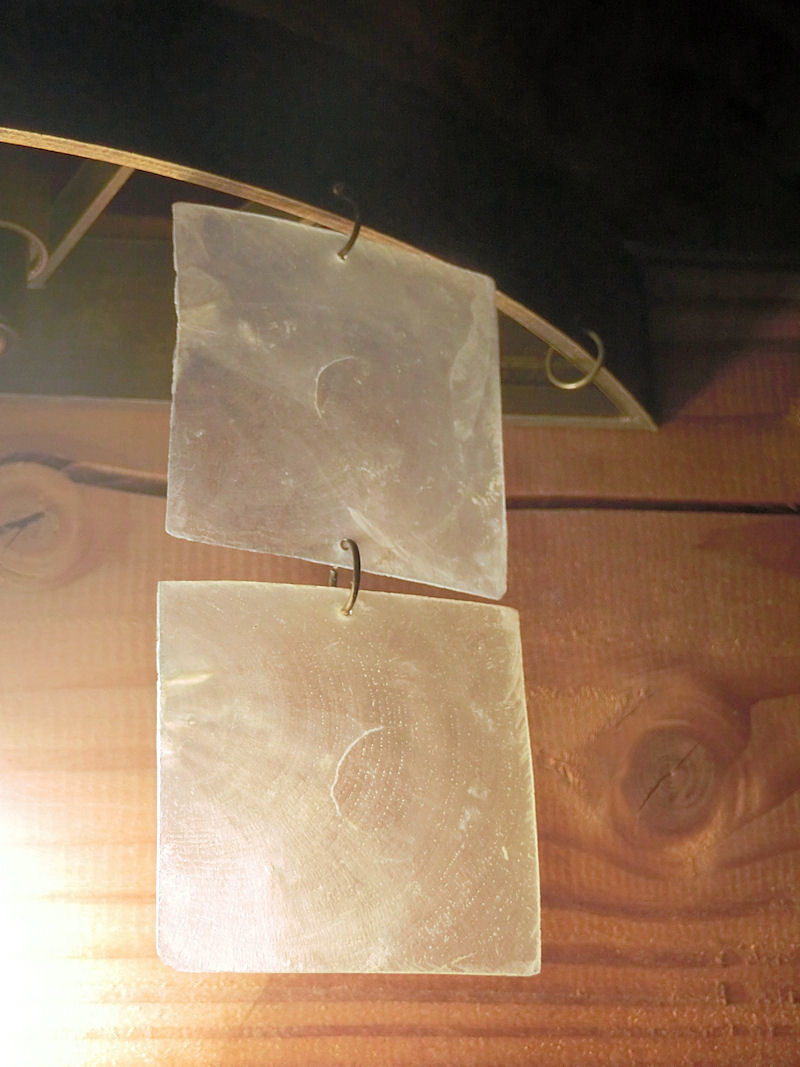
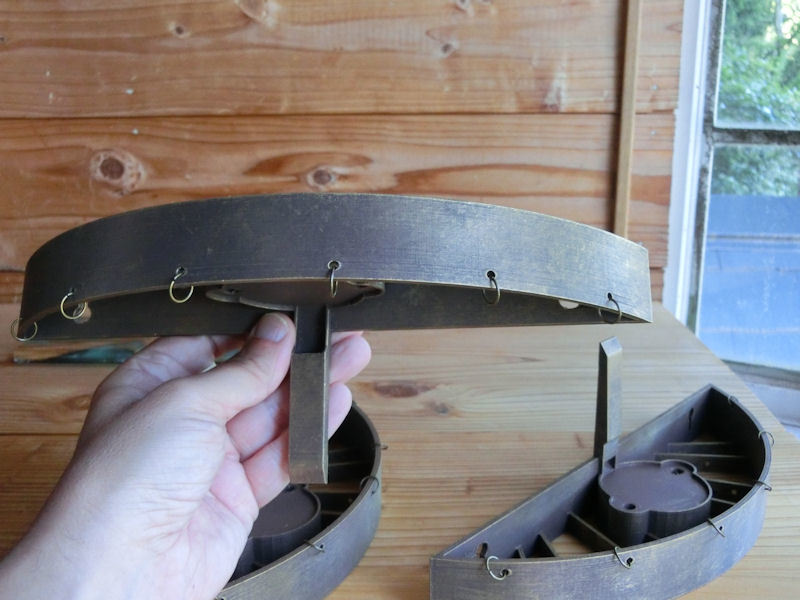
▲ リングでつながって、1行と2行の貝殻がこんな感じになりました。
This is how it looked when I test-fitted two shells. Good so far!
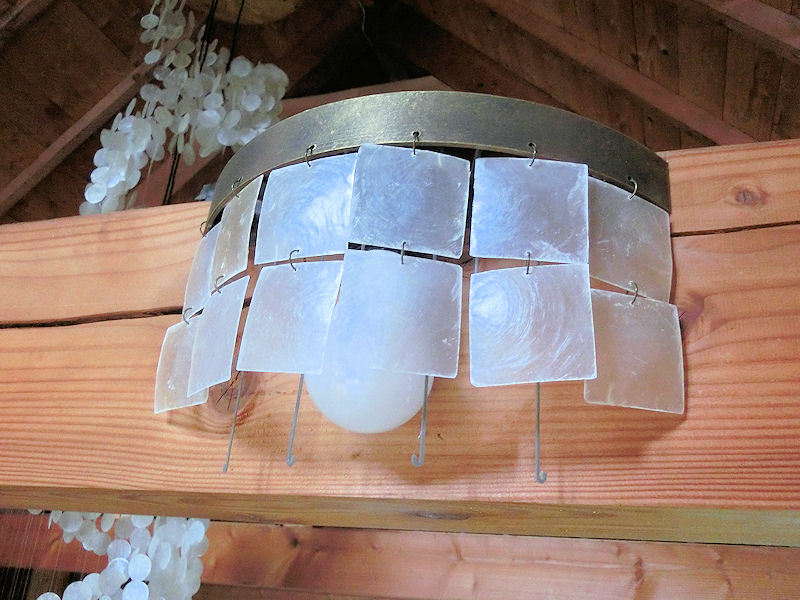
▲ 3行目の貝殻には透明の糸でつながろうとしましたが、やはり大変でした。貝殻が回って回ってしていました!
その代わりにハンガーをプリントしました。それが簡単でしたので、貝殻が前向きにちゃんと並べました。
I originally planned to hang the 3rd and 4th rows of shells with clear thread, but this proved very fiddly to tie in knots, and the shells kept spinning around - so I decided to print some simple hanging hooks instead. This were much easier to fit, and prevented the shells from spinning around.
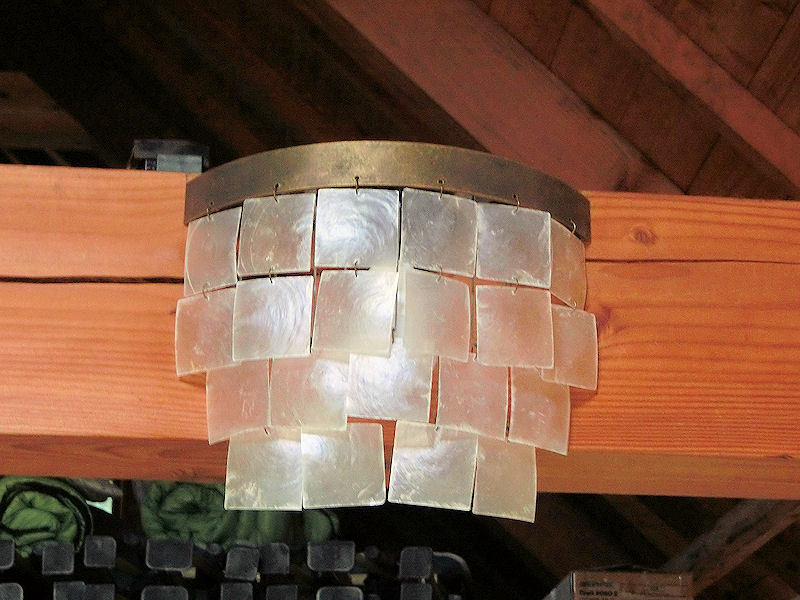
▲ 3行と4行をハンガーに下がると完成になりました!隙間があっちこっちにありますが、これでOKですね。
Hanging the 3rd and 4th rows of shells was easy enough, and I was happy with the end result!
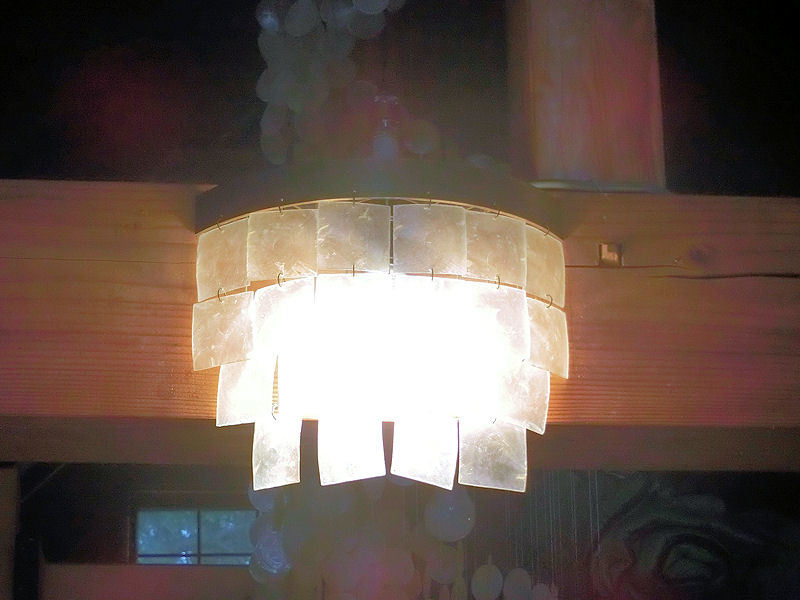
▲ ライトをつけるとこんな感じです!どうですか?
With the bulb turned on, it diffuses the light enough to look pretty good, I think. Do you like it?
ずっと前から車のナンバーを変えたかったので、やっとできました!「北九州」ナンバーから「熊本」ナンバーに変更するのがせっかくですので、好きな番号の「1957」も選べました。
I'd been wanting to change the number plates on the car for a while now, and since I finally had all the documents ready to change it from the Kitakyushu plates to shiny new Kumamoto plates, I also splashed out an extra $30 to get a personalised number. (It was a right pain in the arse, though - with two mornings wasted in tedious paperwork at the prefectural motor vehicle department!)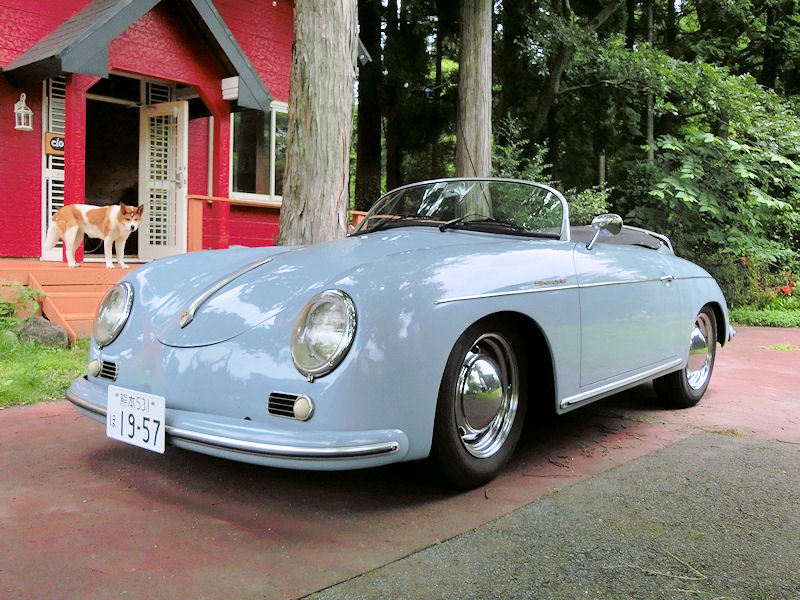
▲ このレプリカの年式が若干違うんですが、元のデザインは1957年でした。似合うでしょう?
Doesn't that look better?! Although this replica actually uses a 1968 chassis, I opted for these '1957' plates, which is the year of the original design of the Porsche 356. Looks lovely, I think. :)
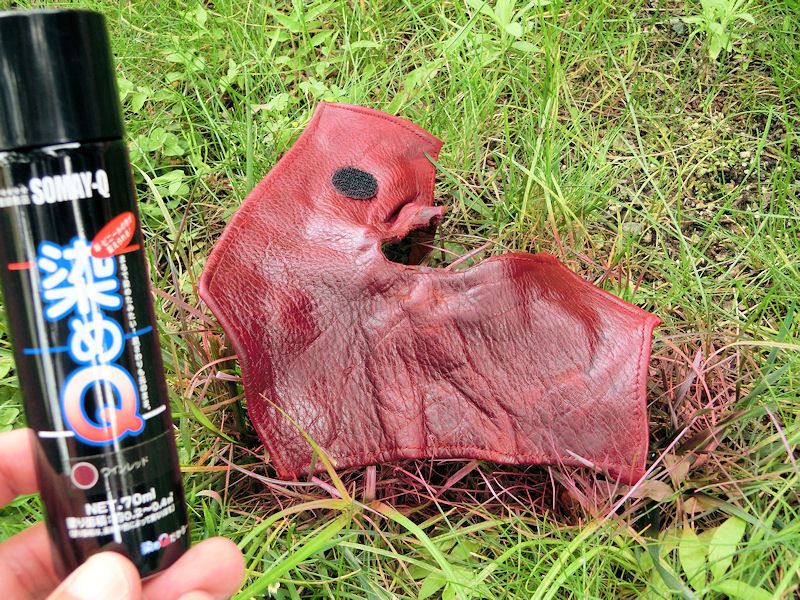
▲ そして、車のインテリアもちょっとリフレッシュするために、シフトレバーのカバーも再スプレーしました。何年前に作ったカバーを再び同じ色の「ワインレッド」革用のペイントにしたんです。
Anyway, to celebrate getting those cool plates I also decided to spruce up the interior a little, by respraying the shiftlever boot I made a few years back. A quick respray with this leather dye, and it looked as good as new.
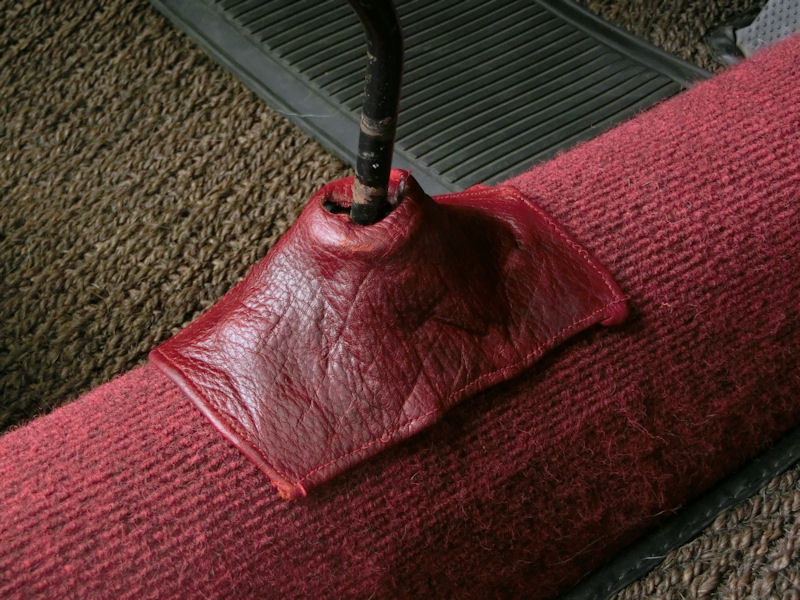
▲ なかなかいいでしょう?
That makes my heart smile!
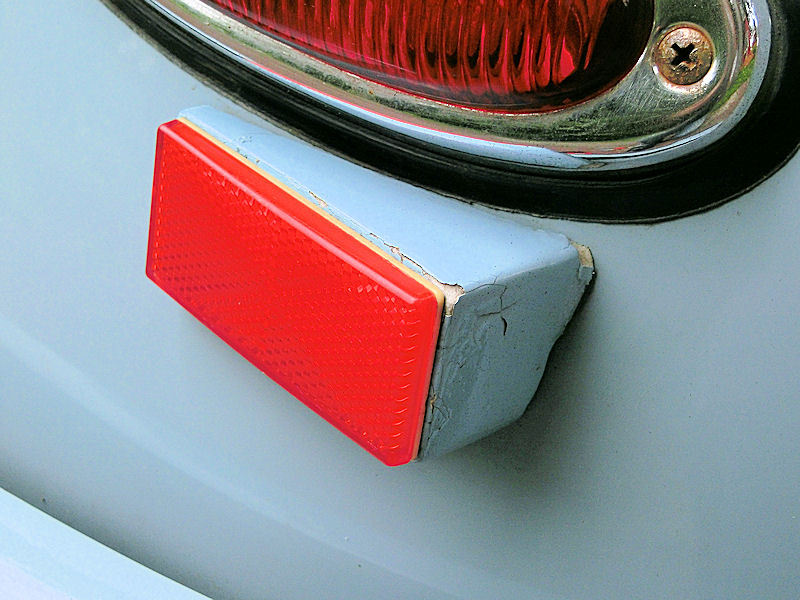
▲ そして、今回の作品は後ろにあったリフレクターですね。8年前に、日本の初車検の時にこれが必要だったみたいです。しかし、8年後の状態がよくないんですね。フォームで作られて、ペイントのひびもありますがネットで購入すると車のボディに穴を開けないといけないんです。あまりしたくないので、自作のやつを作れるかなぁと思ったんです。
Okay, on to the main point of today's blog..... these rear reflectors! In order to pass Japan's strict road-test when it was first registered 8 years ago, the importer's garage fitted these handmade foam blocks to mount rear reflectors. But over the past few years they've started to crack and split, and generally look a bit rubbish. I could remove them completely, but then it would be illegal for the next road-test, and also unsafe at night.
The only ones available for this type of car, apart from being stupidly expensive, also require you to drill holes in that lovely body. So, to avoid doing that, I decided to try my hand at designing my own mounts.
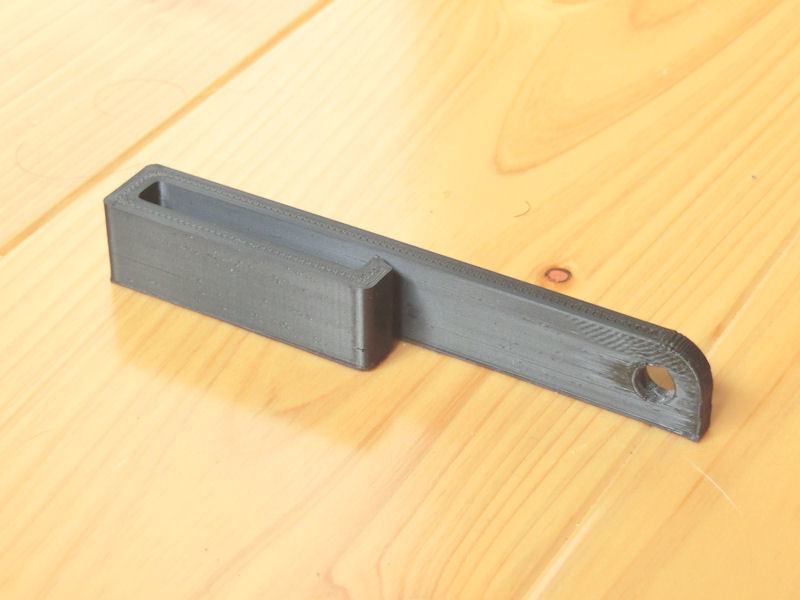
▲ 自作デザインで3Dプリントしました。しかし、いつも使われているPLAプラスチックが熱にちょっと弱いので、今回ABS材で作りました。PLAは200℃で溶けますがABSは約240℃で溶けるので、車パーツにも使えそうだ。
I came up with this simple bracket design (available on Thingiverse for anybody who wants it), and printed it on the 3D printer. I normally print in PLA plastic, but for car exterior parts I decided to try printing it in ABS plastic - which has a higher melting point and is therefore much more durable in the sun and rain. Happily, my first attempt with ABS seemed to work without problems, which is great for such a low-cost printer.
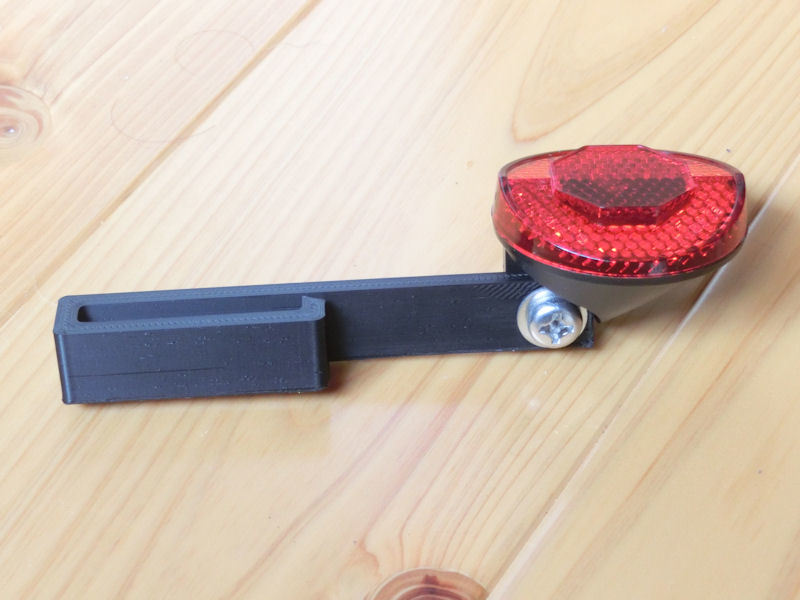
▲ 自転車用のリフレクターをボルトでつけるとこんな感じです。
I mounted a cheap bicycle reflector to the bracket with a simple bolt and nut.
▲ 形を試すために3つのパターンを買いました。
In fact, I bought 3 different reflectors, to see which would look best on the car!
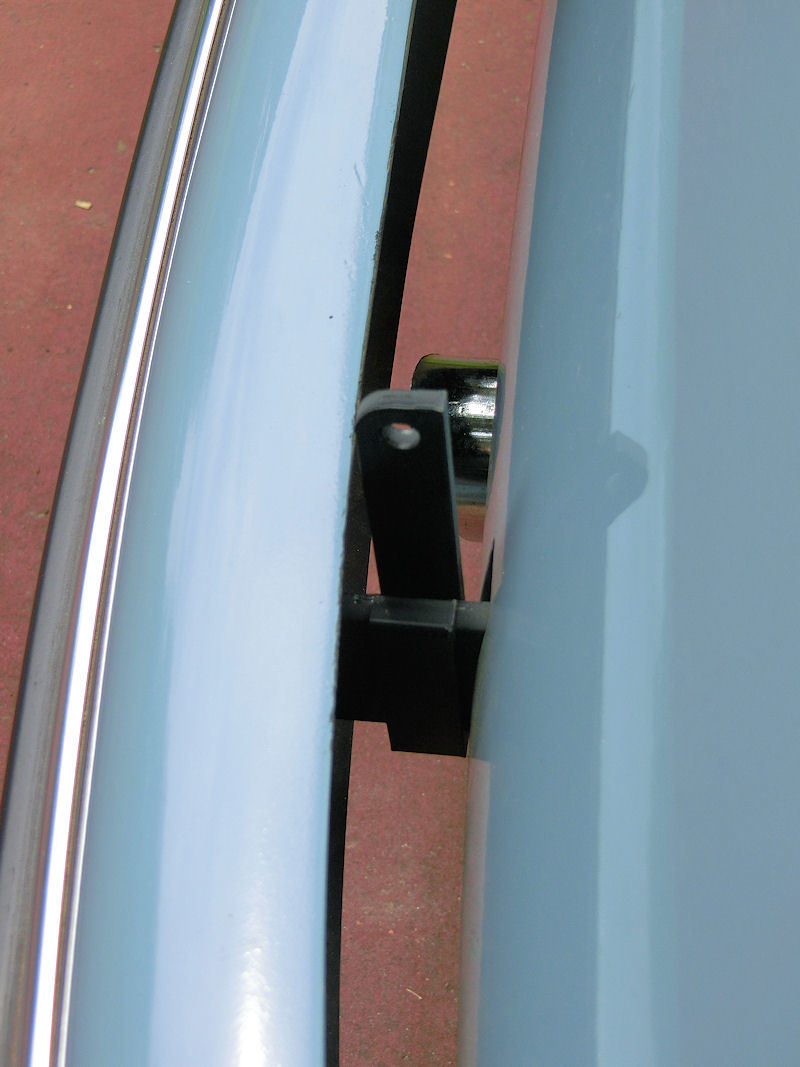
▲ リアバンパーの所にちょっと両面テープを付けると落ちないようにぴったりフィットします。
The bracket clips itself to the mounting bracket for the rear bumper, and a short piece of double-sided tape will hold it in place firmly.
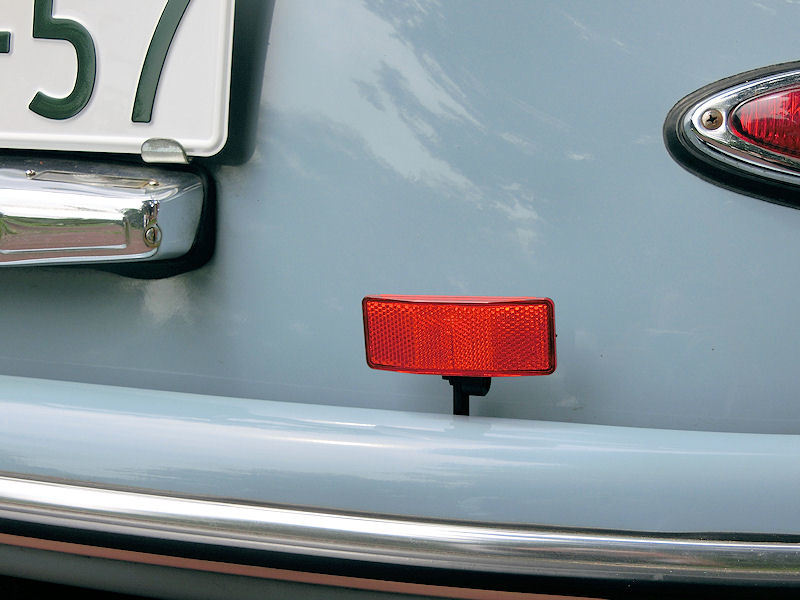
▲ バンパーの上に向いたらこんな感じとなります。やはり大きすぎです。
This was the first reflector shape I tried, which looked too big.
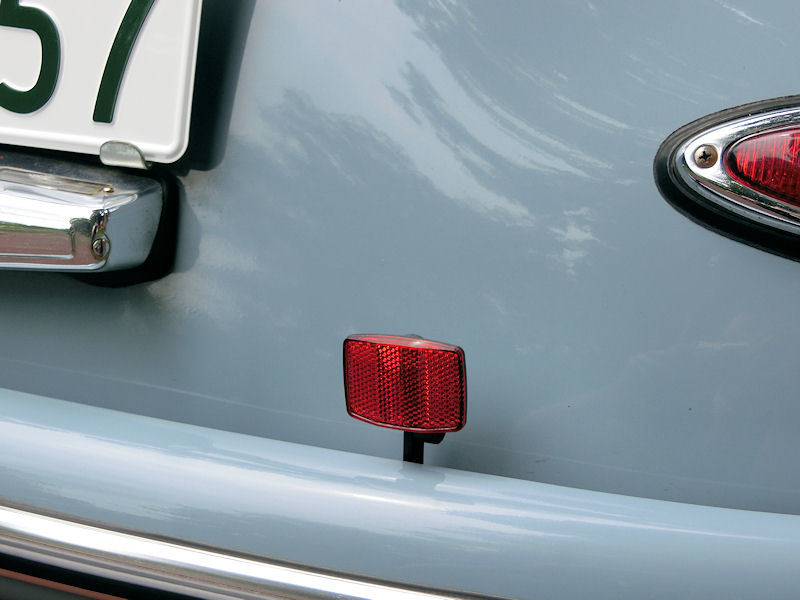
▲ 小さいサイズを付けるとよくなったが。。。
A smaller reflector looked better, but I had one more to try.
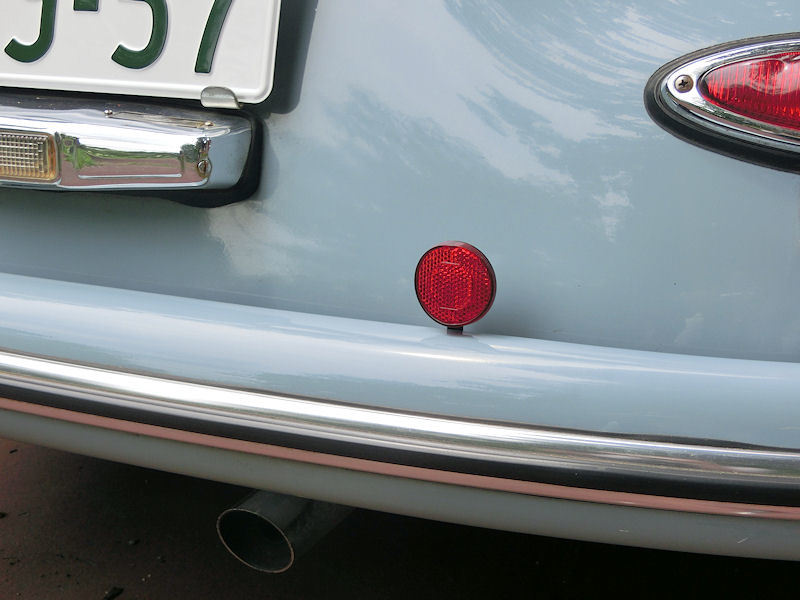
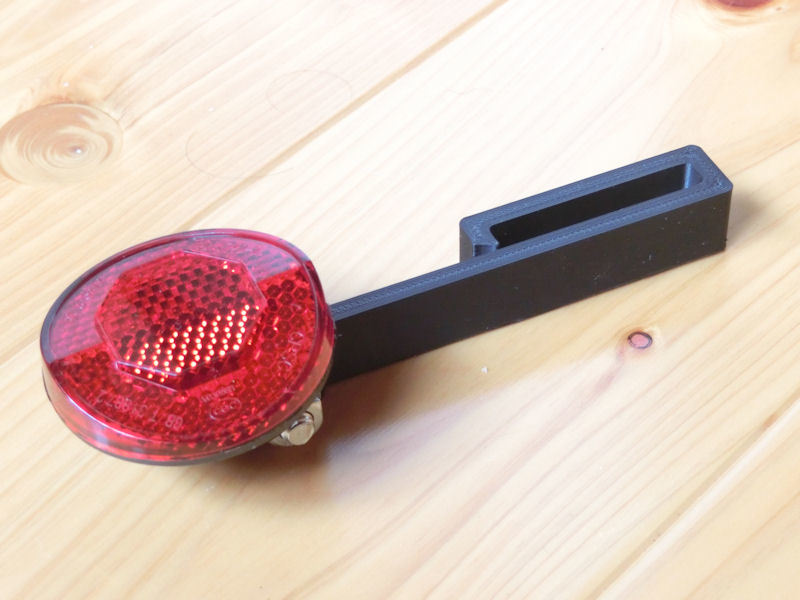
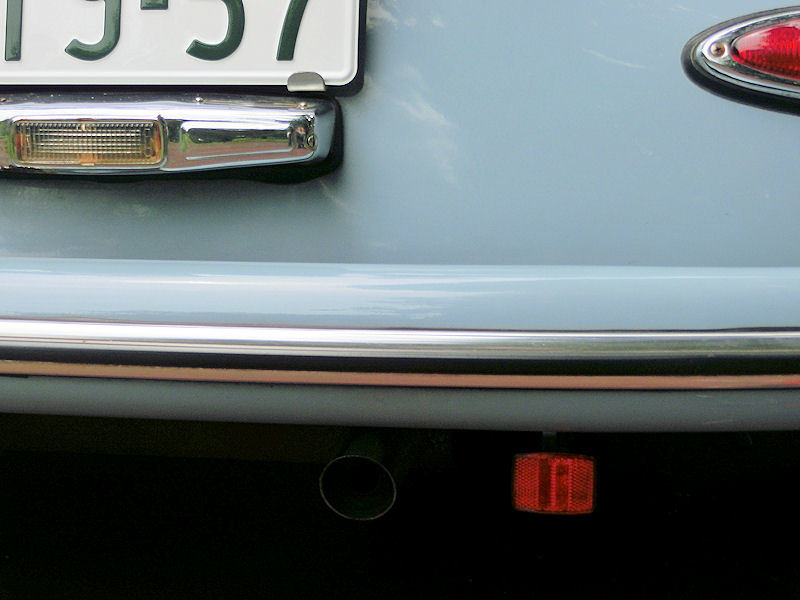
▲ 形的に丸いデザインのほうが好きです。
This little round reflector worked great, but looked a little odd above the bumper.
▲ しかし、バンパーの上だったらちょっと目立つすぎかもしれないので、下にも試してみました。
Luckily, the bracket could also be pointed down to mount a reflector below the bumper, so I tried all 3 designs again...
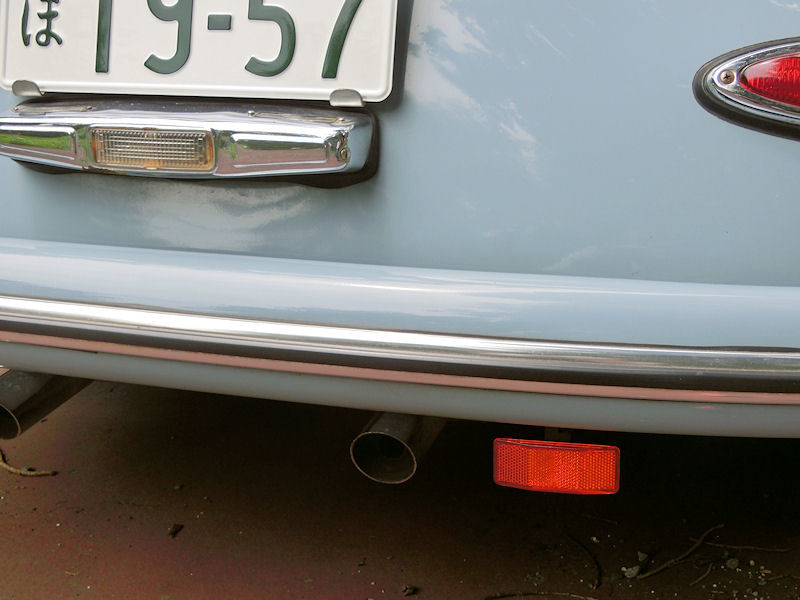
▲ よくなりましたが。。。
Smaller is definitely better...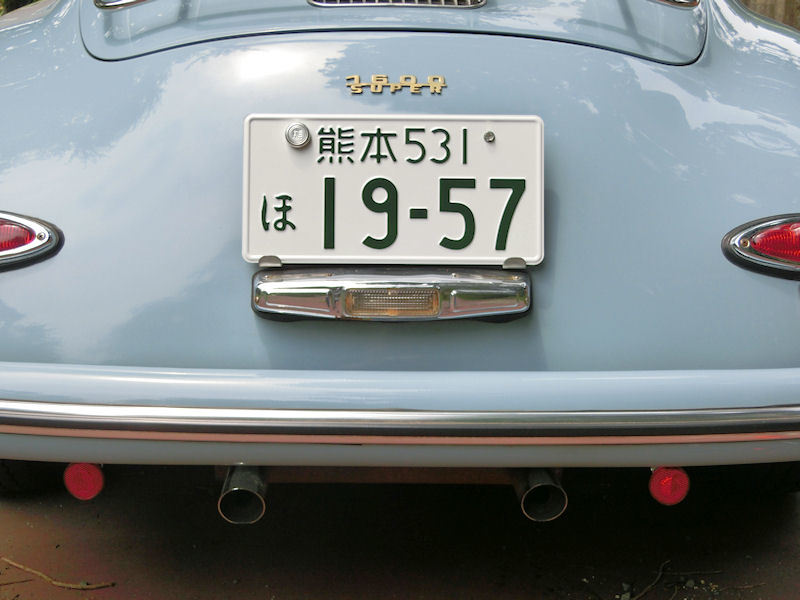
▲ やはりこの丸いデザインにしますね!
目立たないし、暗い道で見えますね。よし、決まりです!
...but I reckon the round ones look best, so we have a winner! They're discreetly placed below the bumper, but are perfectly positioned for cars behind. Success!
Next job is to get the garage built, so I have somewhere to keep this beautiful car!
2階のリビングのライトが全部交換したいです。80年代のつまらないデザインだし、省エネのためにも新しくしたいですが、やはり4つのライトを購入すると高いですね。その代わりに自分で作成しようと考えています。これでちょうど会うデザインも作れるかもね!
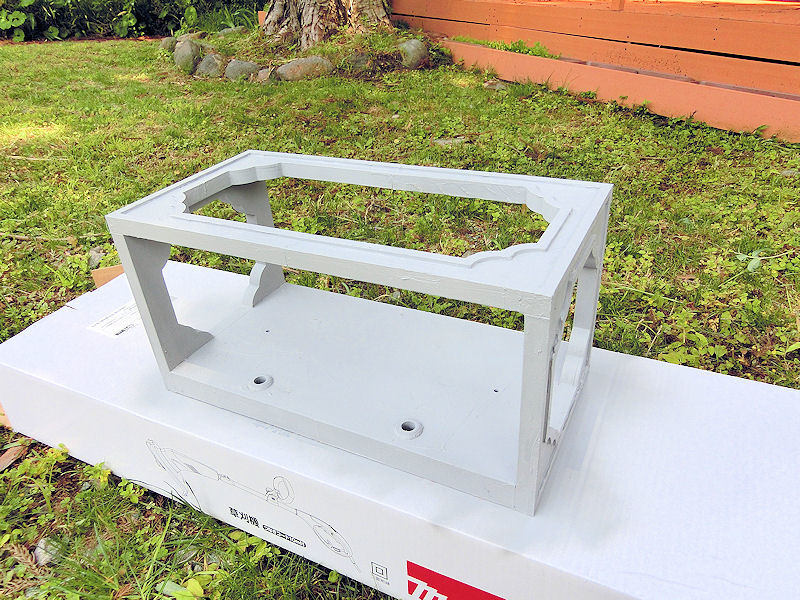
まずは壁掛けのライトを古い80ワットから電球2個で合計8ワットに変わります。フランス風のアンティークなボックス形のデザインをネットで見ましたが、2万5千円ぐらいでした!
A little project I've been wanting to tackle for a while now is replacing the old lights in the 2F living room. They're all 80s-style boring globe lights, and I want to make them a little more stylish and unique - to match the recently-finished shell chandelier. As an added bonus to being able to update the style of the room, the new lights will all be low-energy LED bulbs fittings, too.
I found a French-inspired rustic antique-style wall light design I liked, which has 2 chandelier bulbs in a painted wooden box, but the price online was a staggering $250. So I decided to try making my own, with a little help from my 3D printers....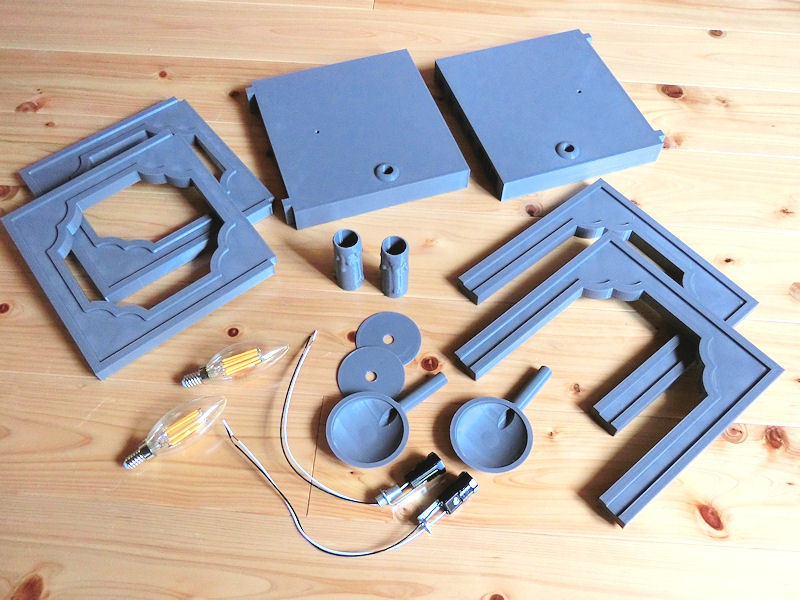
▲ 同じ風で3Dプリンターで作れるデザインを作ってみました。大体二日間かかりましたが、必要なパーツは約1000円のプラスチック材と300円の電球ソケット2個で集めました。そして、4ワットのE12電球はすでに持っていました。
After an evening of 3D modelling on the computer, I came up with a very similar design to the wall light, and after a couple of days of printing I had all these parts ready to assemble. It required about $10 of 3D-printer plastic, and a couple of E12 bulb sockets for $3 each. I had a couple of spare E12 LED chandelier bulbs in the cupboard, which would work perfectly!
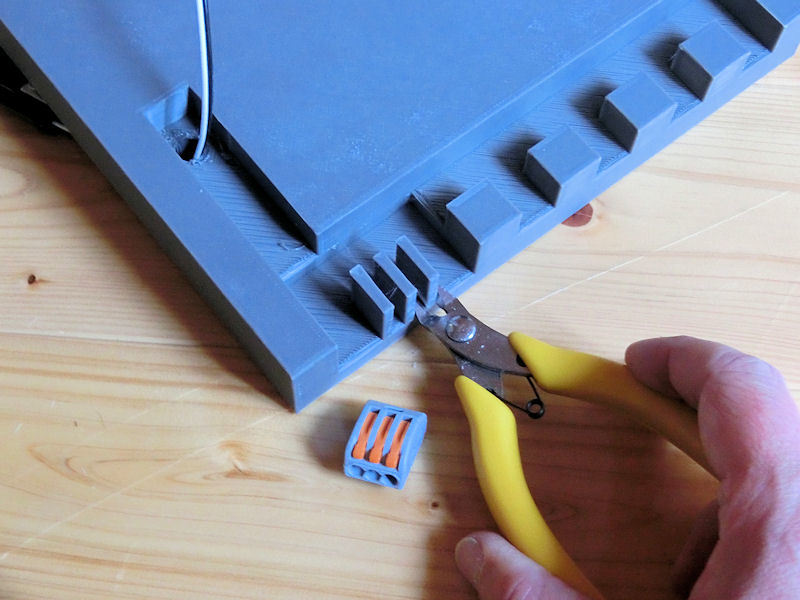
▲ ライトの裏側には電気配線のために開いているスペースを用意しました。
I designed a little bit of hidden space at the back of the pieces, to hide the wiring.
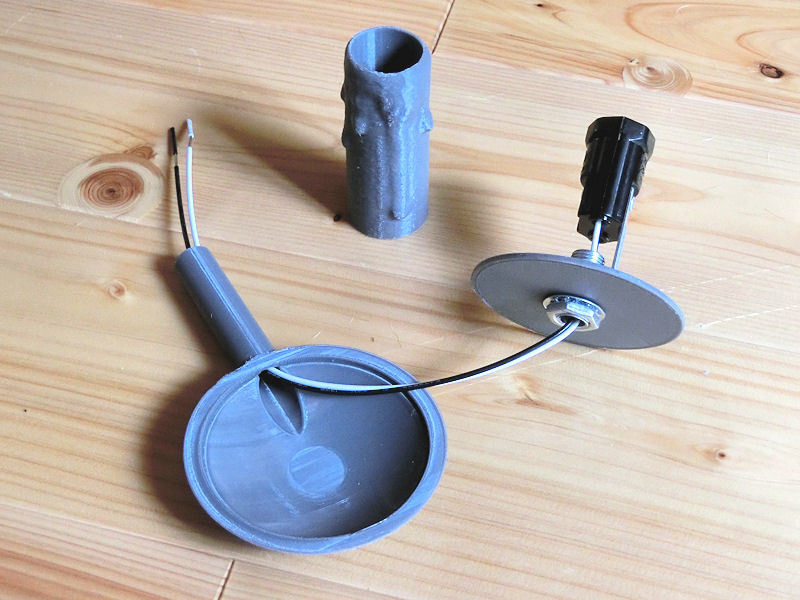
▲ アンティーク風の蝋燭形のソケットをデザインしました。偽物蝋燭の中にE12用のソケットをジャストフィットできました。
I carefully measured the space required to house the E12 sockets, and then (using the 3D software) cut a 21mm hole in this fake candle to hide everything.

▲ ソケットをホルダーに入れるとすべてのワイヤが隠せます。
Slotting the socket and base into this sconce, everything gets neatly hidden away.
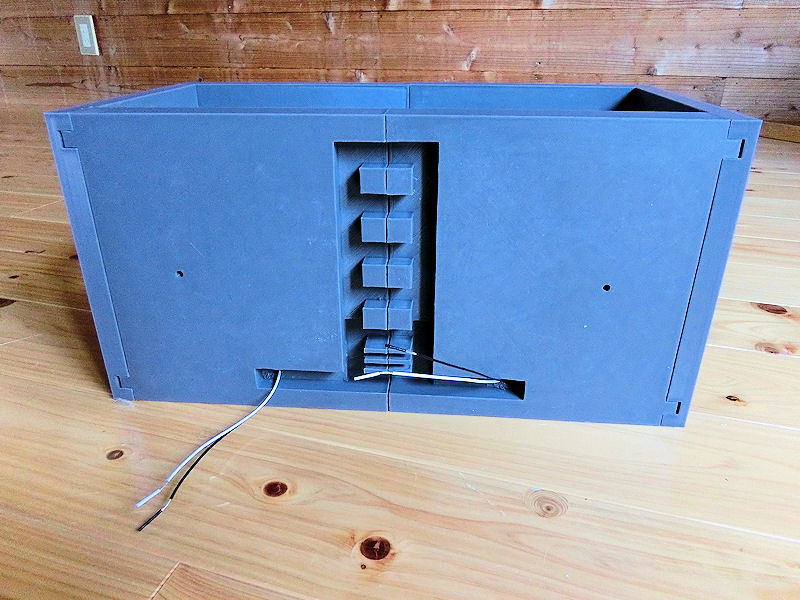
▲ 裏側の電気配線はこんな感じでした。
The rest of the wiring connections will be hidden at the back of the box.
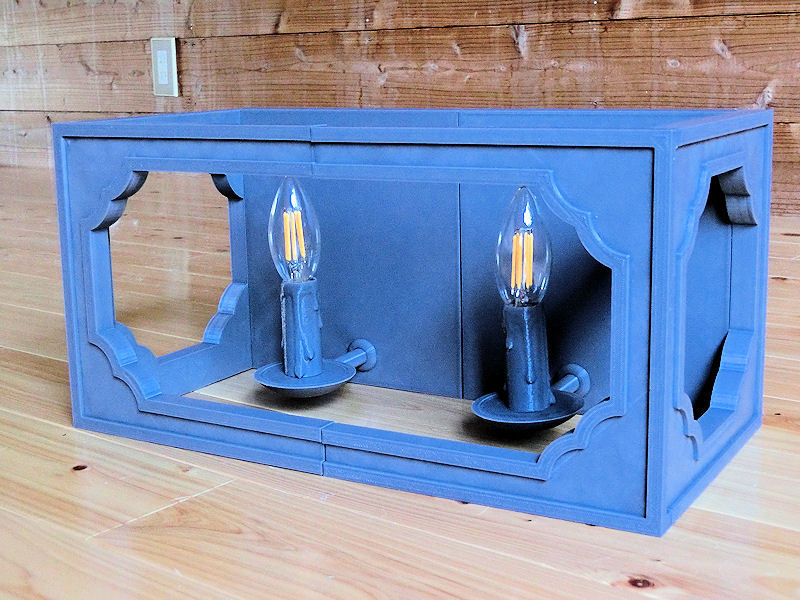
▲ すべてのパーツを組み合わせると完成品になりました。
しかし、アンティーク風にするとペイントが大事ですね!
Here's the finished light fitting, with bulbs in place.
However, that was only half the job, because for the correct rustic-feel, the paintjob would be very important.
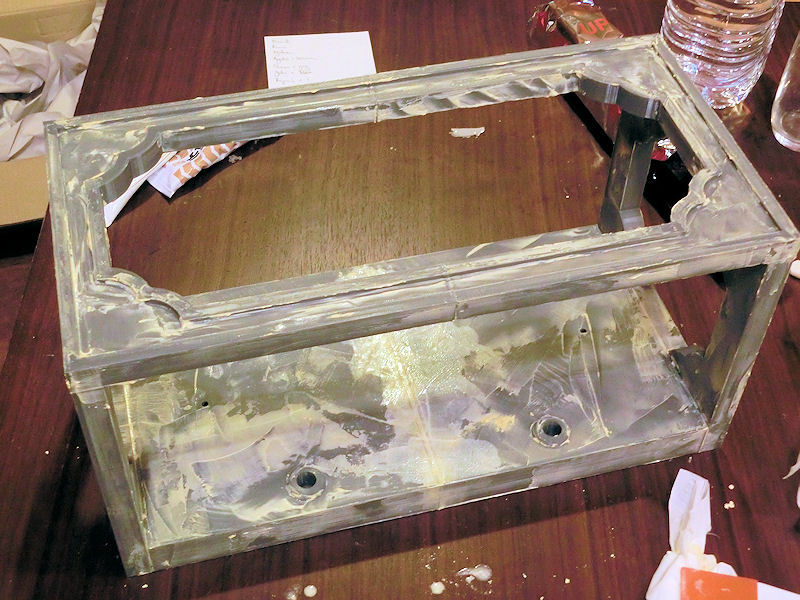
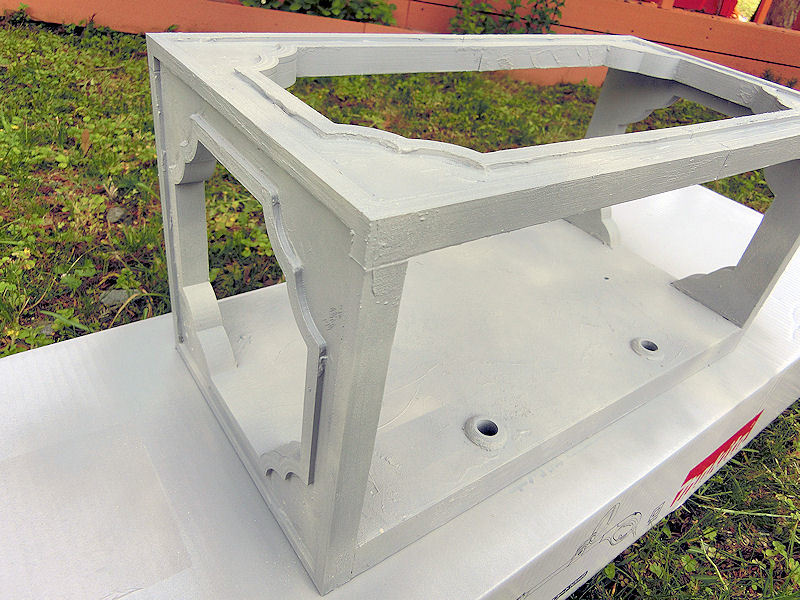
▲ ウッドパテを適当にベラでつけました。
I roughed up all those flat surfaces with some messy application of wood putty.
▲ そして、ライトグレーのツヤなしスプレーでベースコートしました。
Then the whole light was given a spray undercoat of light grey...
▲ その上に適当にクリーム色もあっちこっちにスプレーしました。
... followed by random patches of cream colour, sprayed on in light bursts.
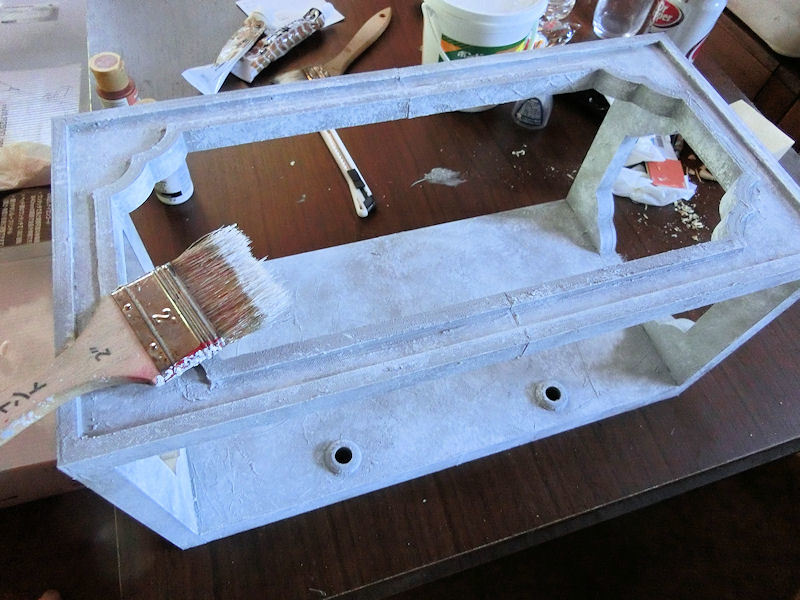
▲ 白のアクリルペイントをちょっとづつでブラッシュで塗りました。英語の「stipple」は「点描」だそうです!
White acrylic paint was then carefully stippled on with a large brush, to break up the flatness.

▲ 飾りで、周りの部分に銅アクリルペイントをスポンジで押しました。アンティーク風ですのでこれも適当にしました。別にきれいじゃなくてもOKですね。銅の後に、金も同じ風にスポンジで押しました。
これで完成でした。。。
The edges received a patchy stippling with a sponge and some bronze paint ("Worn Penny", I think), and then again with gold paint just to brighten it up.
And with that, the light was finished!
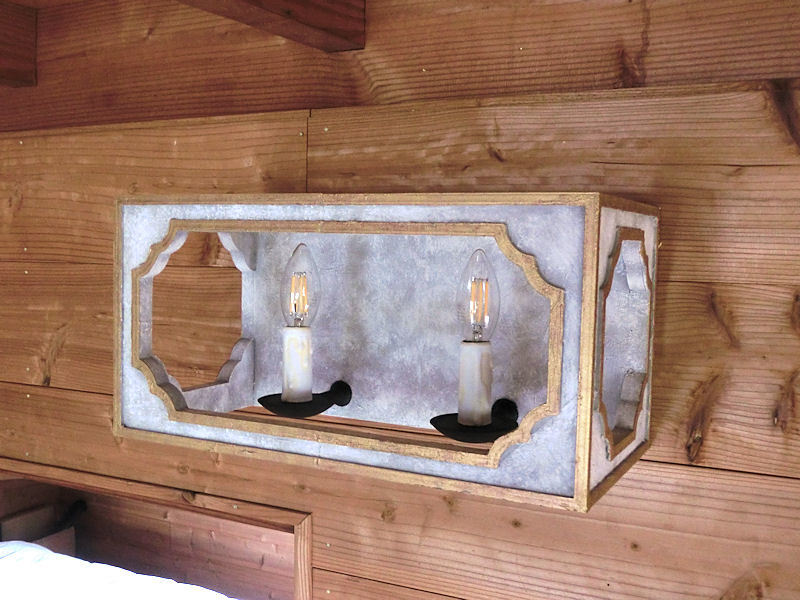
▲ 白い蝋燭を黒いホルダーの上に載せて、壁に付けました。どうでしょうか?
ちょっとユニークなライトになっていましたので、とても満足しています!
The matt black sconces were glued into place, and then the white candles slotted in on top and the whole light screwed to the wall.
I think it's a lovely unique design, and came out really well!
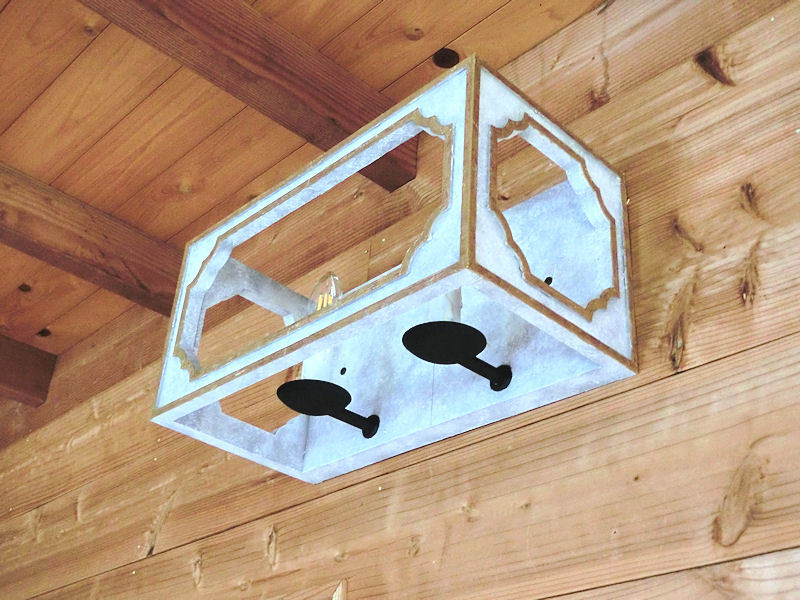
▲ 下から見ろと電気配線が全く見えません。
Even from directly beneath no wiring cables are visible.
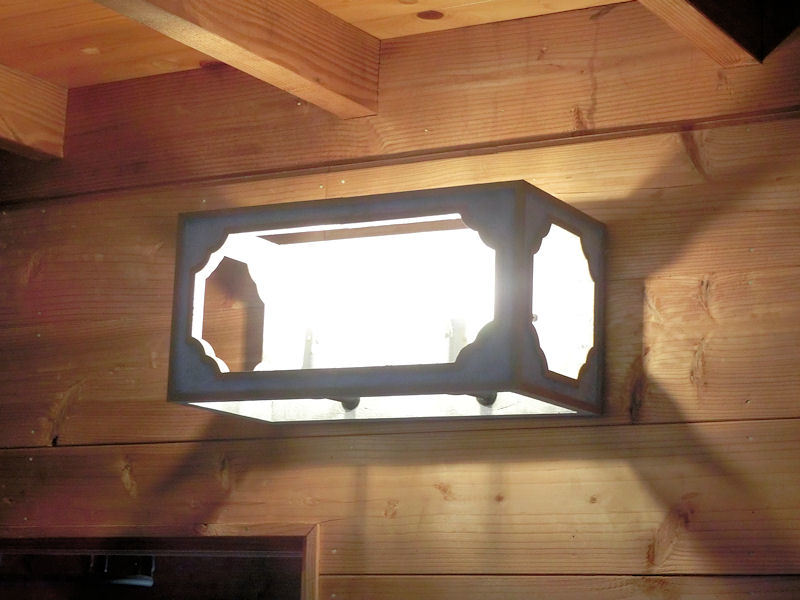
▲ ボックスの壁に大きい穴がありますので、結構照明が届きます。
The top and bottom of the light box let plenty of light through.
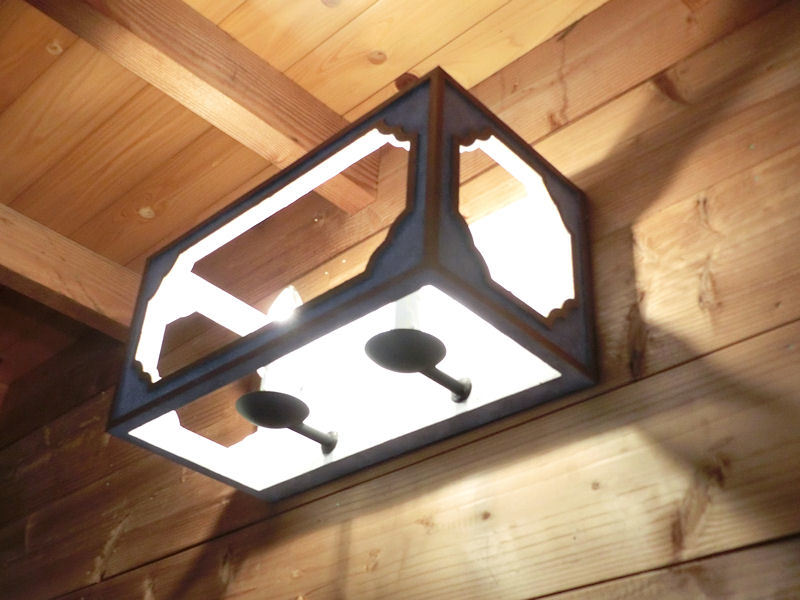
▲ ネット価格の25,000円とDIY価格の1,600円を比べたら、結構節約できました!やったー!
So for a project that cost only $16 instead of the $250 for the version on the net, I'm super happy with how it turned out!
〒869-2226 熊本県阿蘇市乙姫2070-48
営業時間:10:00~17:00*
定 休 日 :毎週日曜日・月曜日
(* ドアが閉まっている場合もあります ー 近くにいます。ちょっとお待ち下さい!)


Scale model of the Inaba Residence 稲葉家下屋敷の模型
Customer request - Pokemon Ball! ポケモンボール
Garage construction ガレージ工事 PART 6
Secret Aso-volcano pool 阿蘇山の隠れプール
Garage construction ガレージ工事 PART 5
Garage construction ガレージ工事 PART 4
Garage construction ガレージ工事 PART 3


 神社
神社 寺
寺 茶屋
茶屋 城
城 家
家 建物その他
建物その他 農場
農場 壁・柵
壁・柵 市場
市場 橋
橋 池
池 LEDライト
0 コメント :
コメントを書く :